![](https://studiodn2.com/wp-content/uploads/2019/10/img_3874.jpg)
![](https://studiodn2.com/wp-content/uploads/2019/10/img_3876.jpg)
![](https://studiodn2.com/wp-content/uploads/2019/10/img_3882.jpg)
![](https://studiodn2.com/wp-content/uploads/2019/10/img_3880.jpg)
![](https://studiodn2.com/wp-content/uploads/2019/10/img_3883.jpg)
![](https://studiodn2.com/wp-content/uploads/2019/10/img_3884-scaled-2560-e1572673685227.jpg)
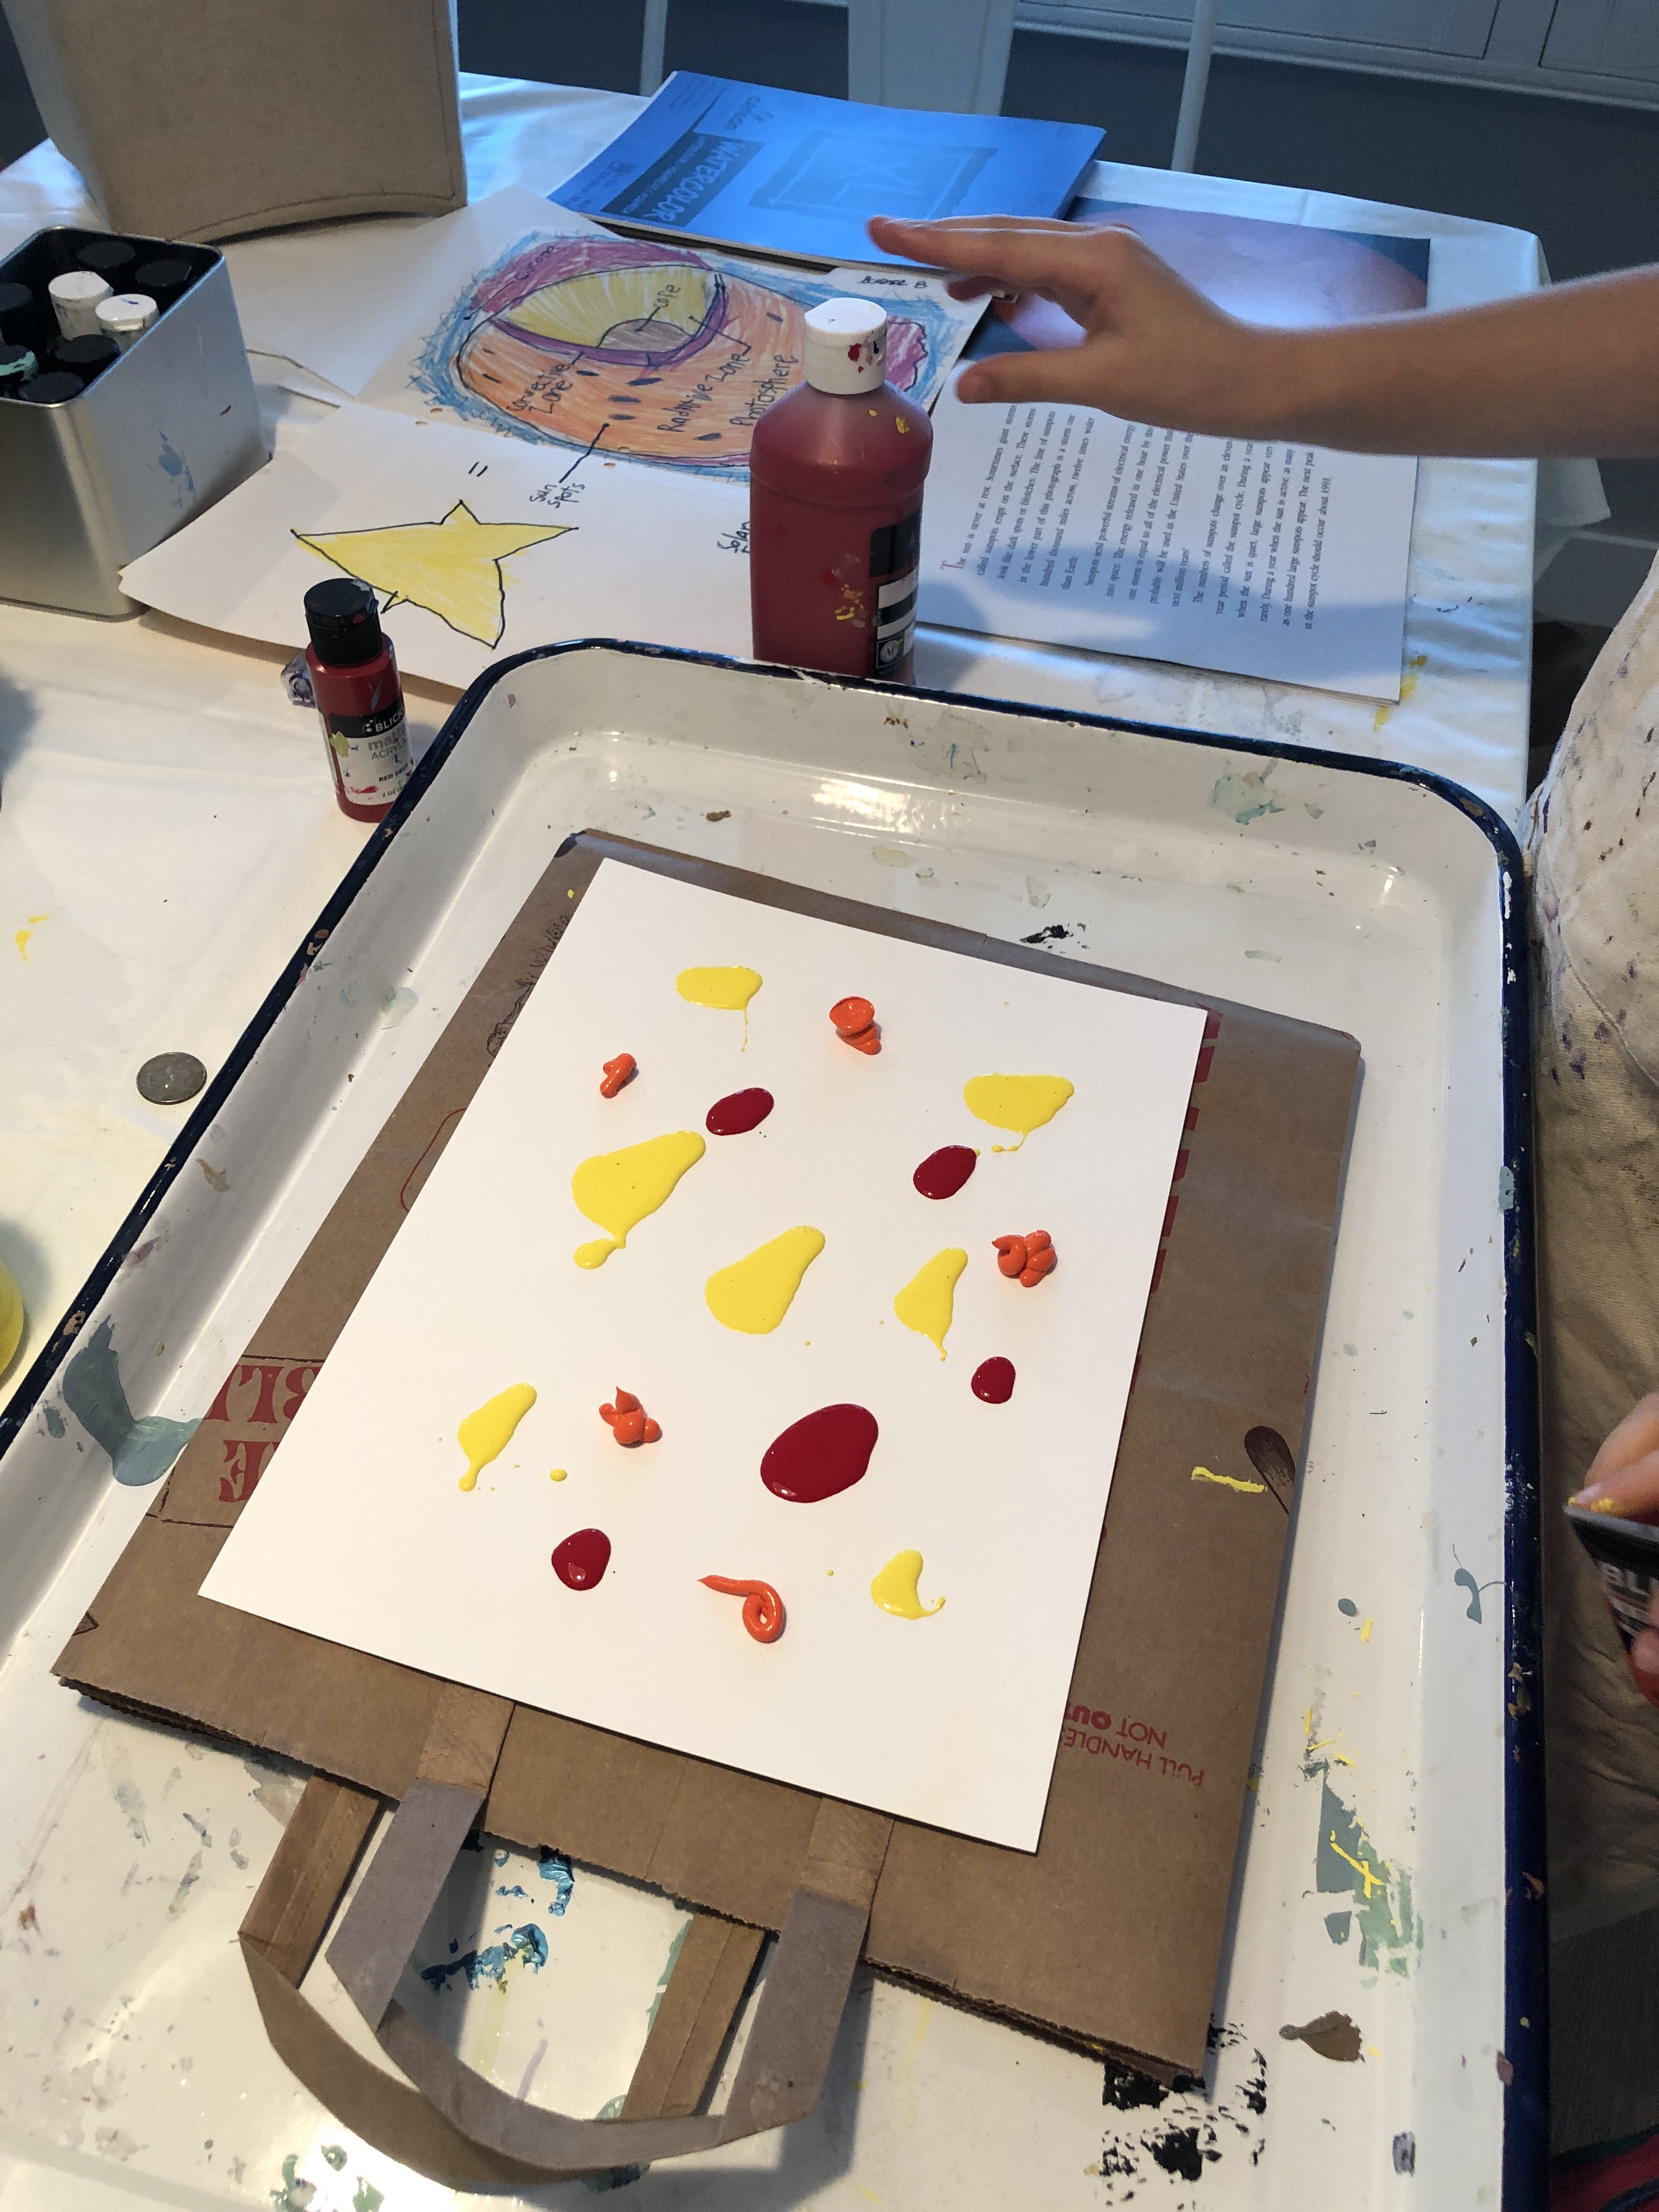
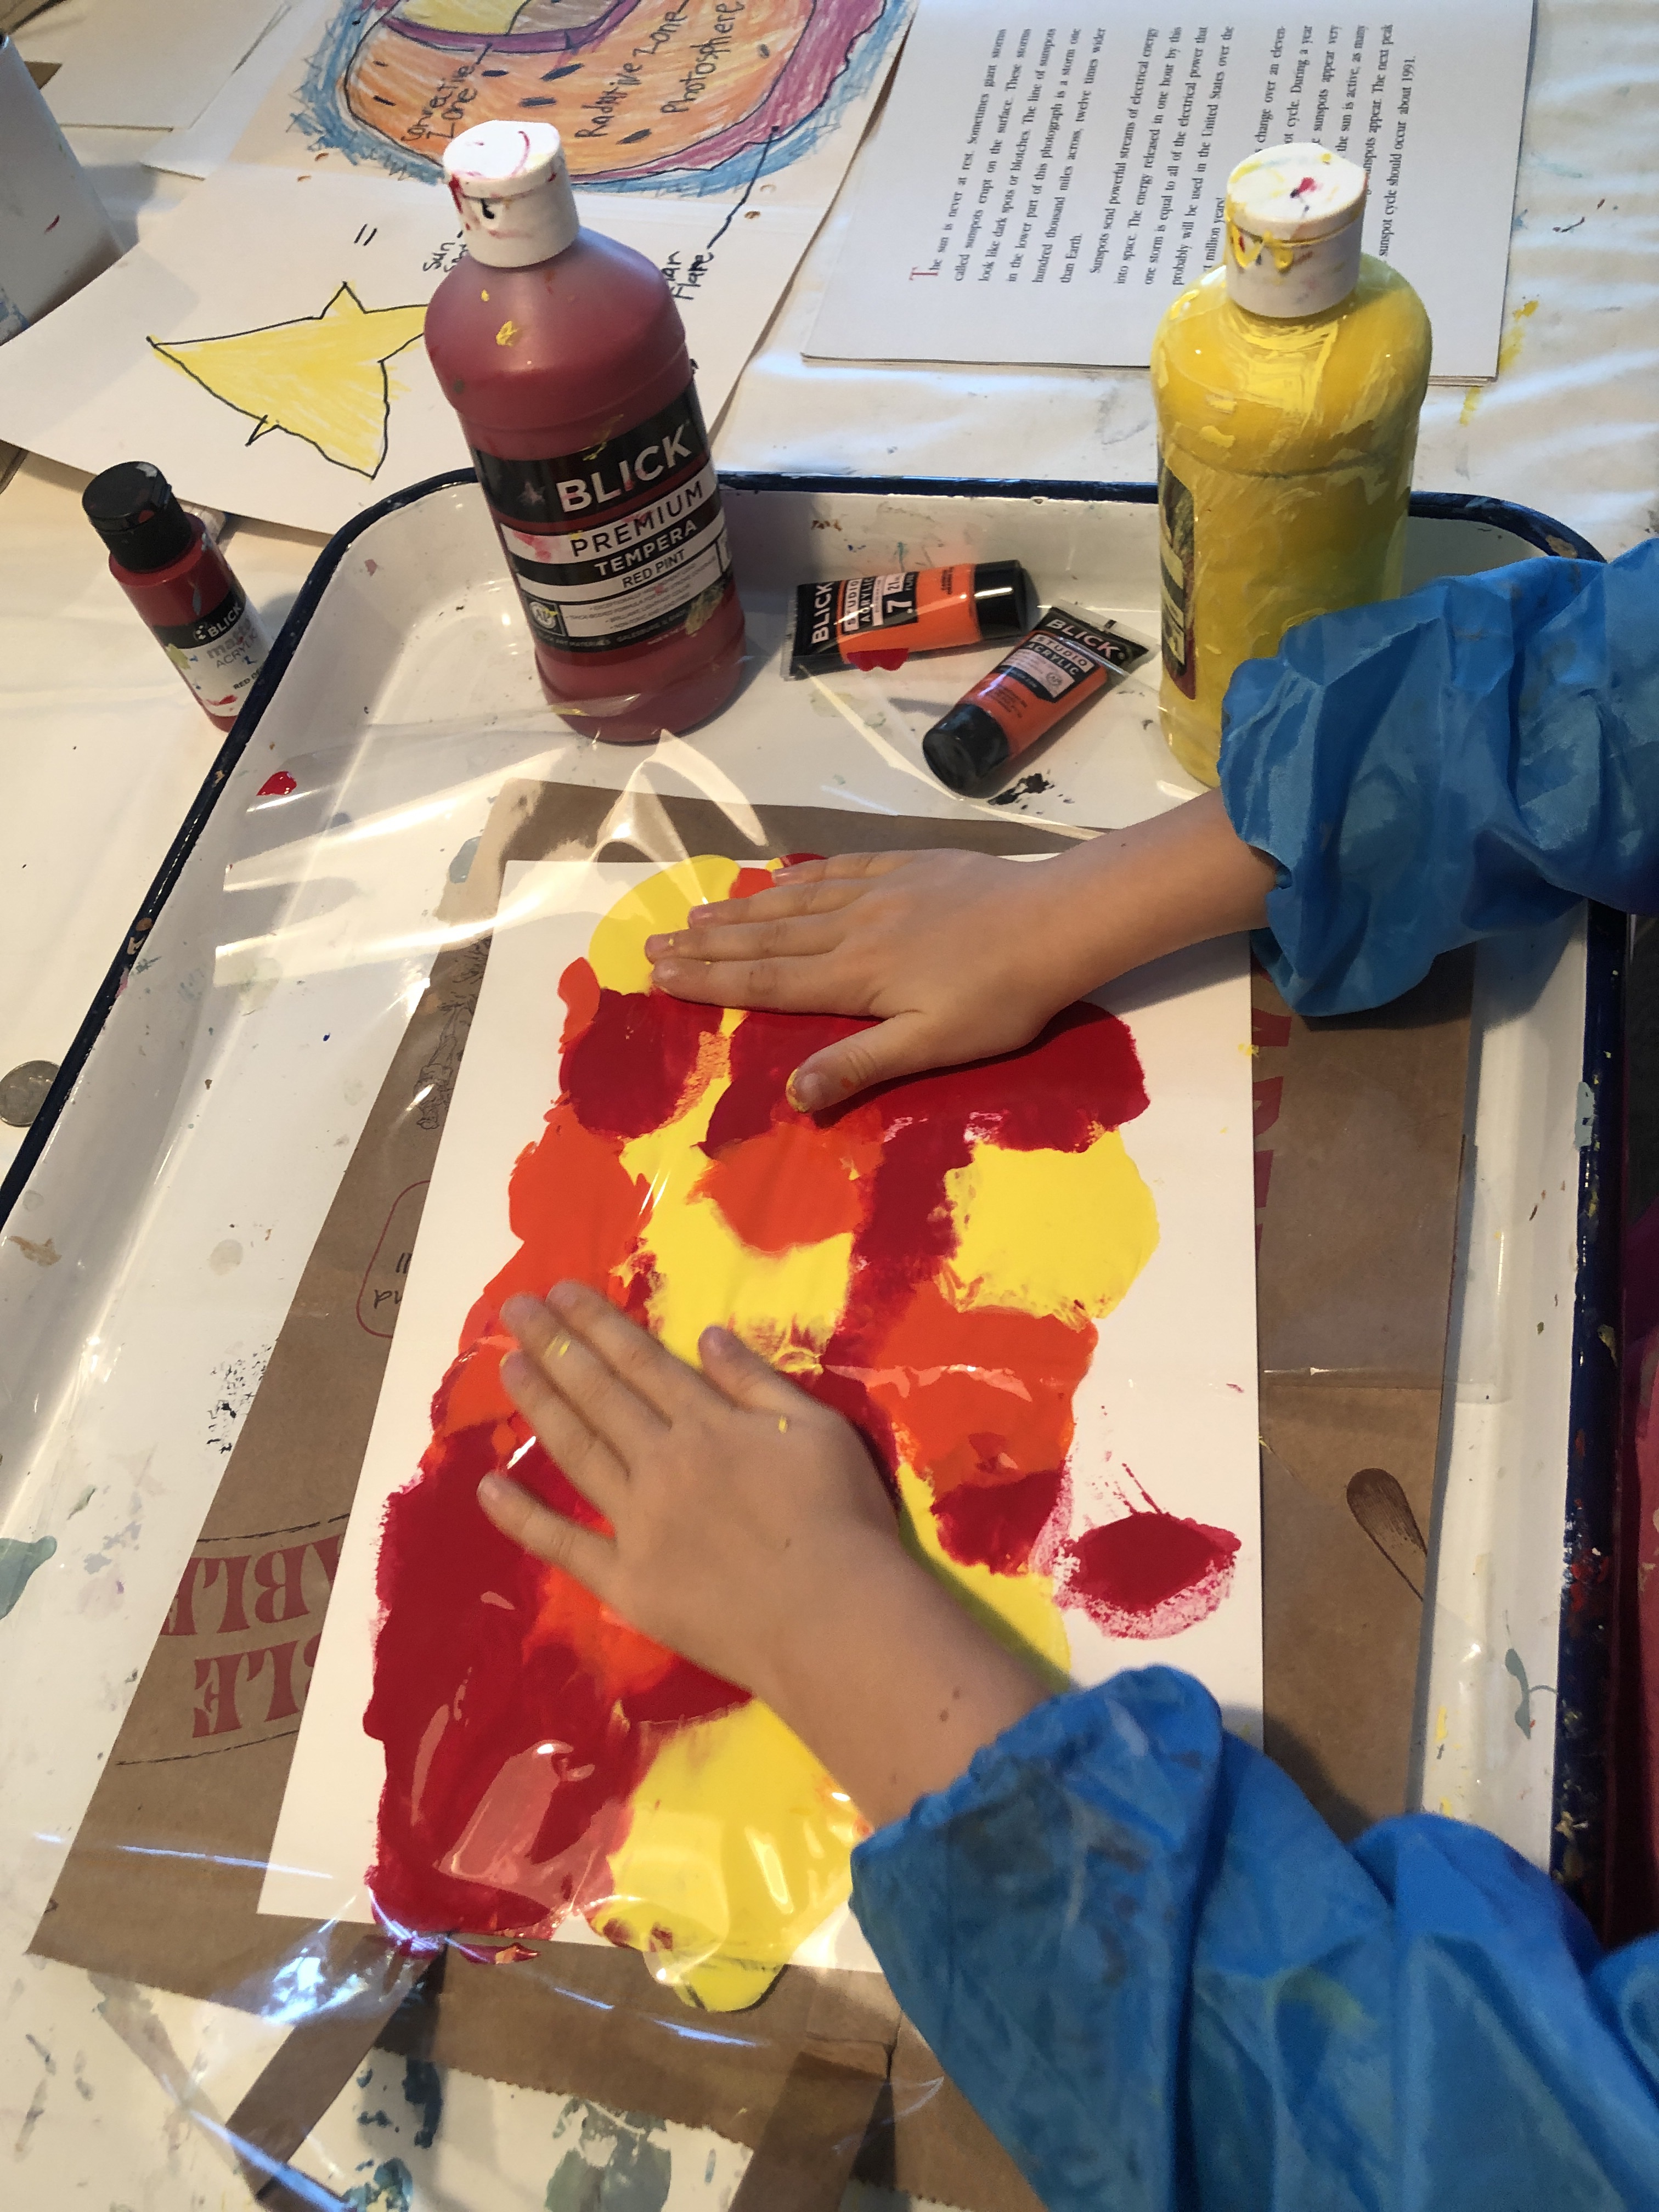
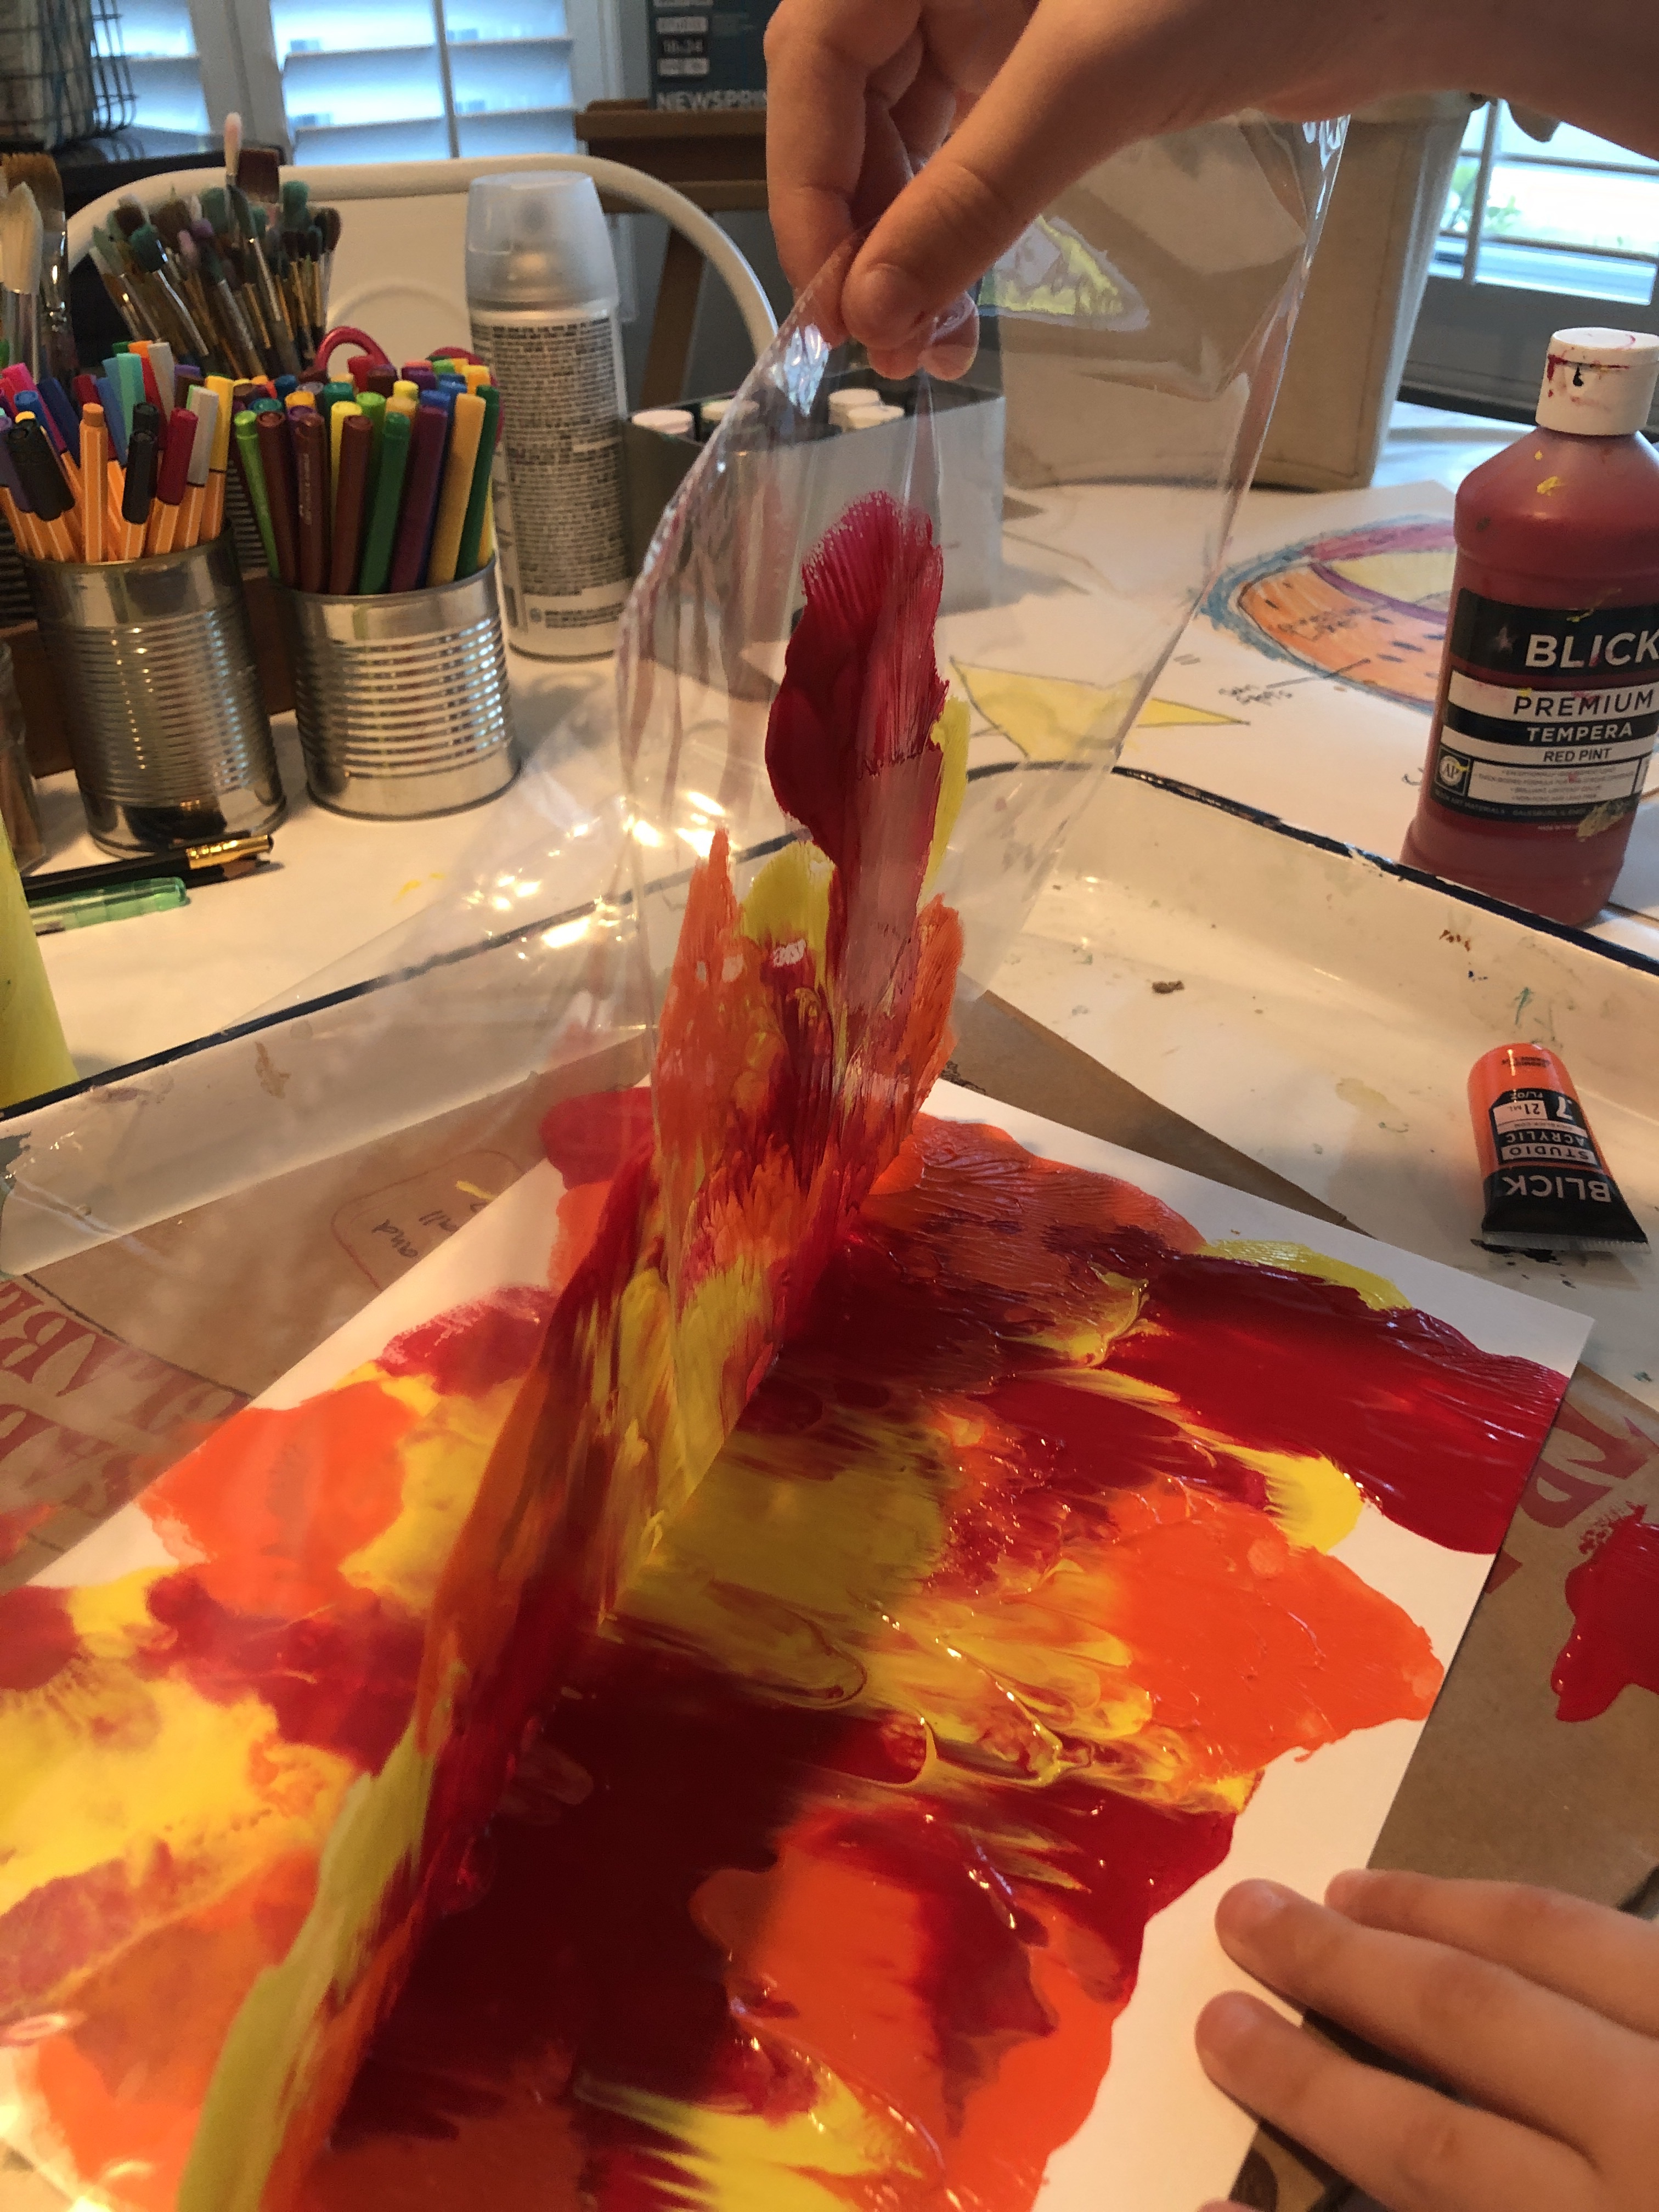
DESIGN SKILLS TO LEARN
- cellophane painting technique
MATERIALS
- watercolor sketchbook or 2 sheets of watercolor paper
- red, yellow, orange tempera paint (poster paint) note: red and yellow make orange
- cellophane
- pencil
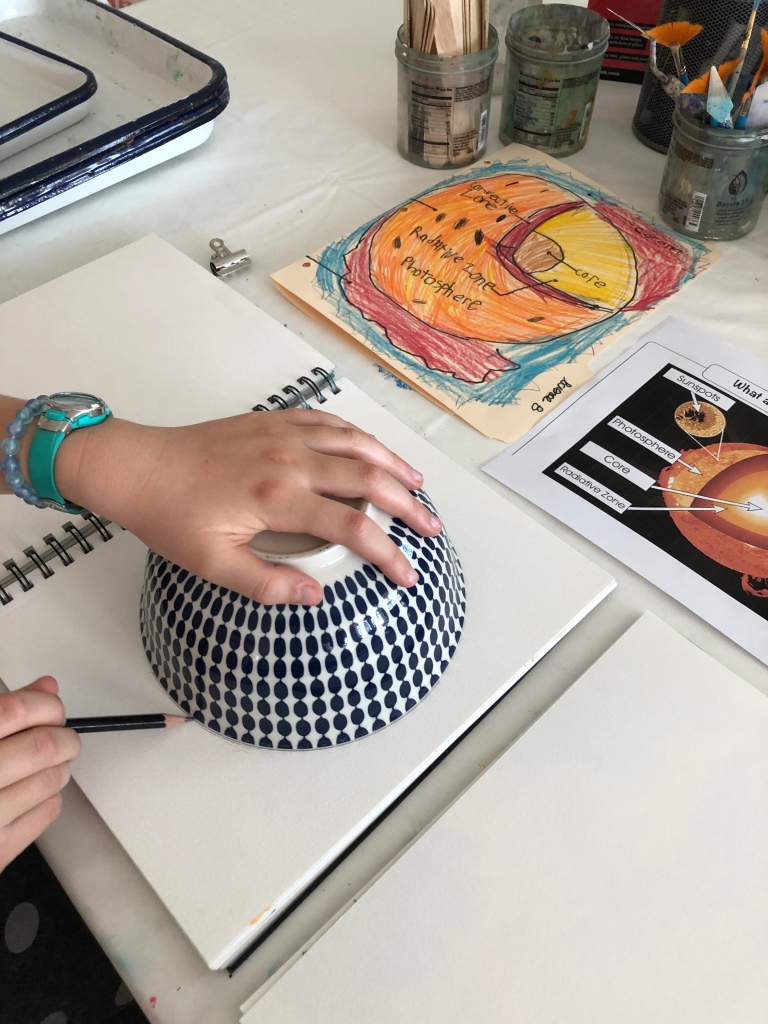
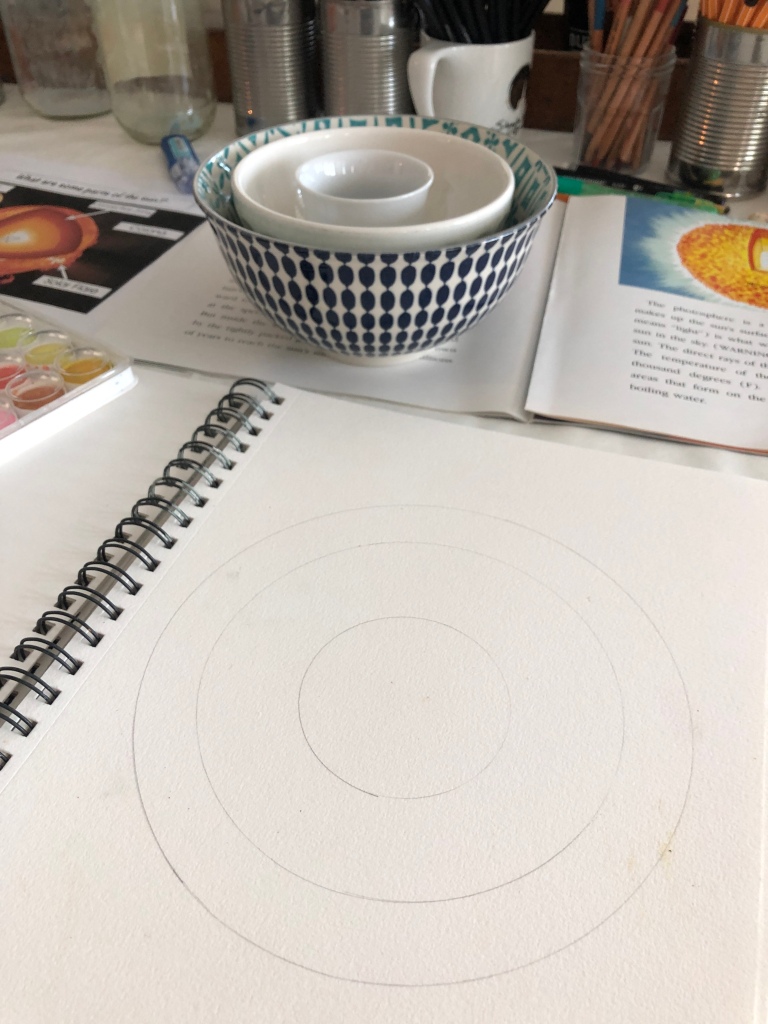
- small, medium, large bowls to trace
- scissors
- ruler
- watercolor paint palette
- brushes
- felt tip pen or marker
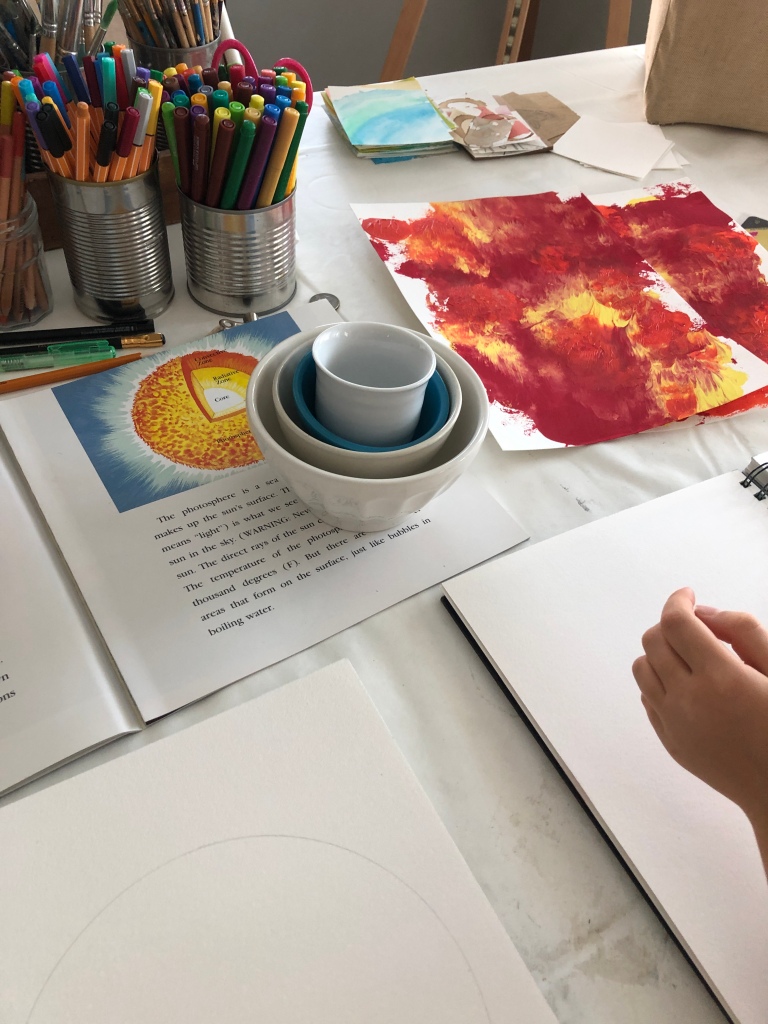
![](https://studiodn2.com/wp-content/uploads/2019/10/img_3855.jpg)
![](https://studiodn2.com/wp-content/uploads/2019/10/img_3833.jpg)
step no.1
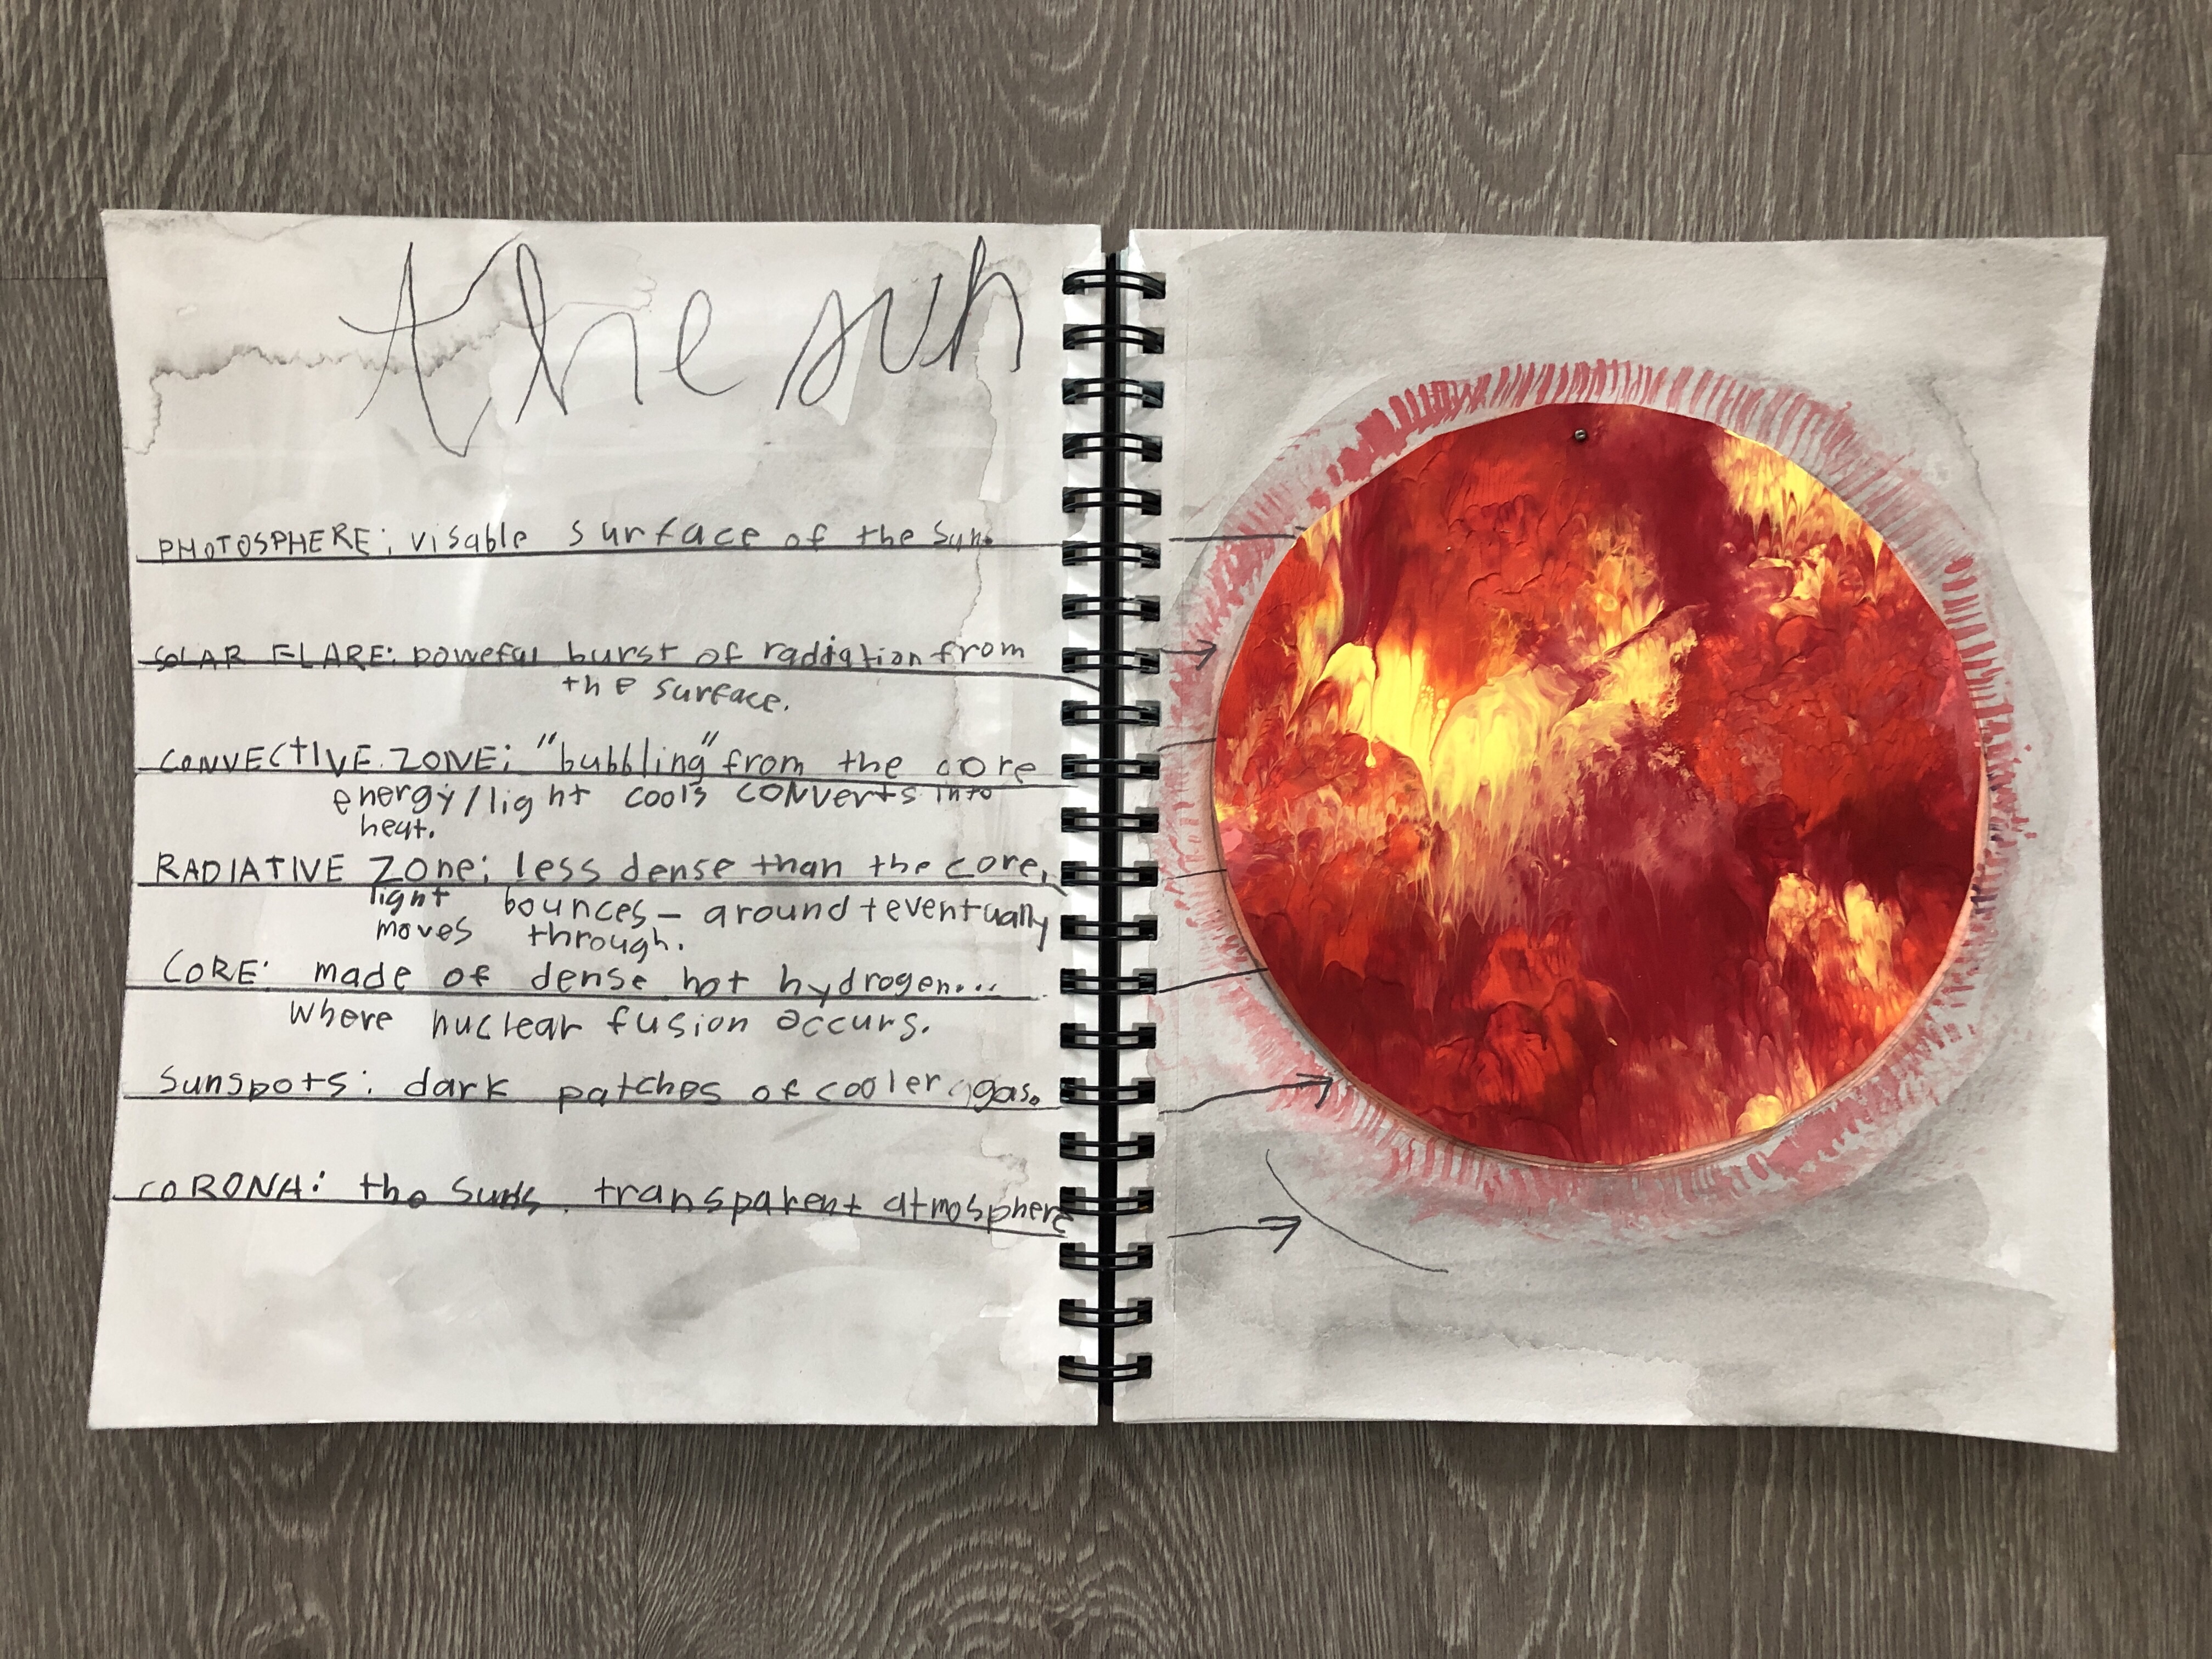
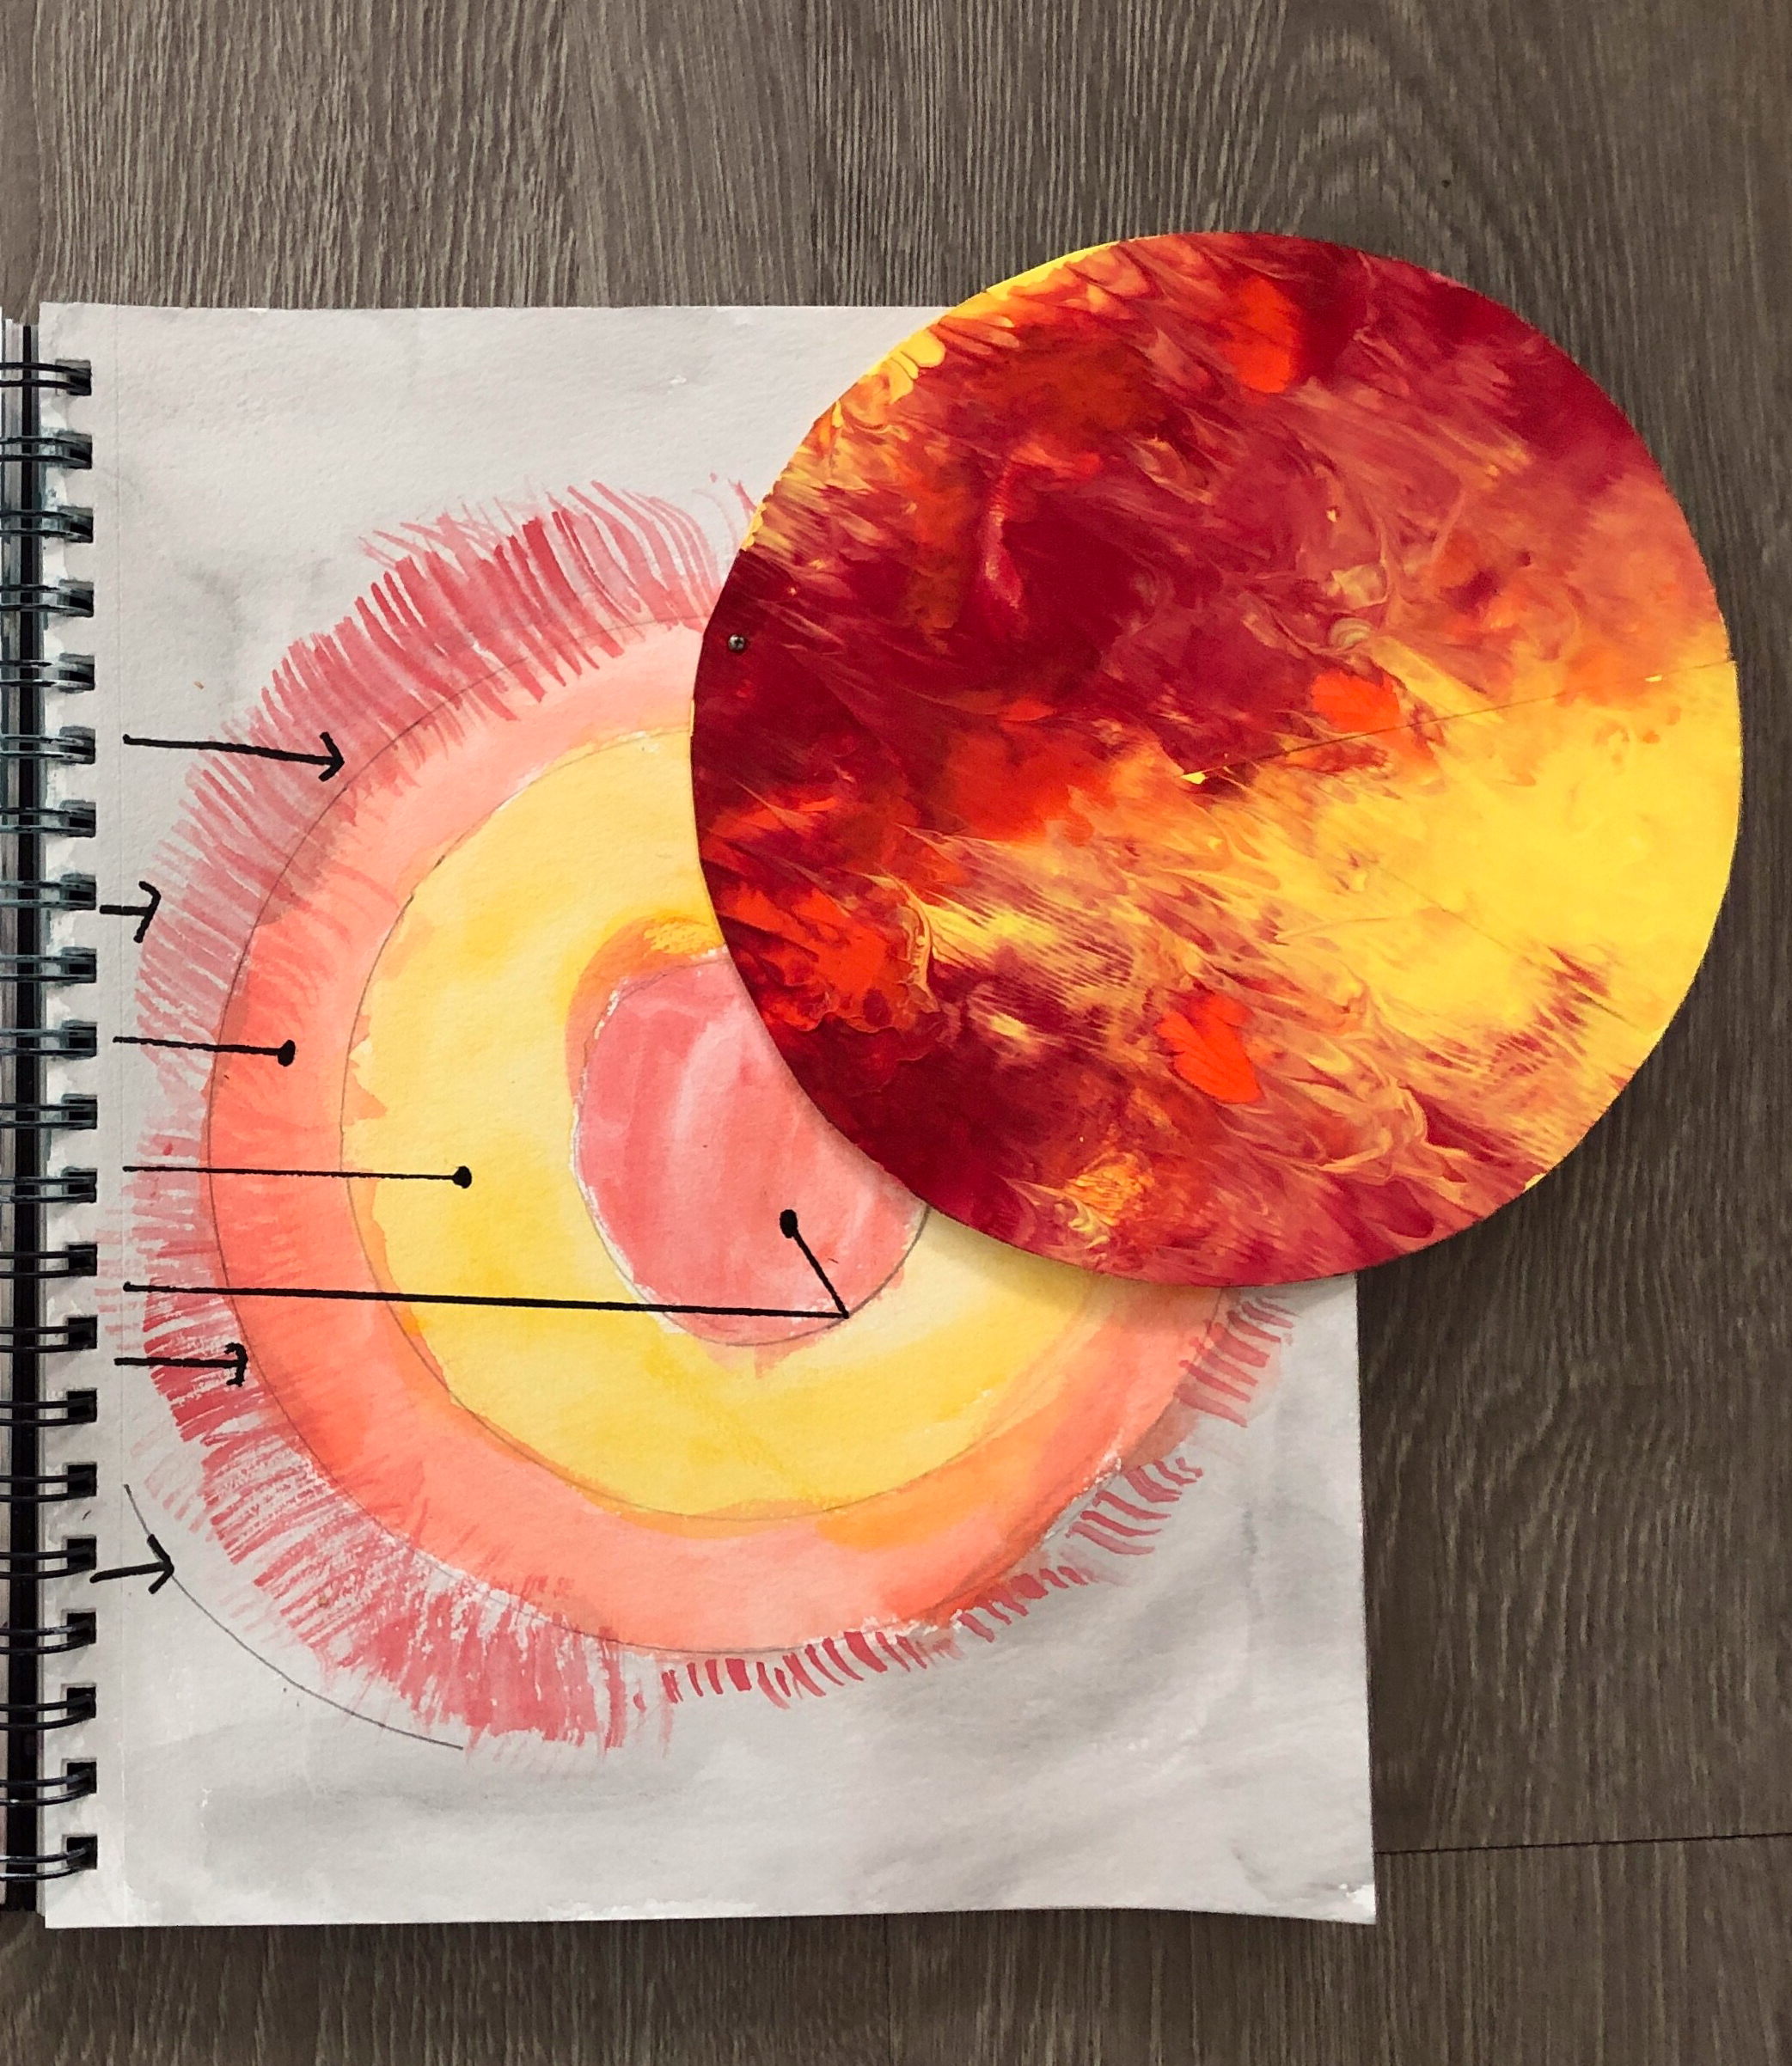
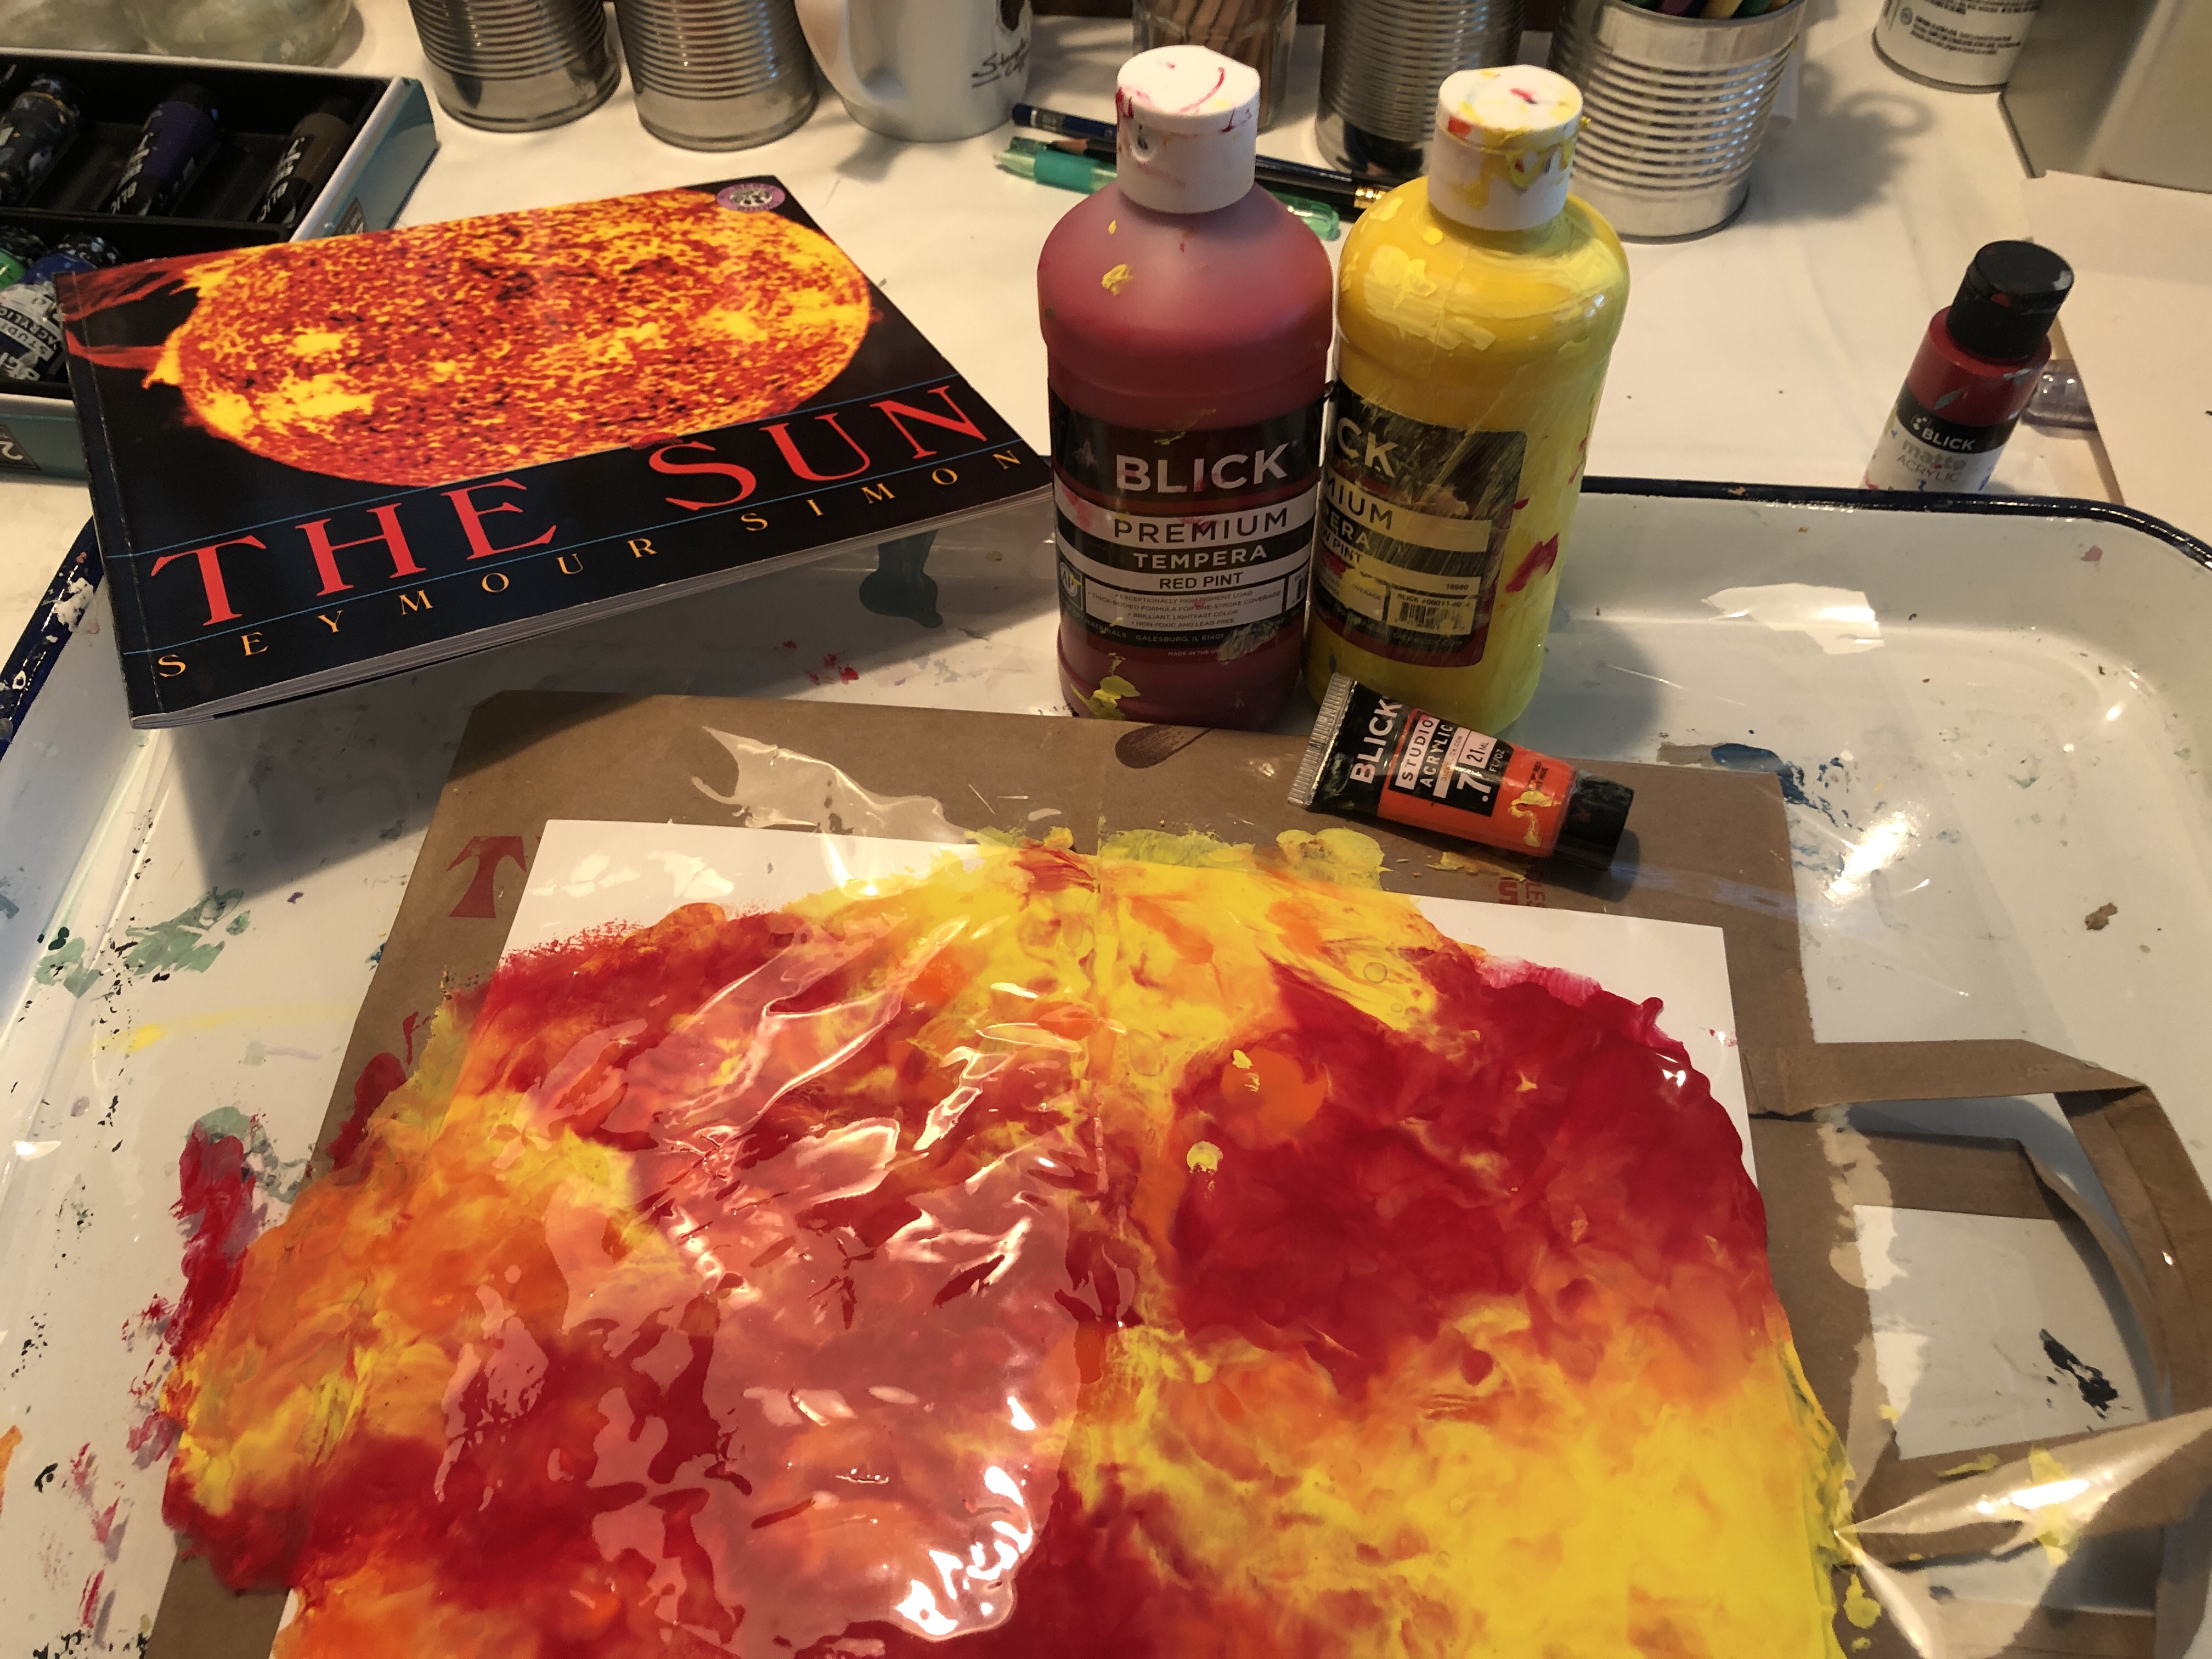
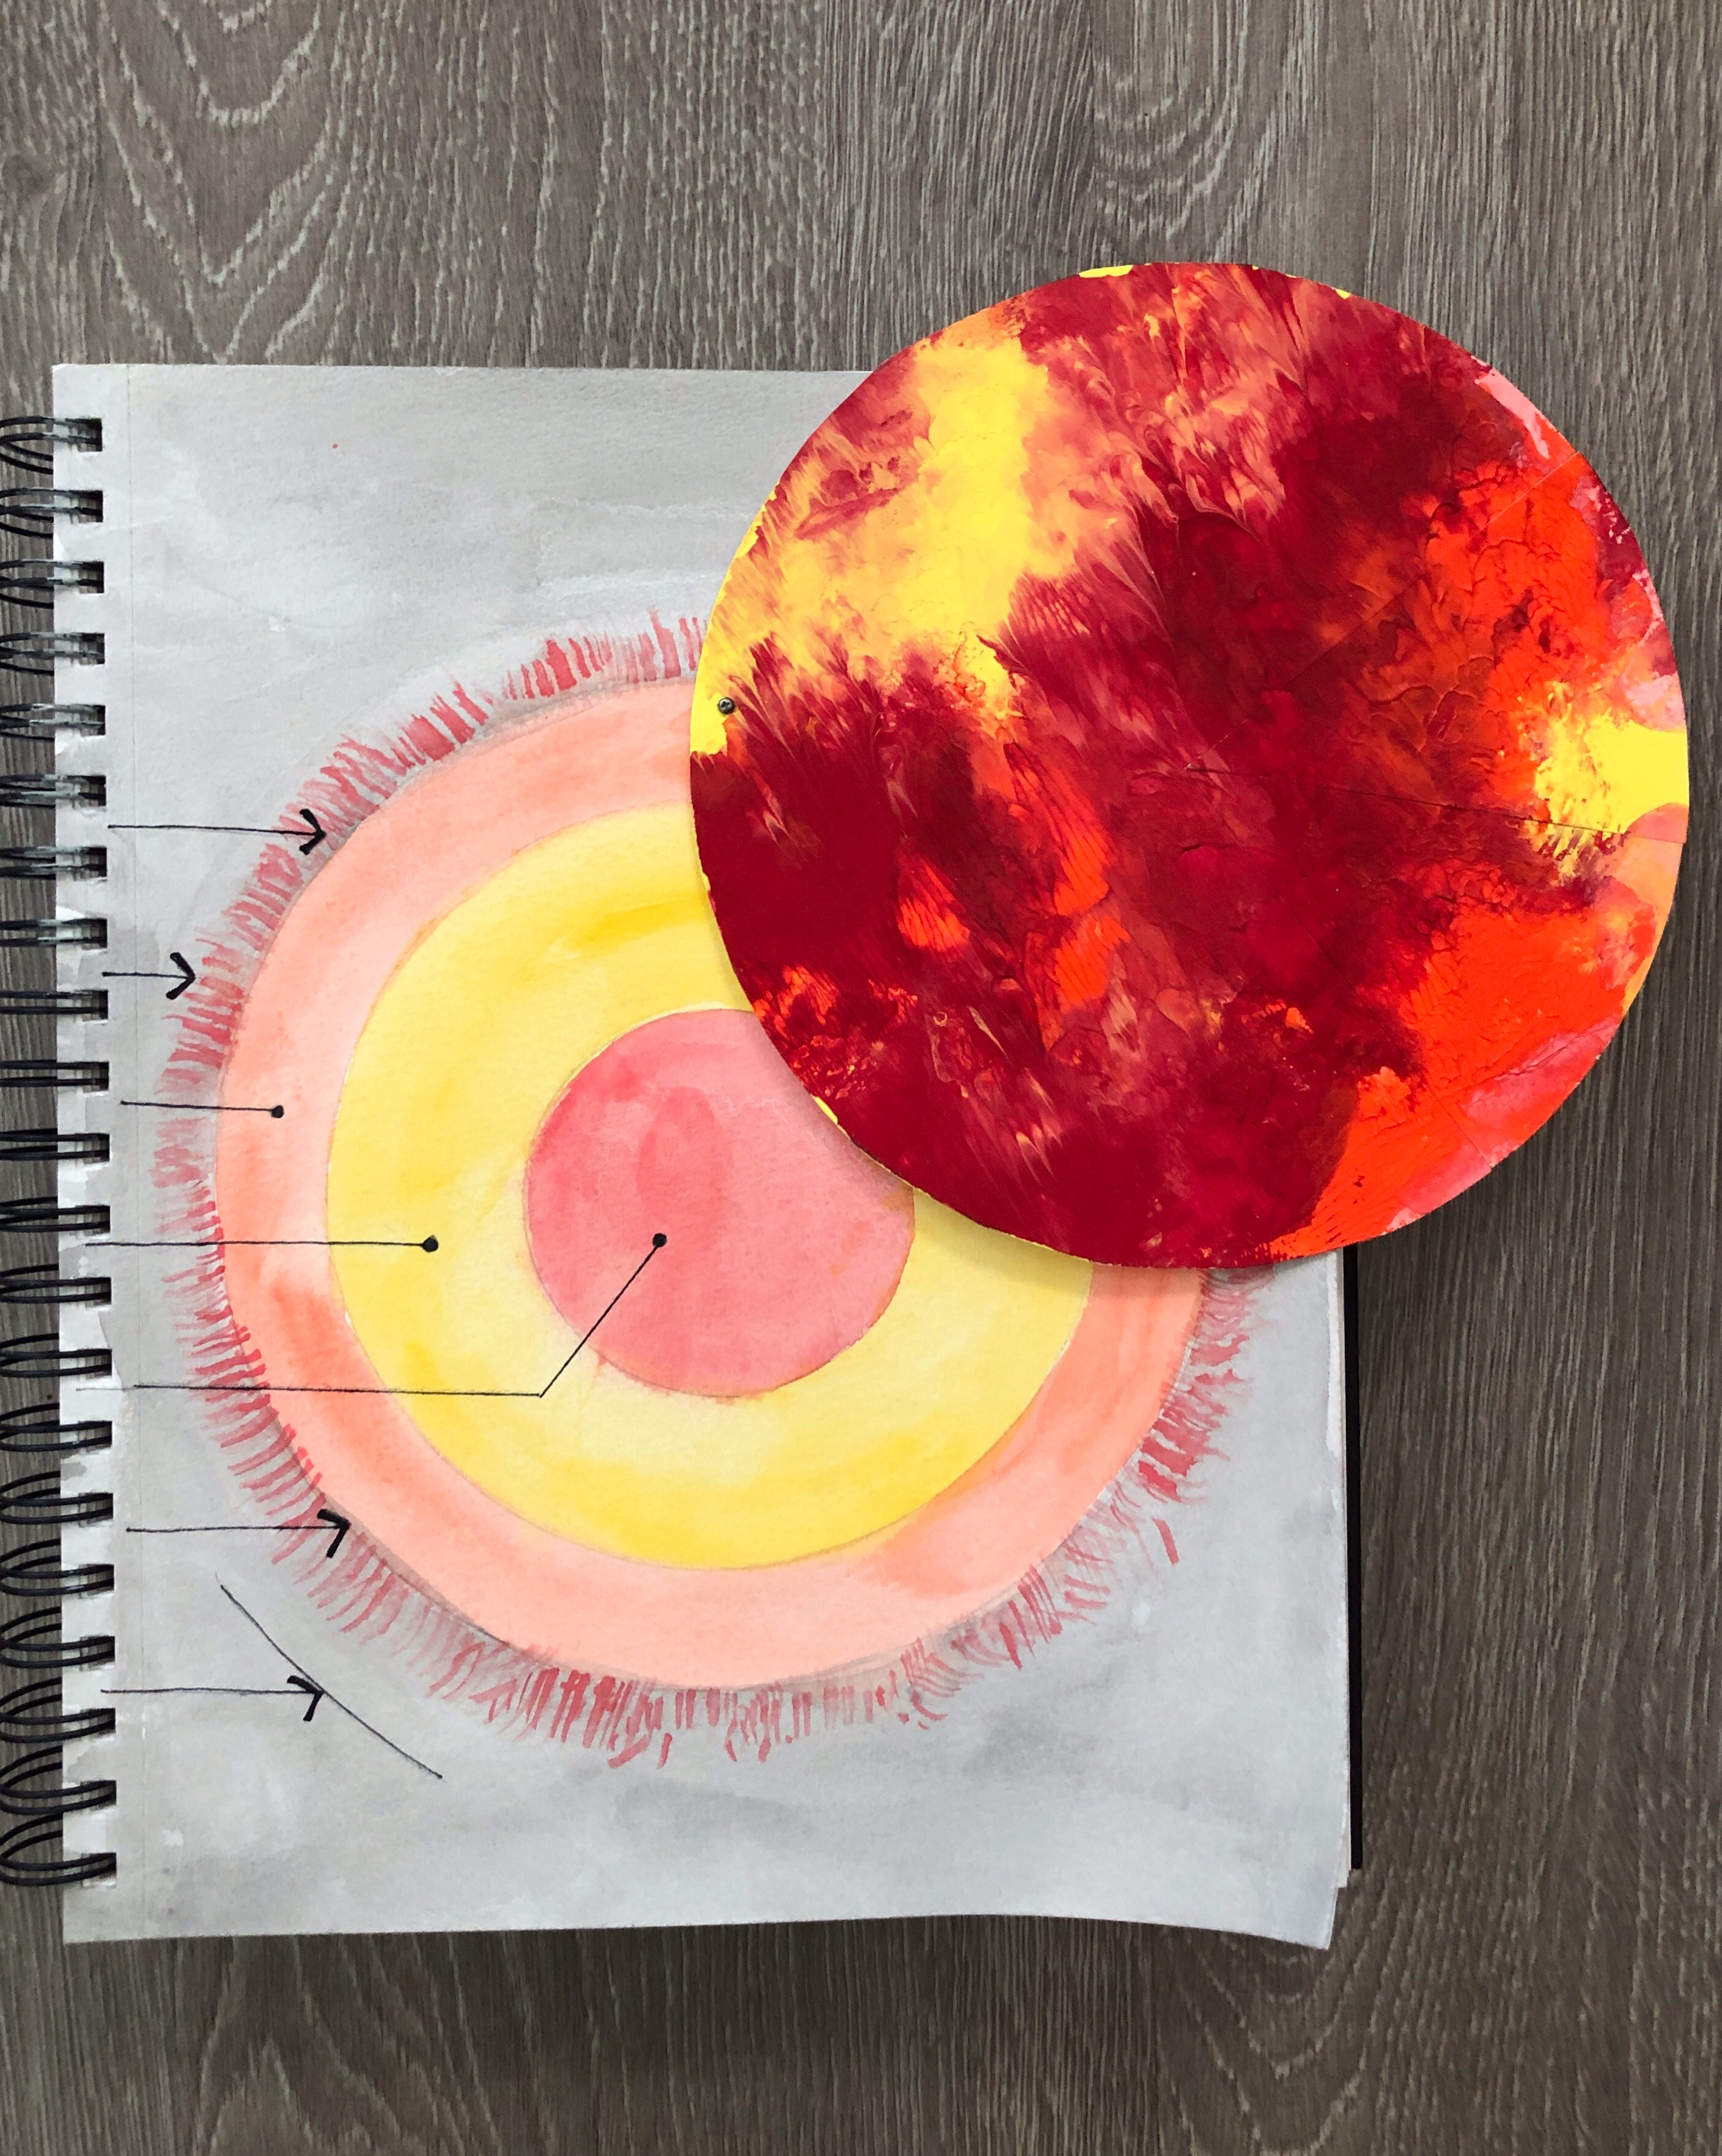
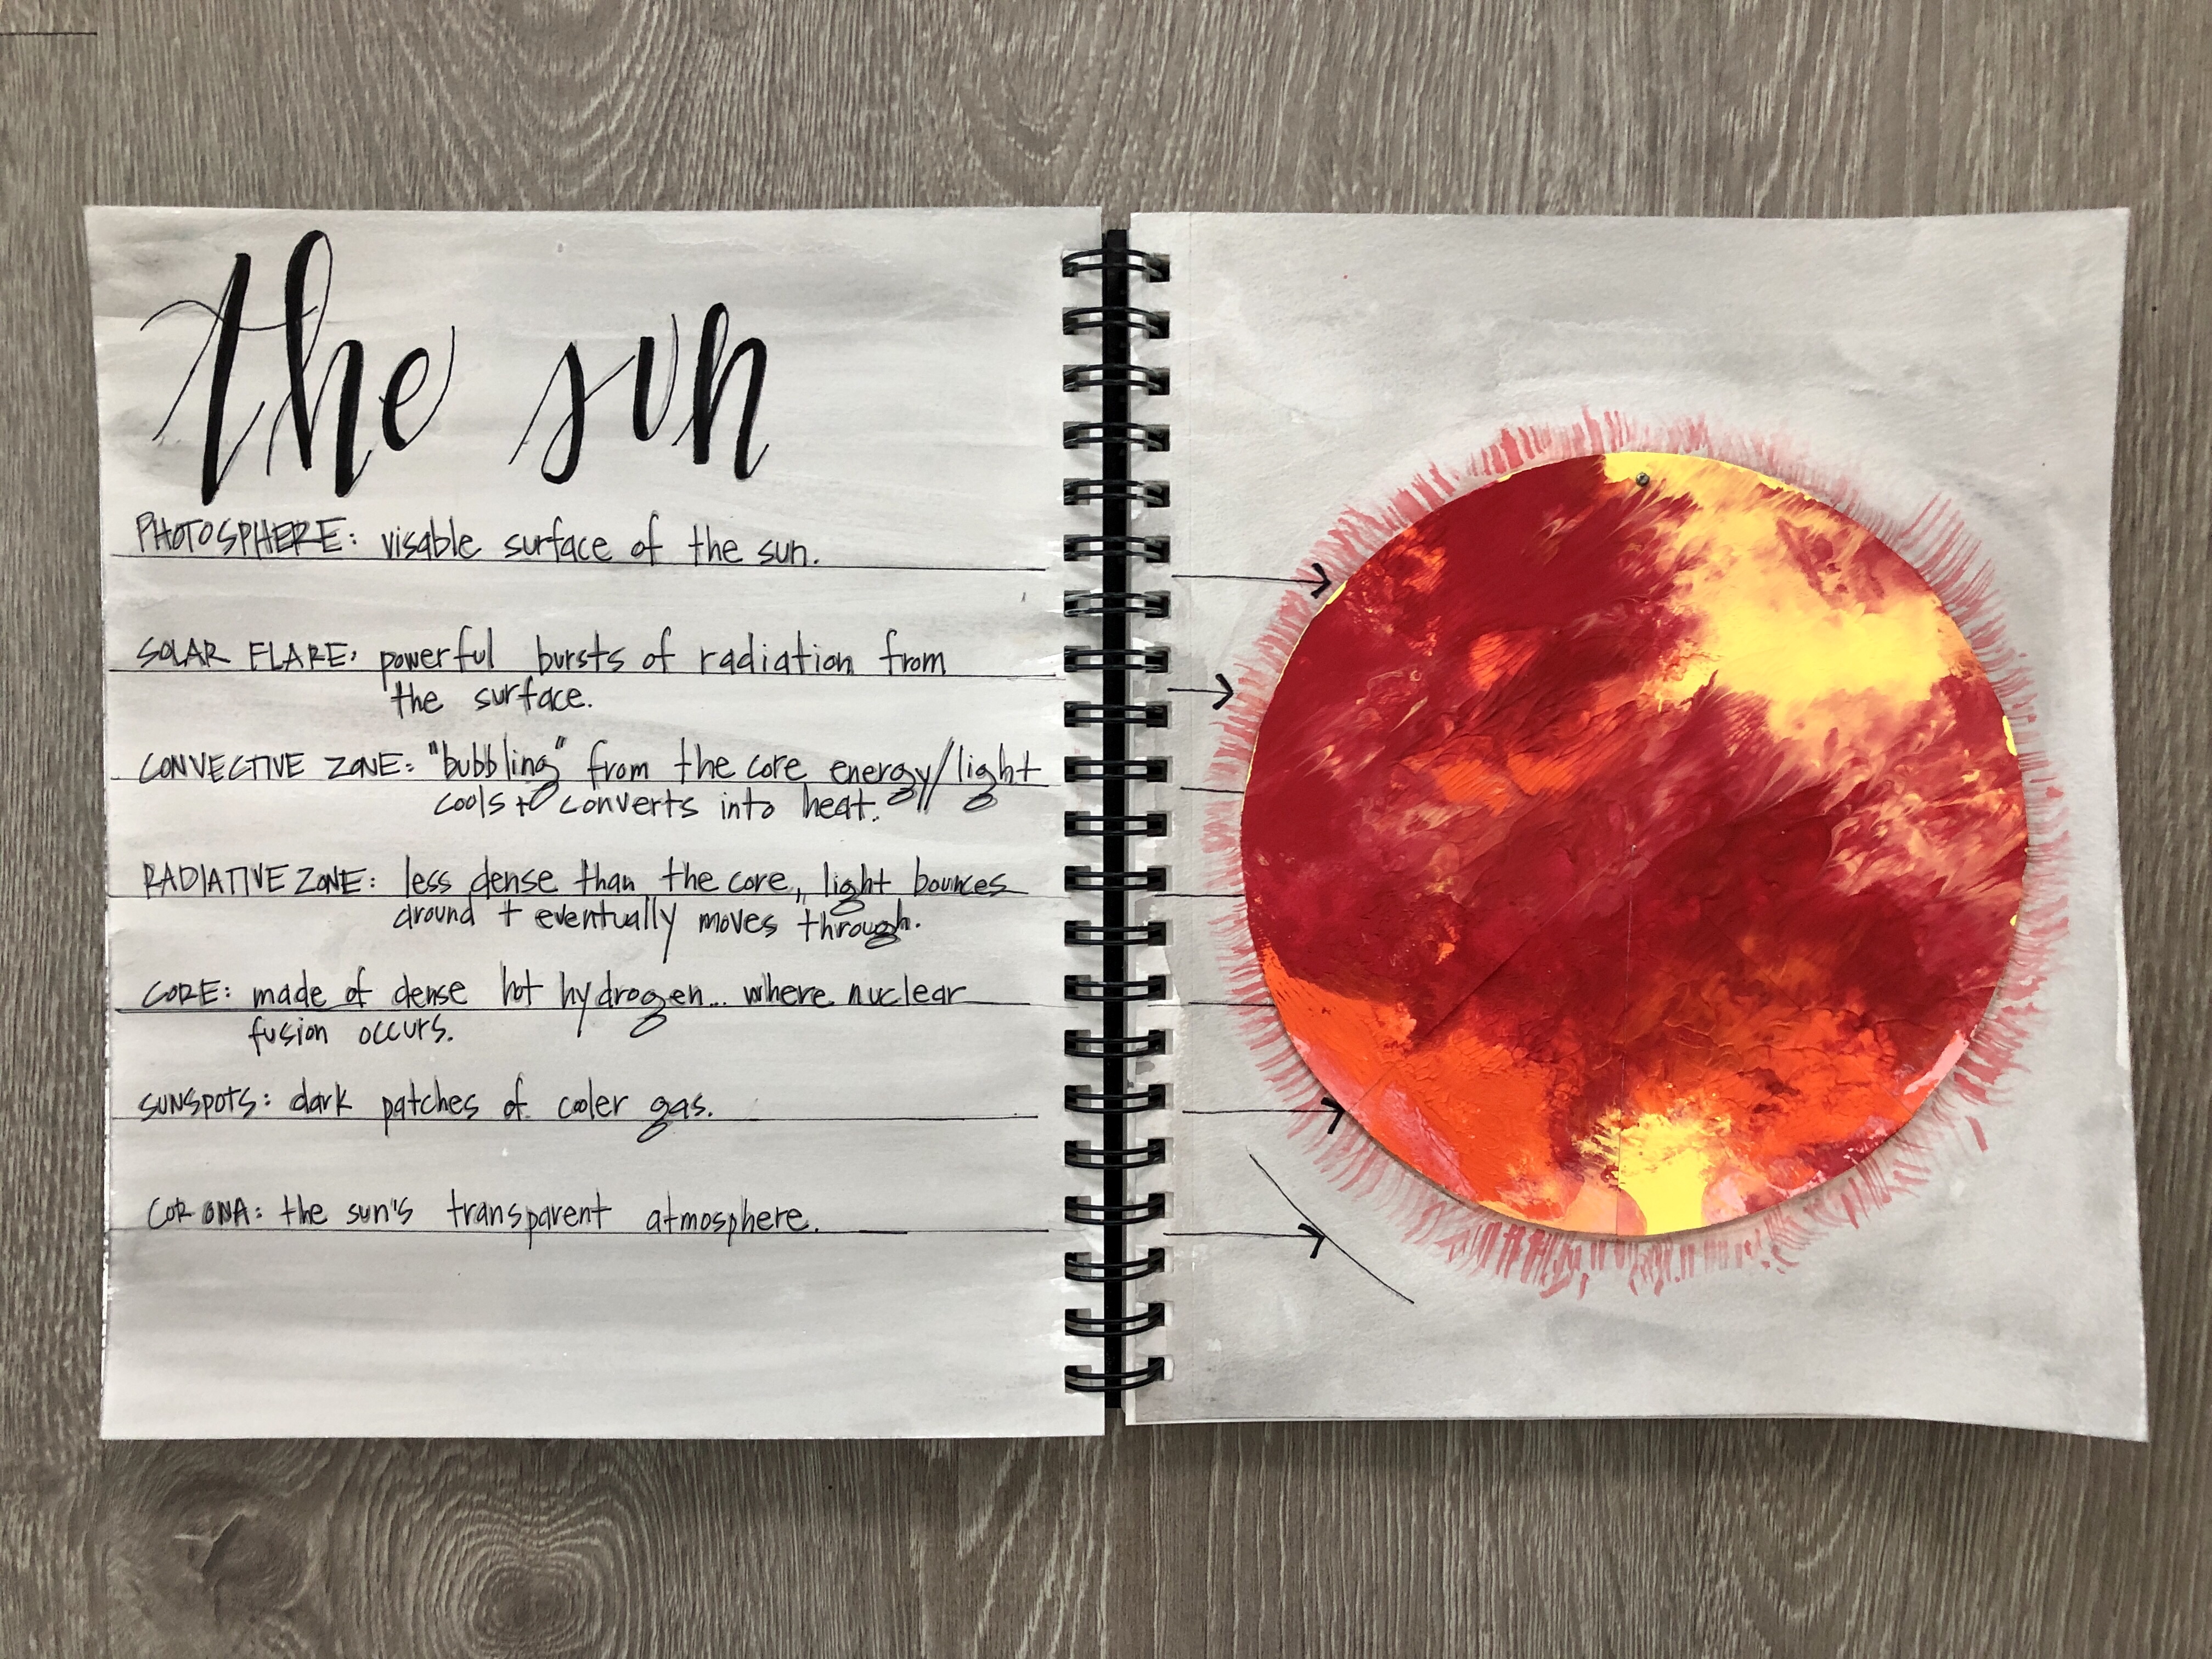
- follow the photos + demo below to cellophane paint the photosphere of the sun
![](https://studiodn2.com/wp-content/uploads/2019/10/img_3818.jpg)
![](https://studiodn2.com/wp-content/uploads/2019/10/img_3820.jpg)
![](https://studiodn2.com/wp-content/uploads/2019/10/img_3826.jpg)
![](https://studiodn2.com/wp-content/uploads/2019/10/img_3823.jpg)
Step no.2
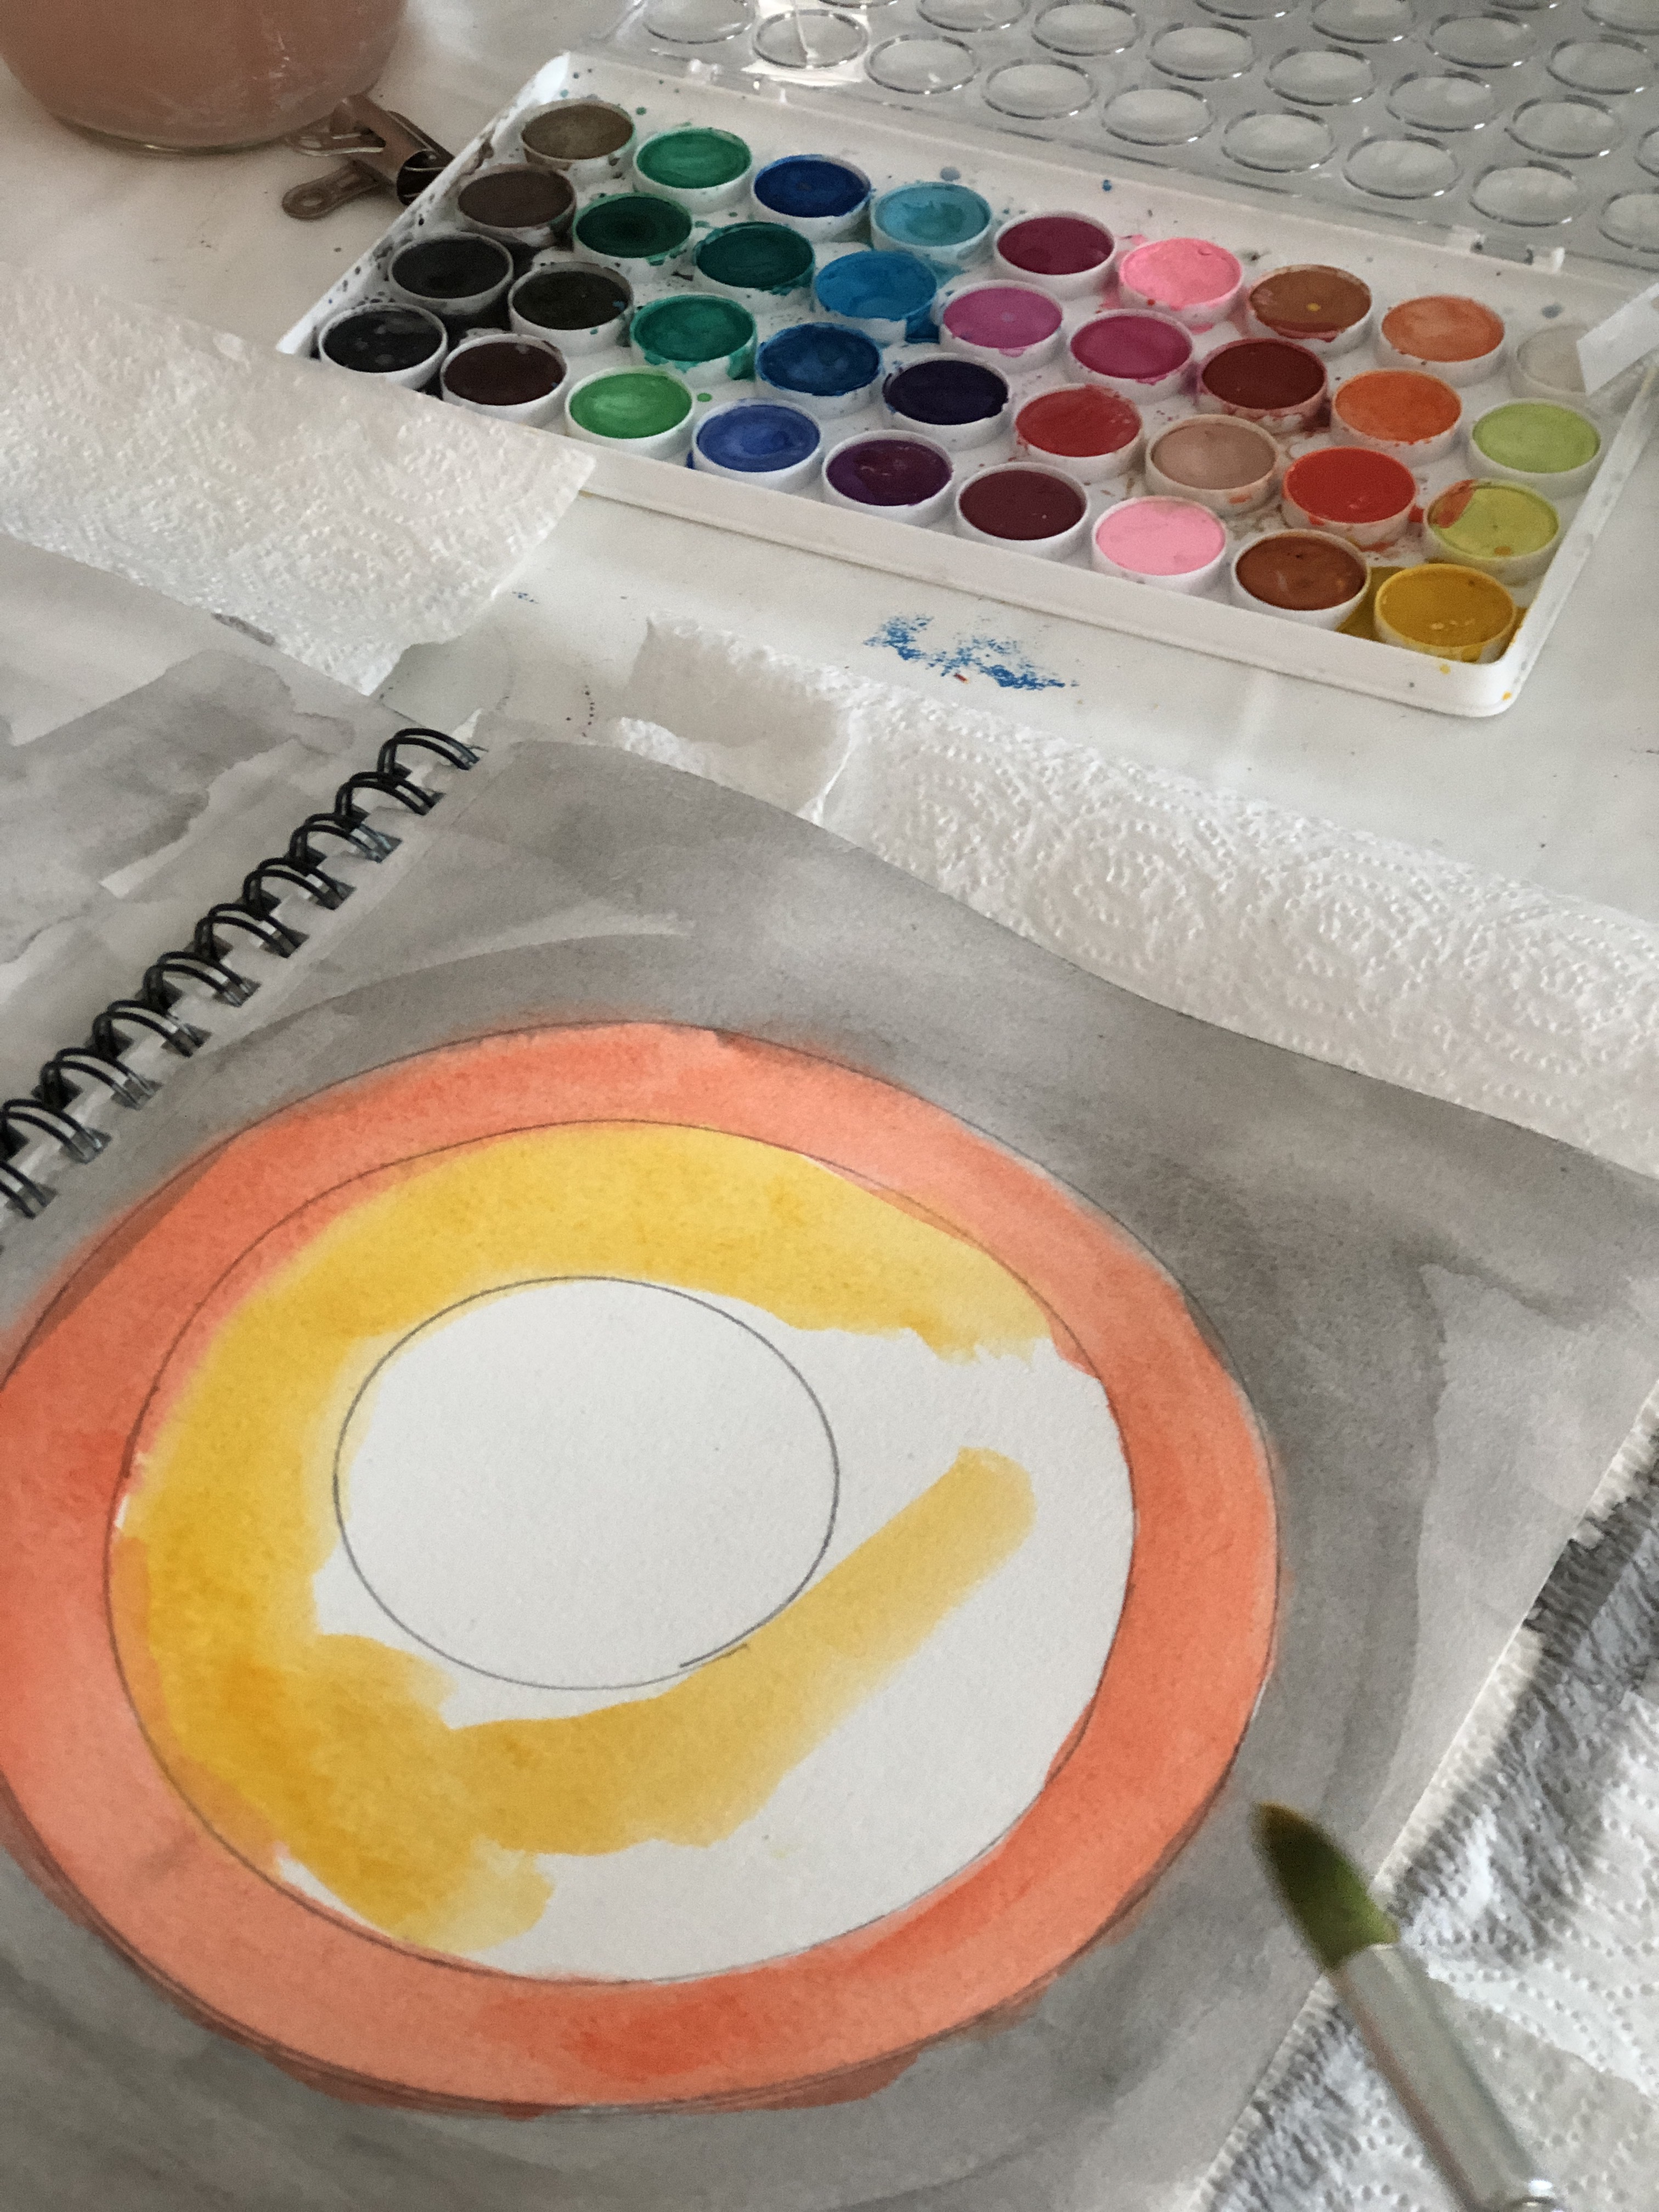
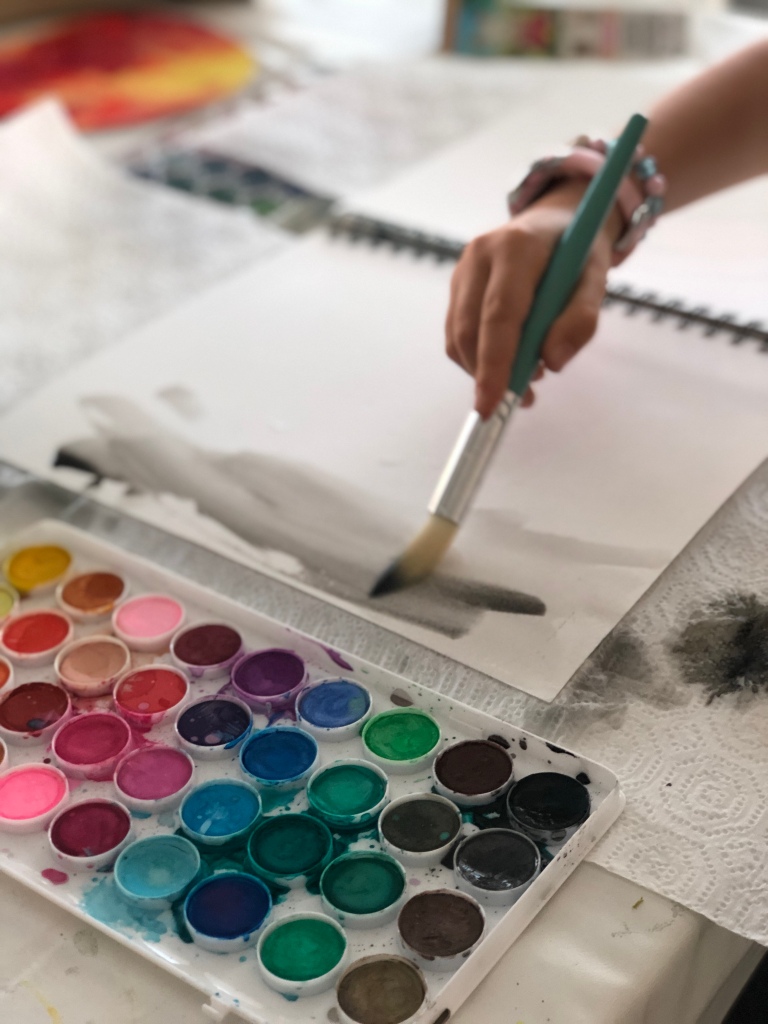
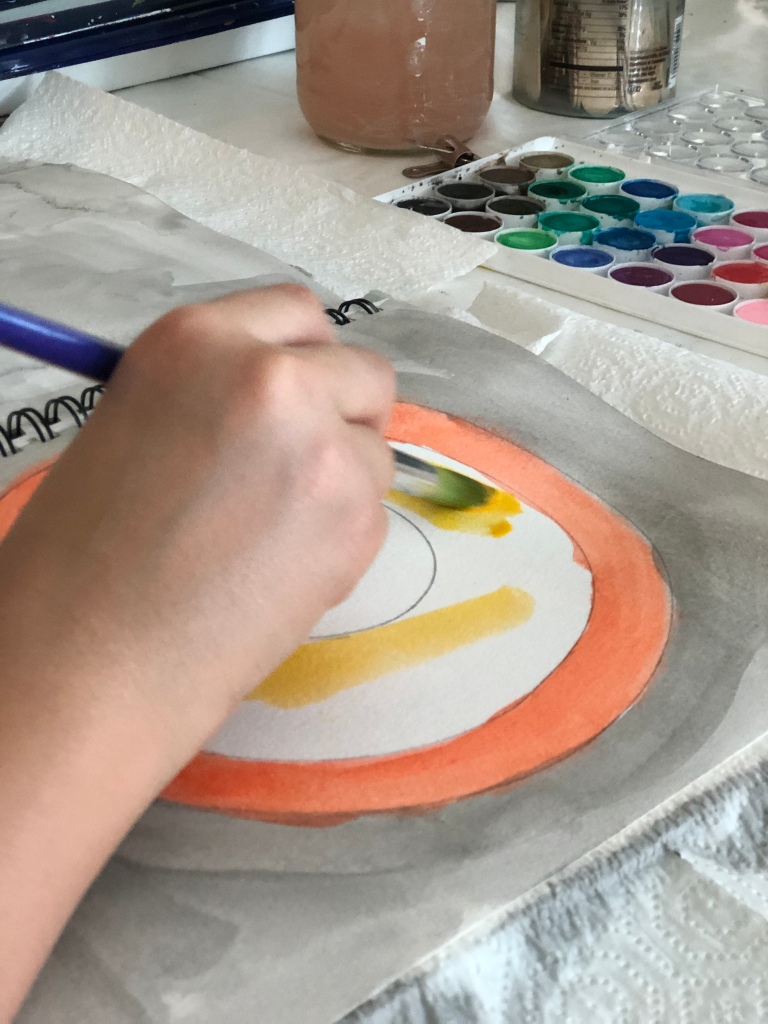
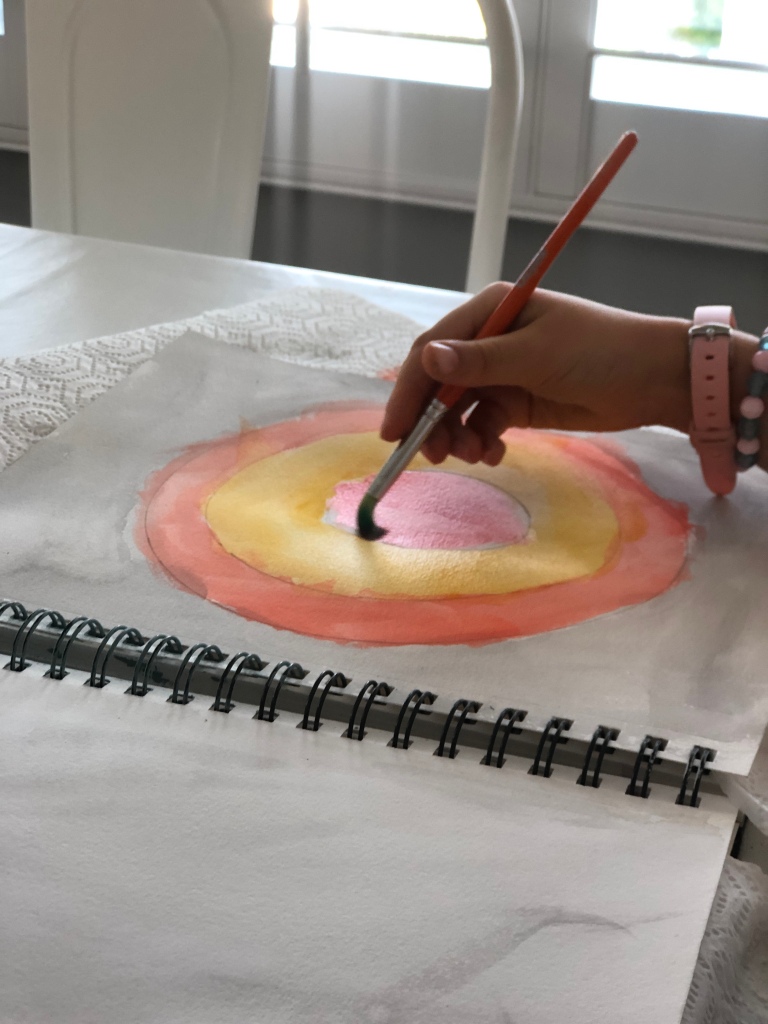
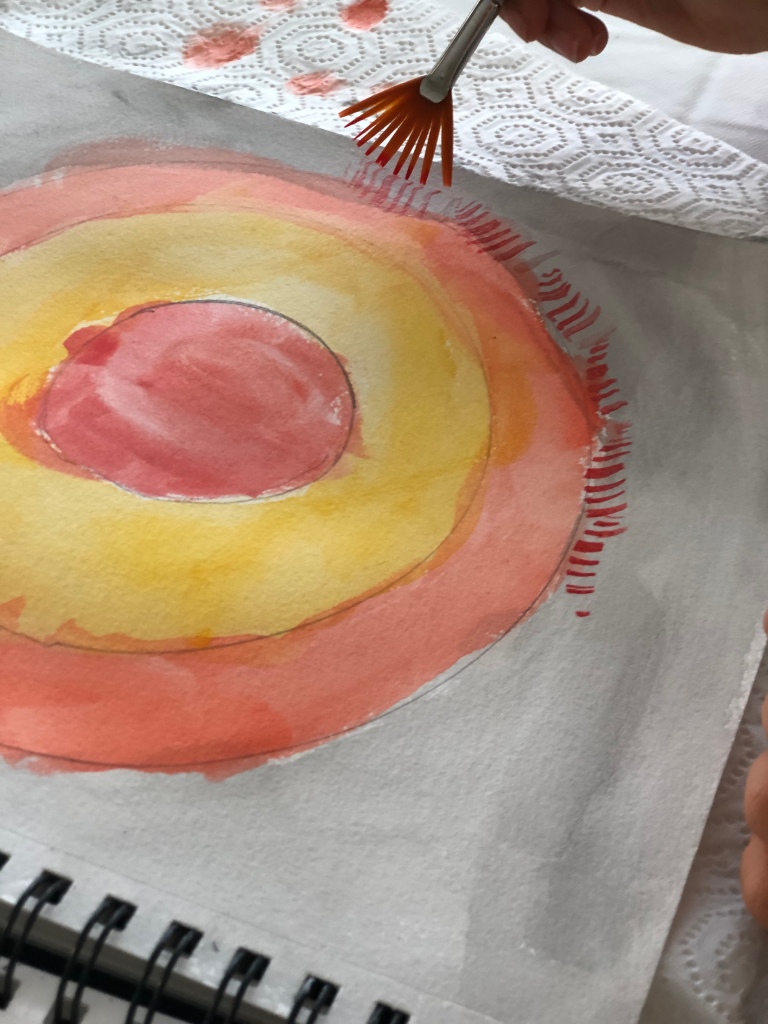
- see photos & video for instructions to watercolor the layers of the sun
Step No.3
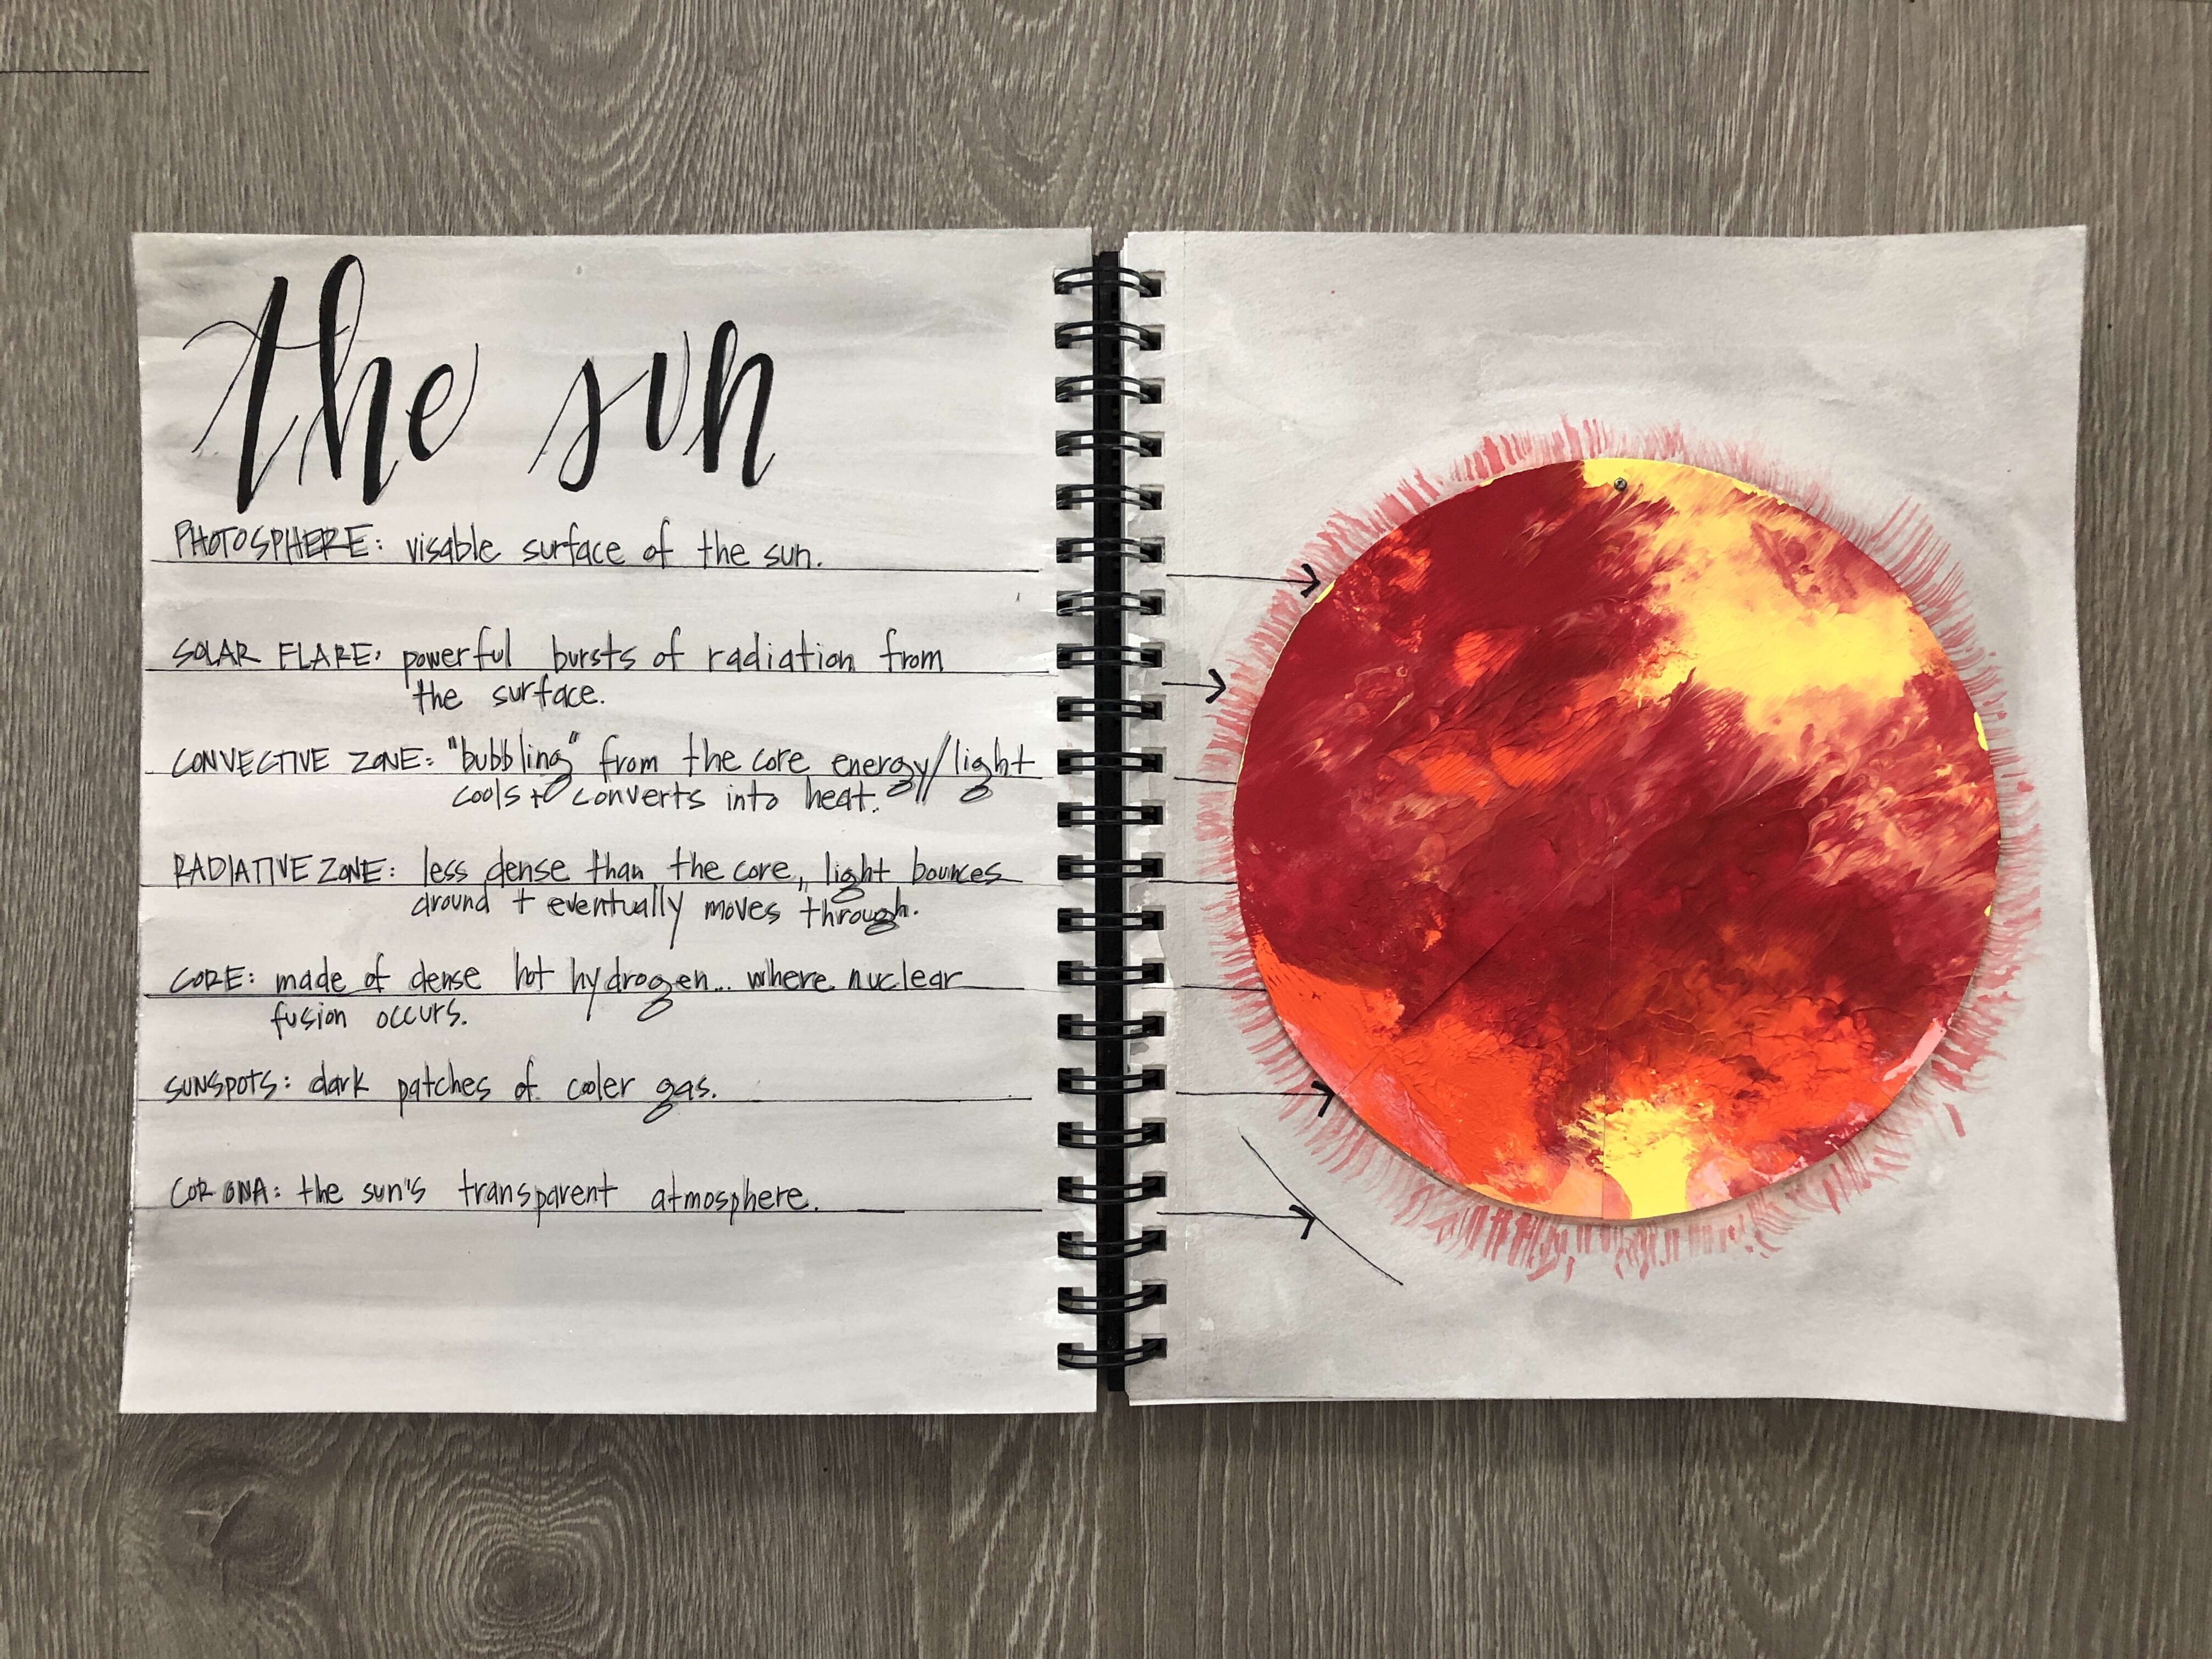
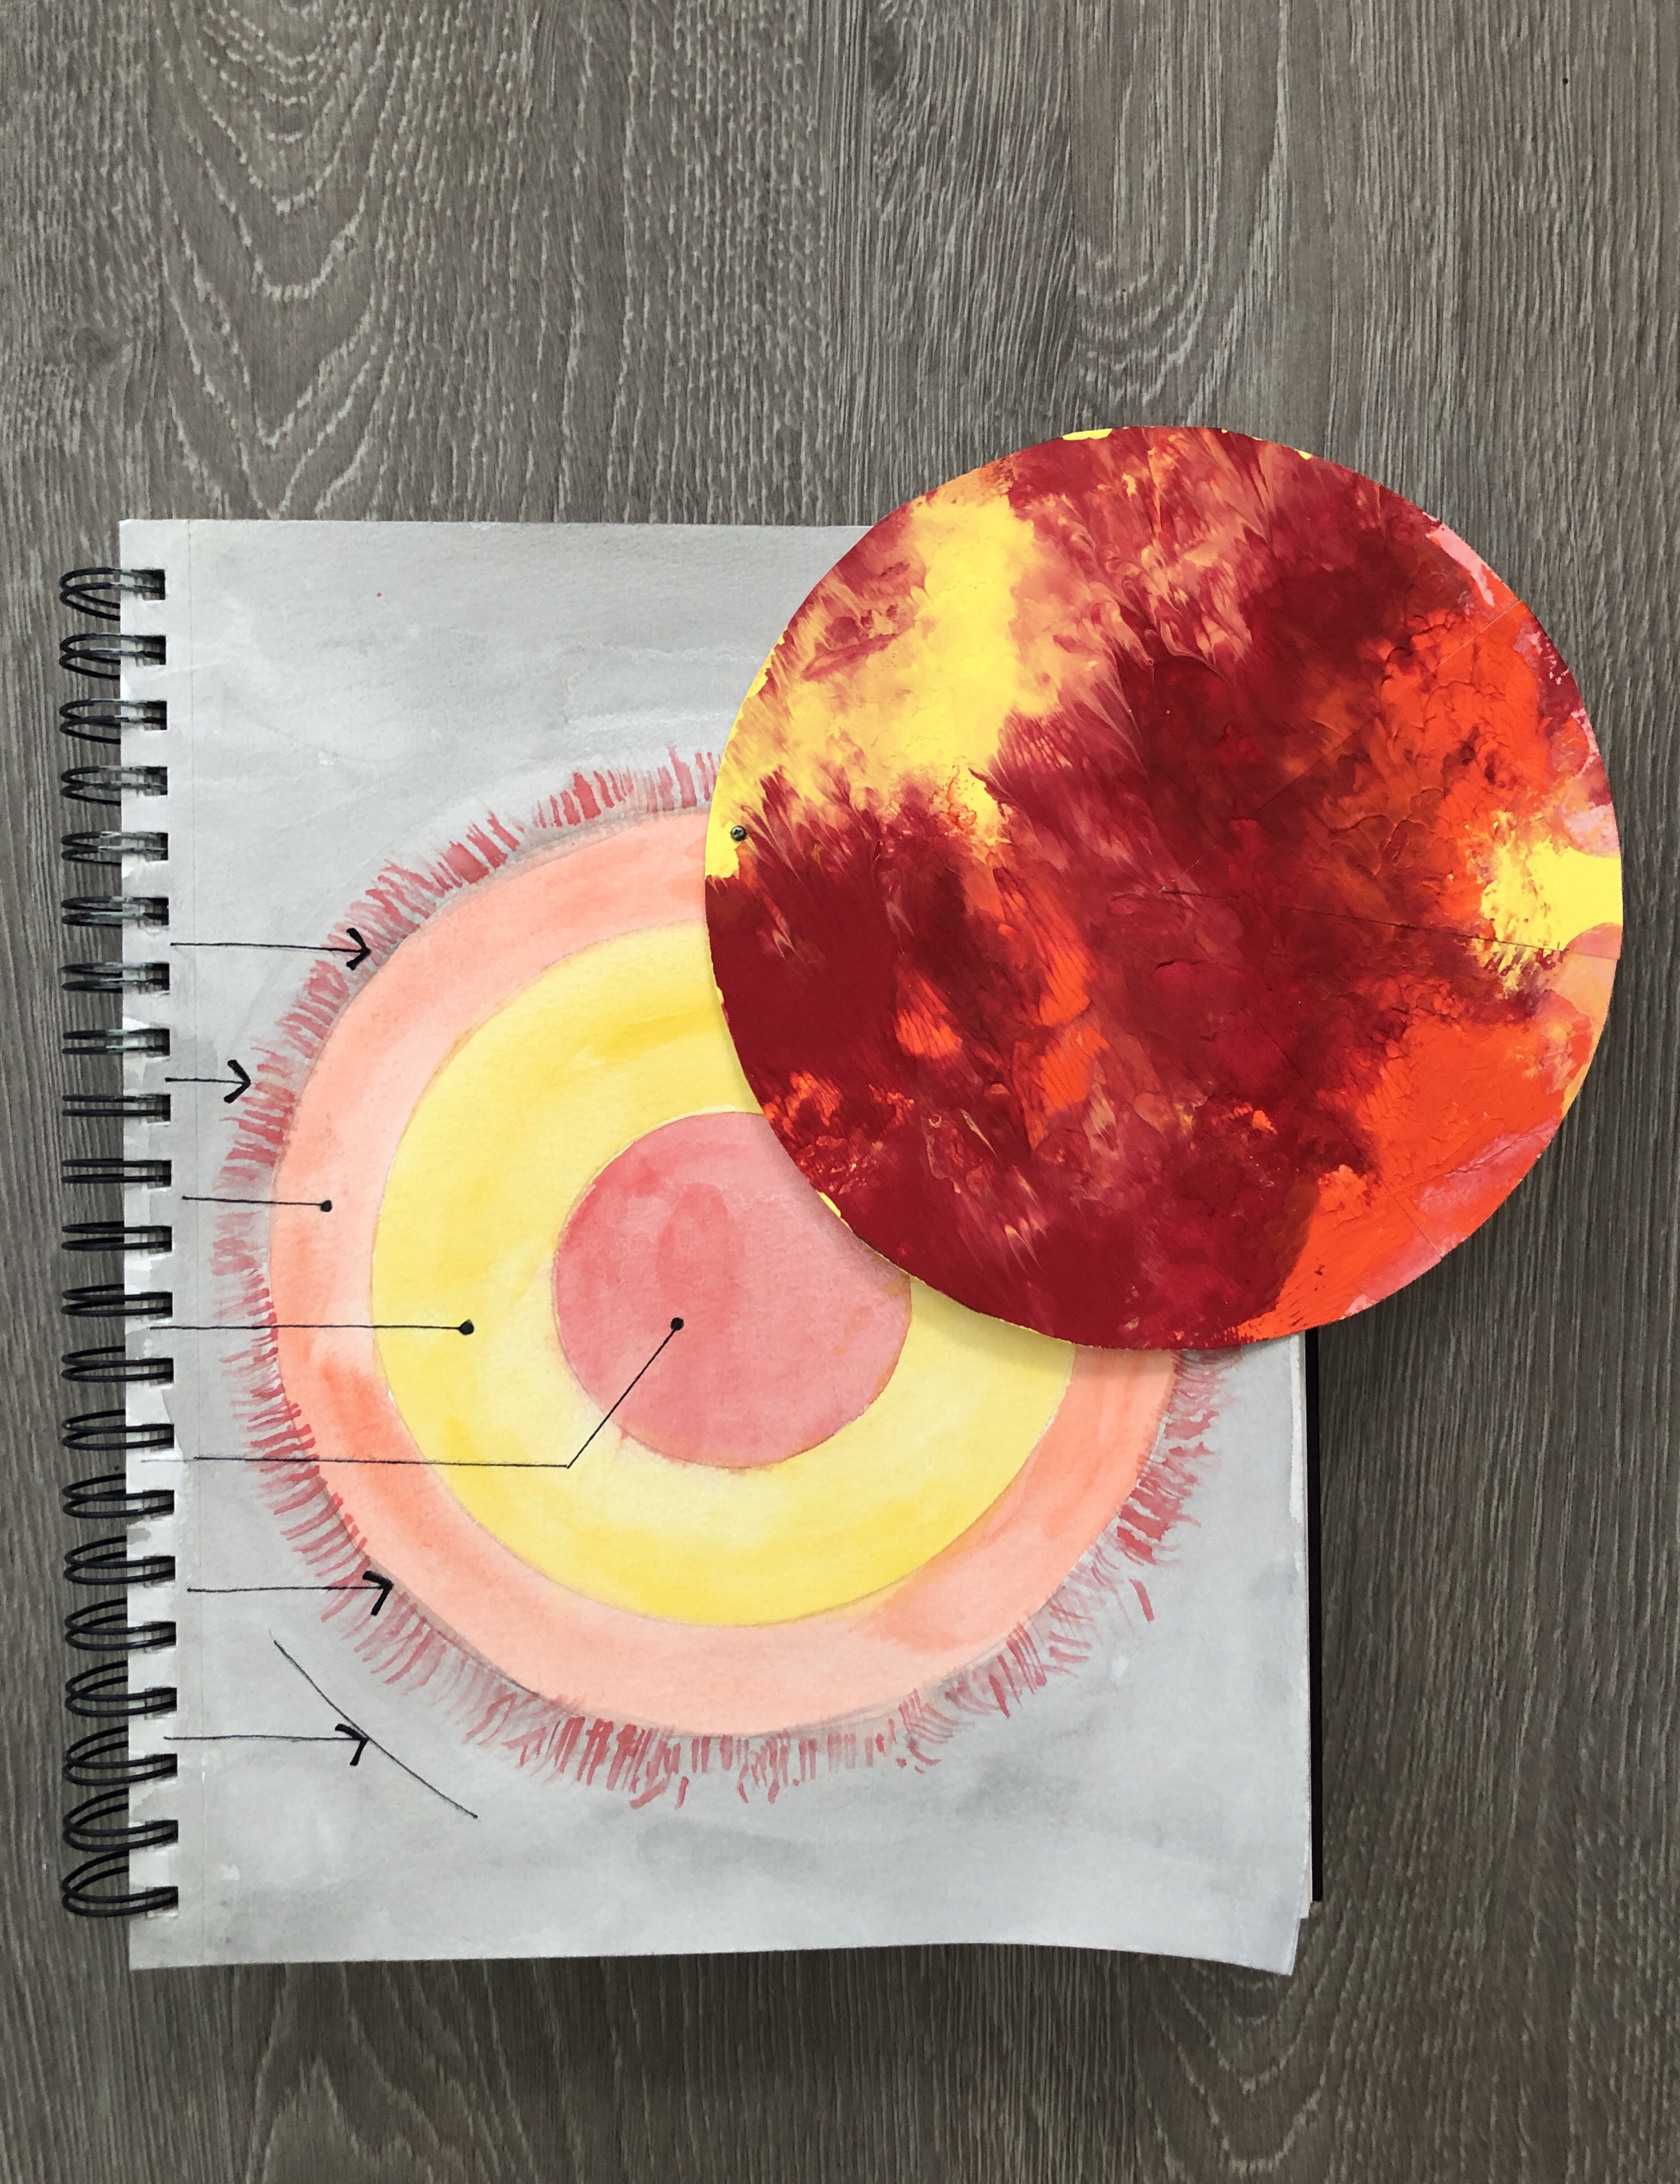
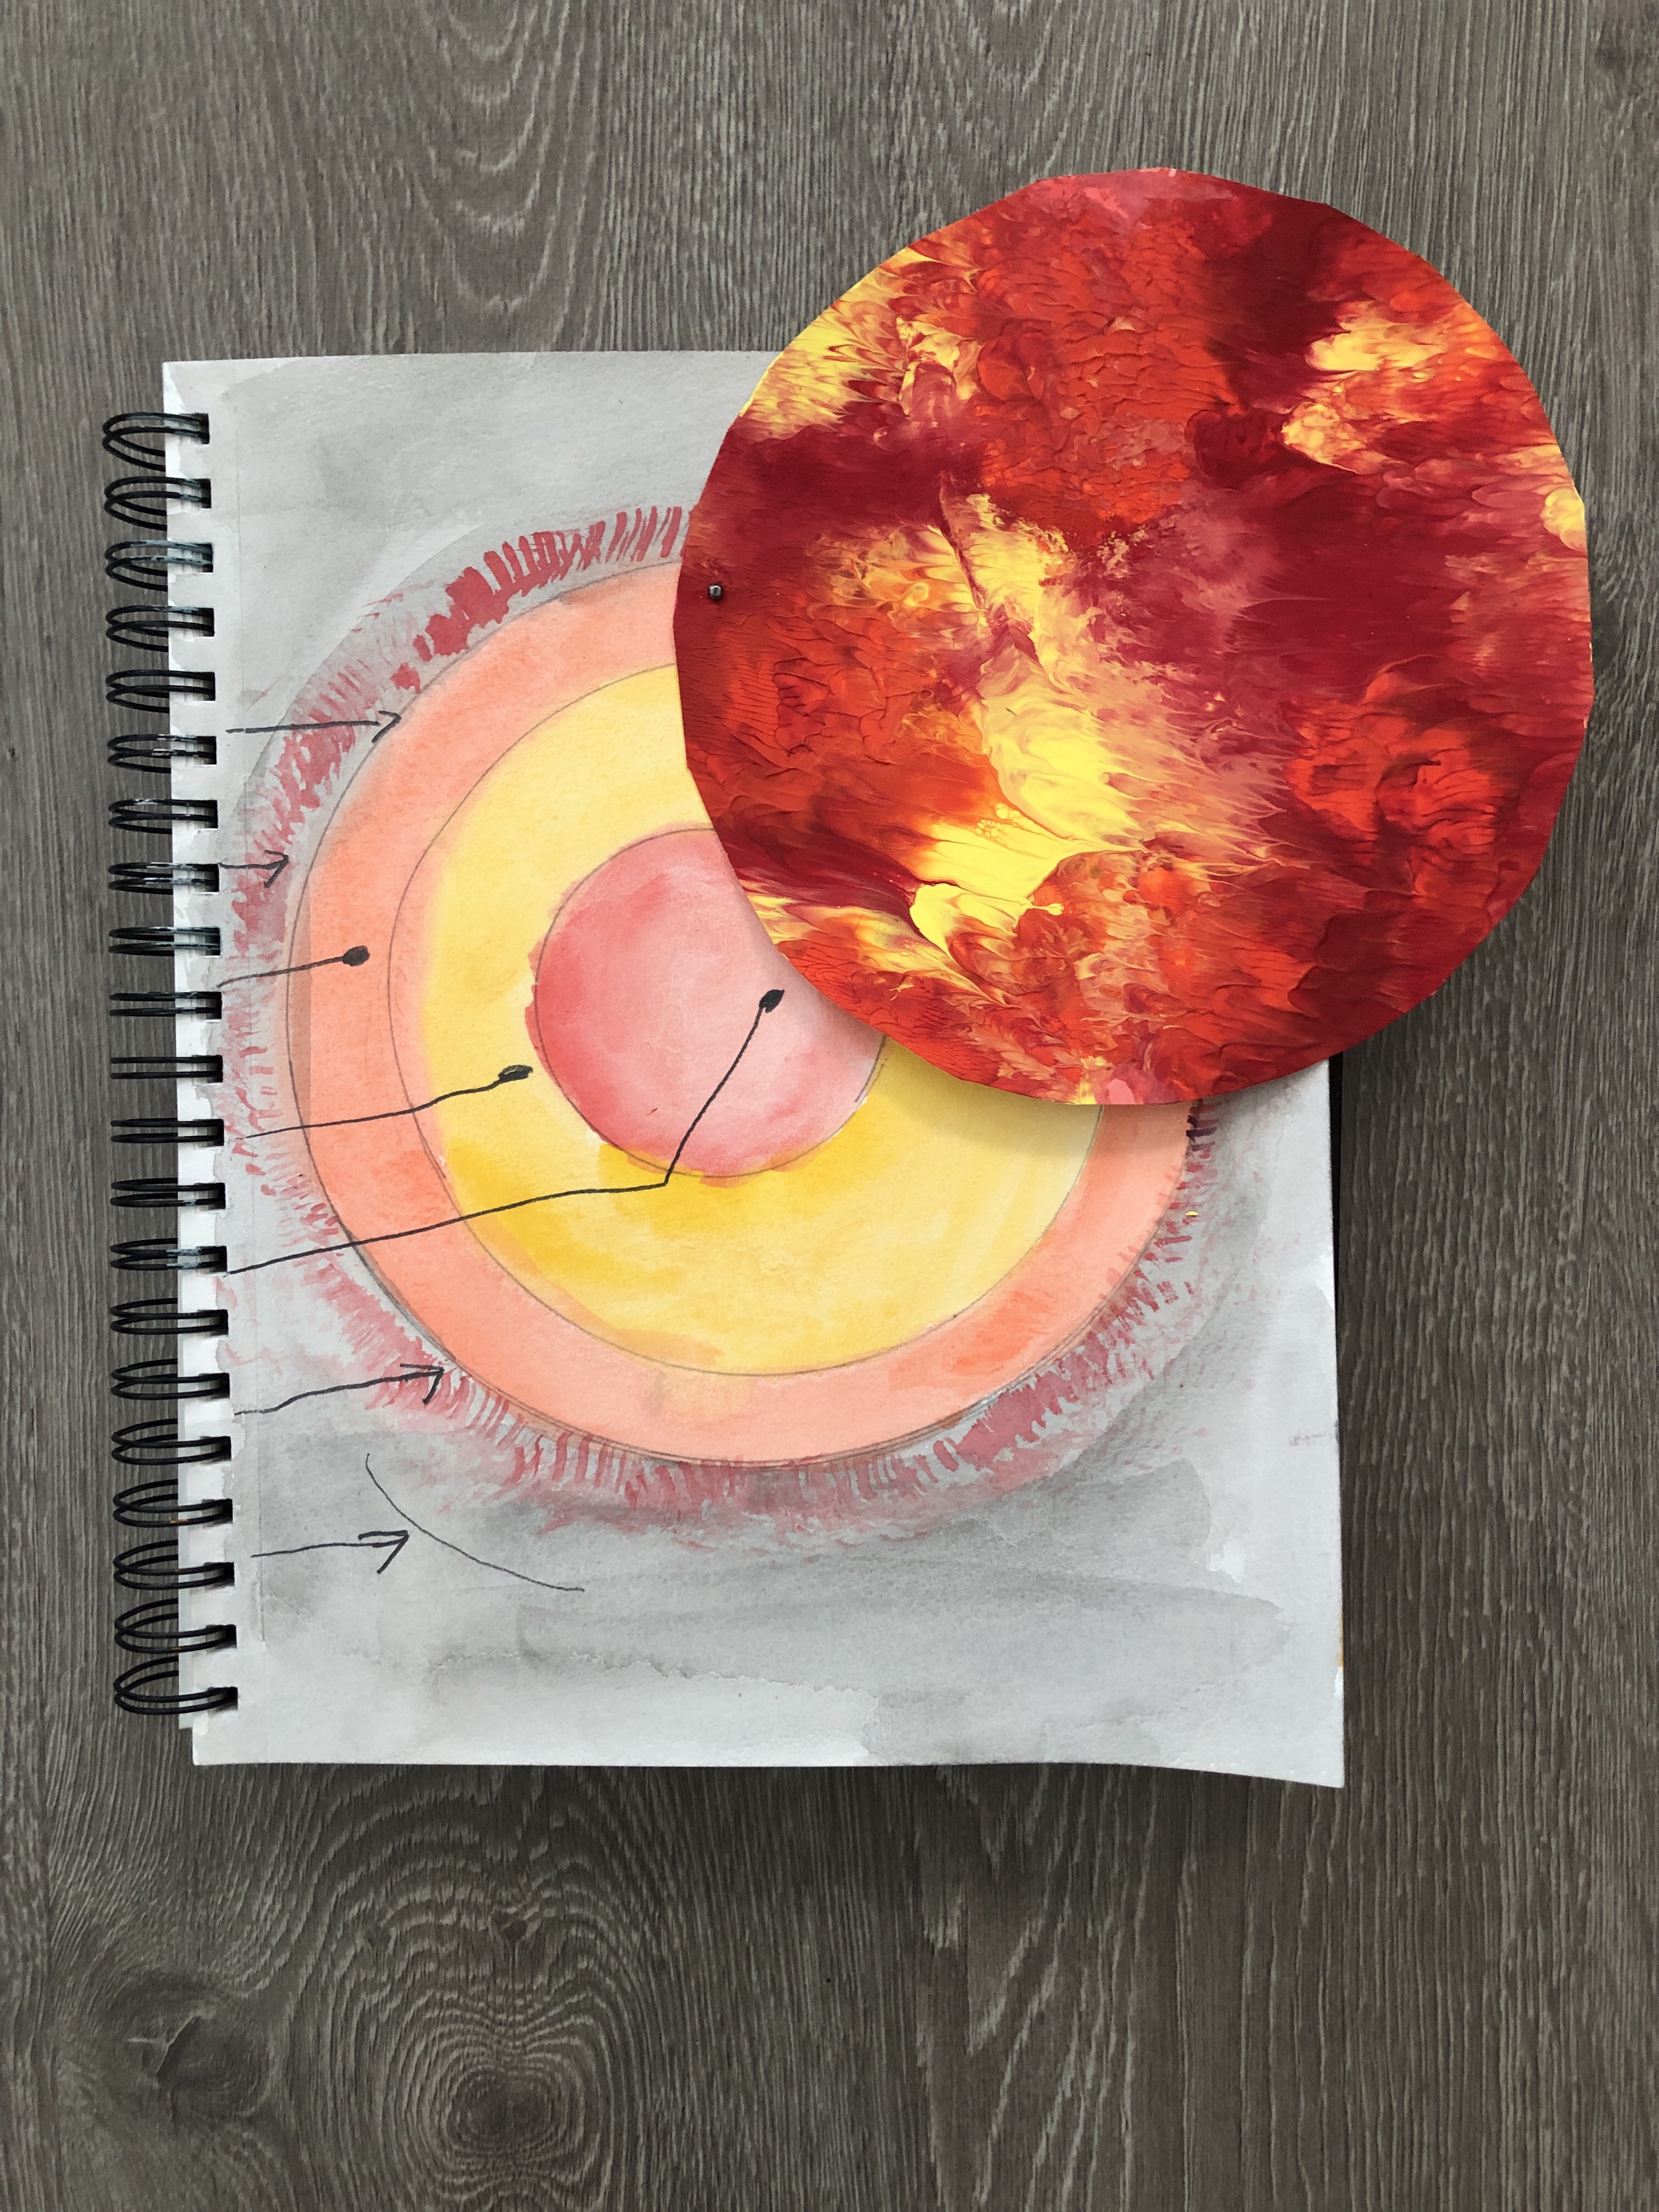
- attach photosphere on top of sun layers with a brad
![](https://studiodn2.com/wp-content/uploads/2019/10/img_3876-scaled-2560-e1572673742827.jpg)
![](https://studiodn2.com/wp-content/uploads/2019/10/img_3873.jpg)
Step no.4
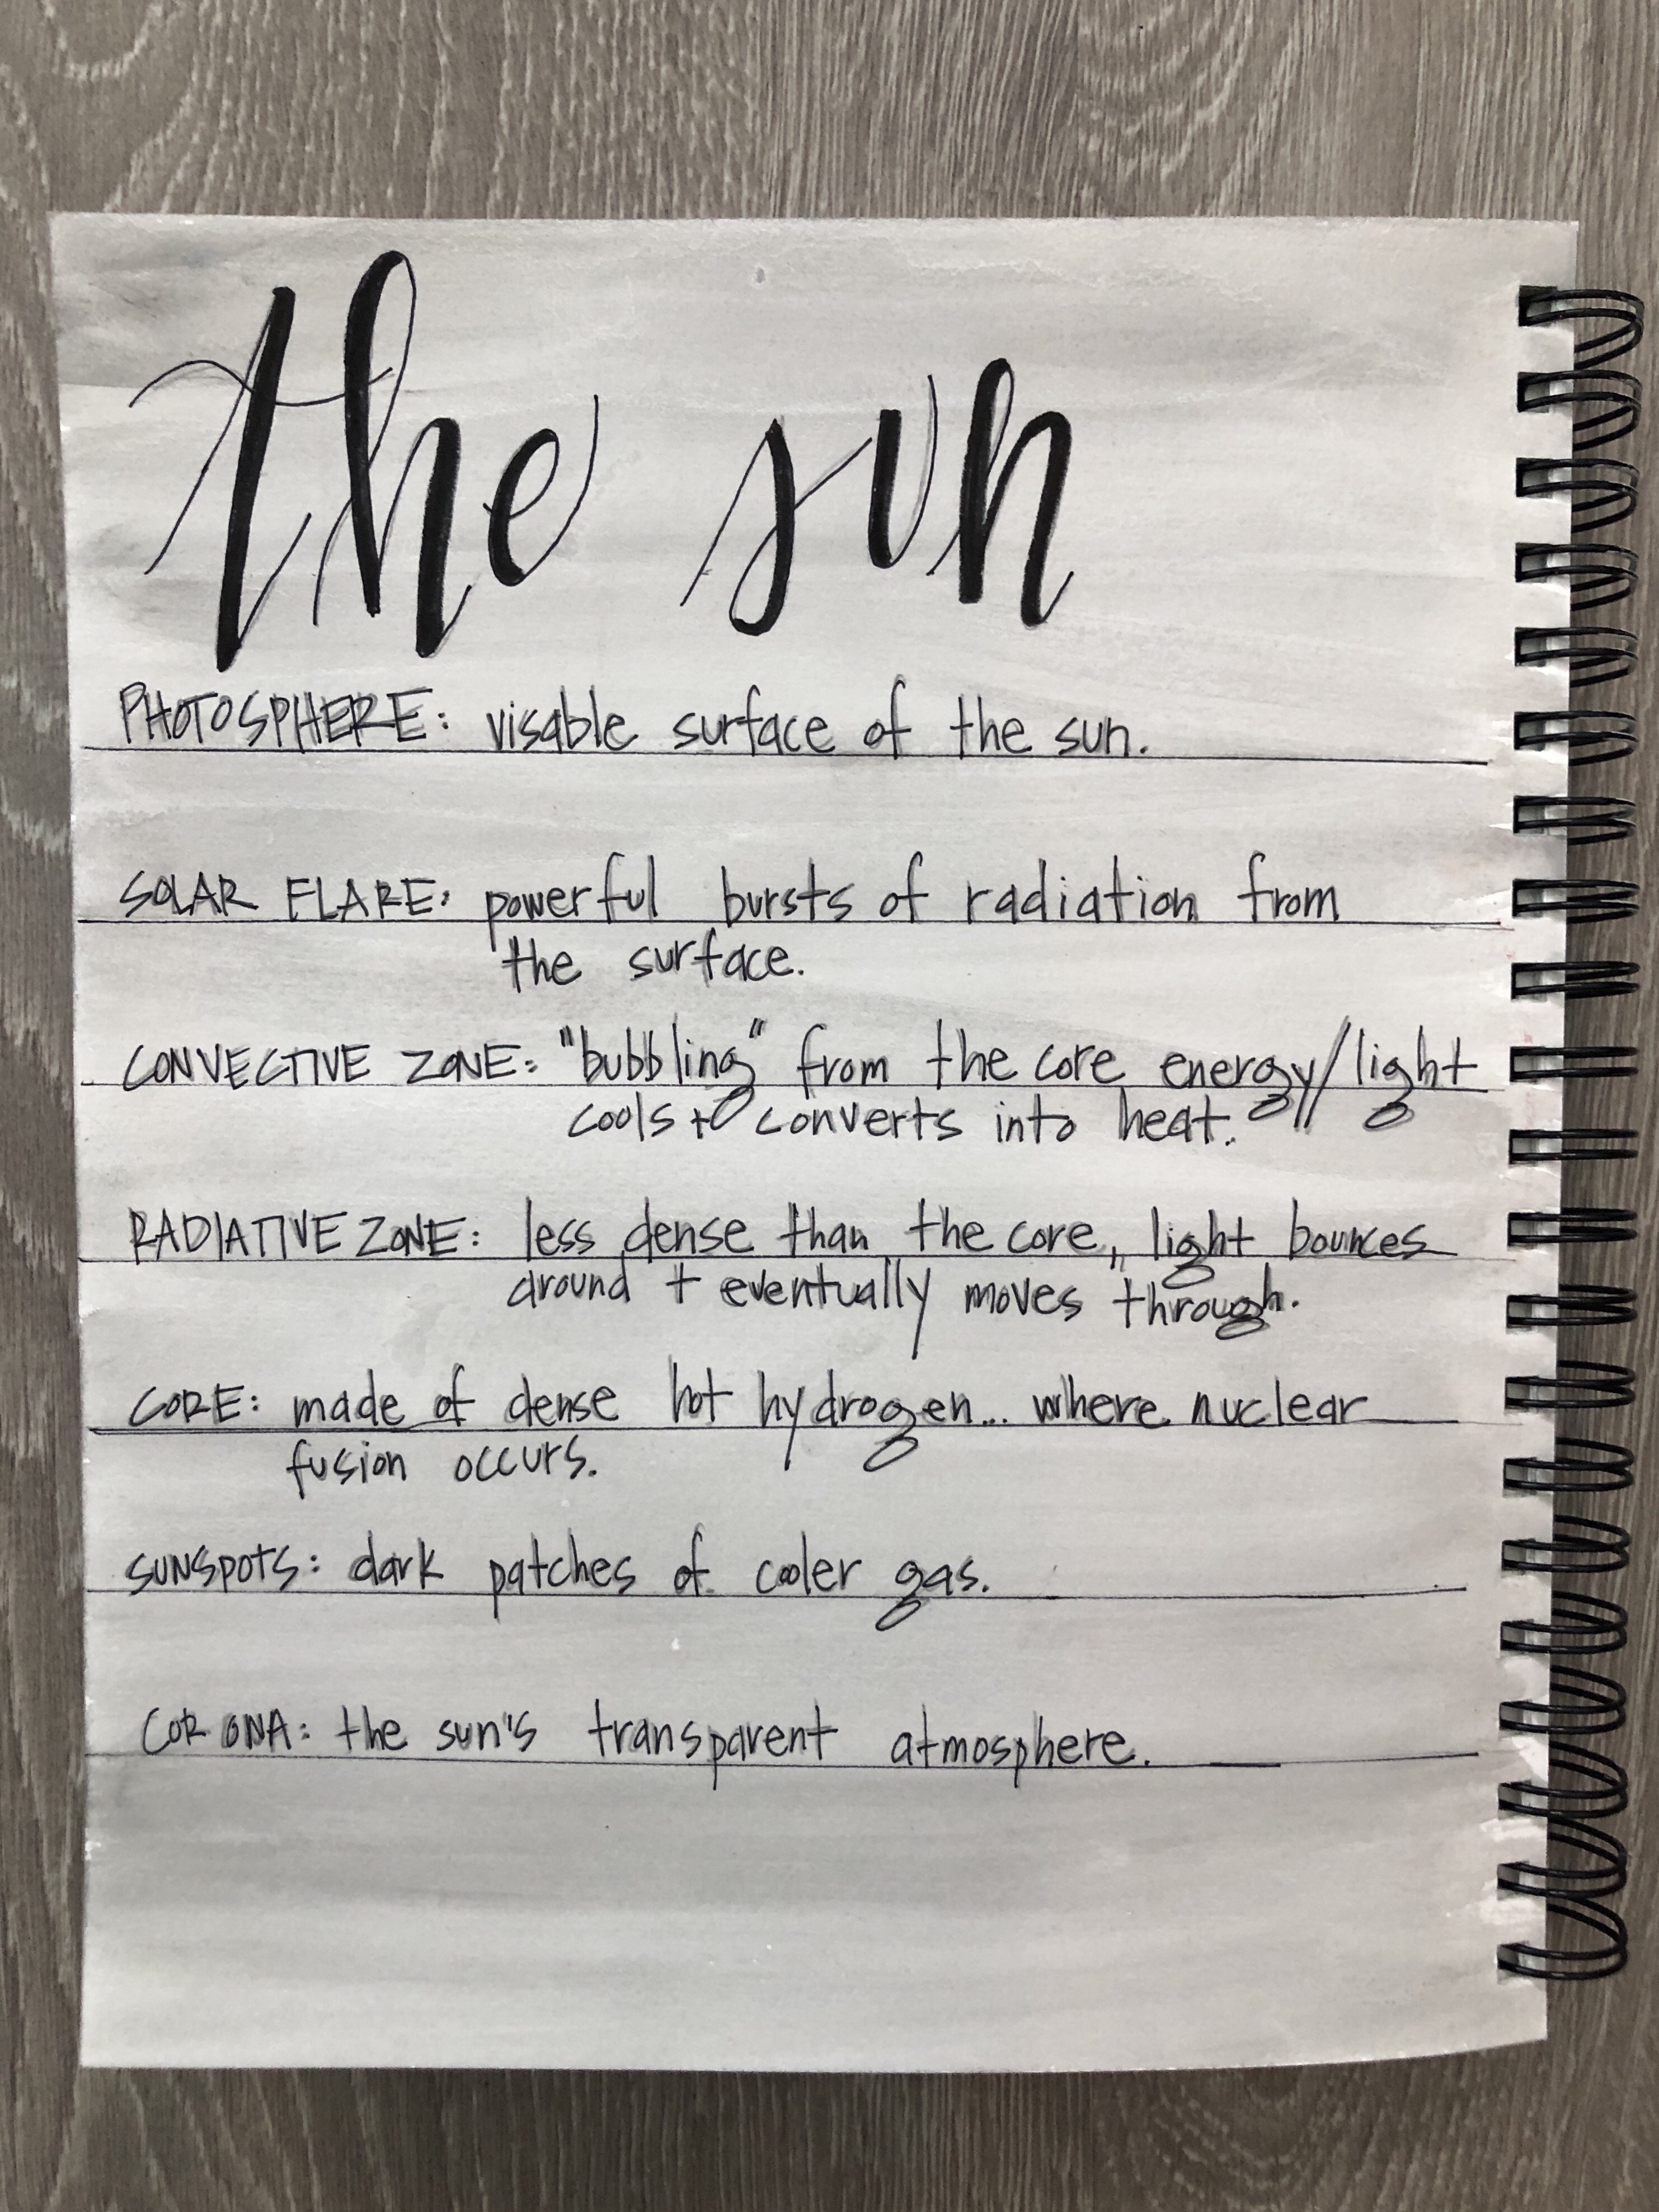
- label layers of the sun
![](https://studiodn2.com/wp-content/uploads/2019/10/img_3871.jpg)
![](https://studiodn2.com/wp-content/uploads/2019/10/img_3885.jpg)