Renaissance Artists
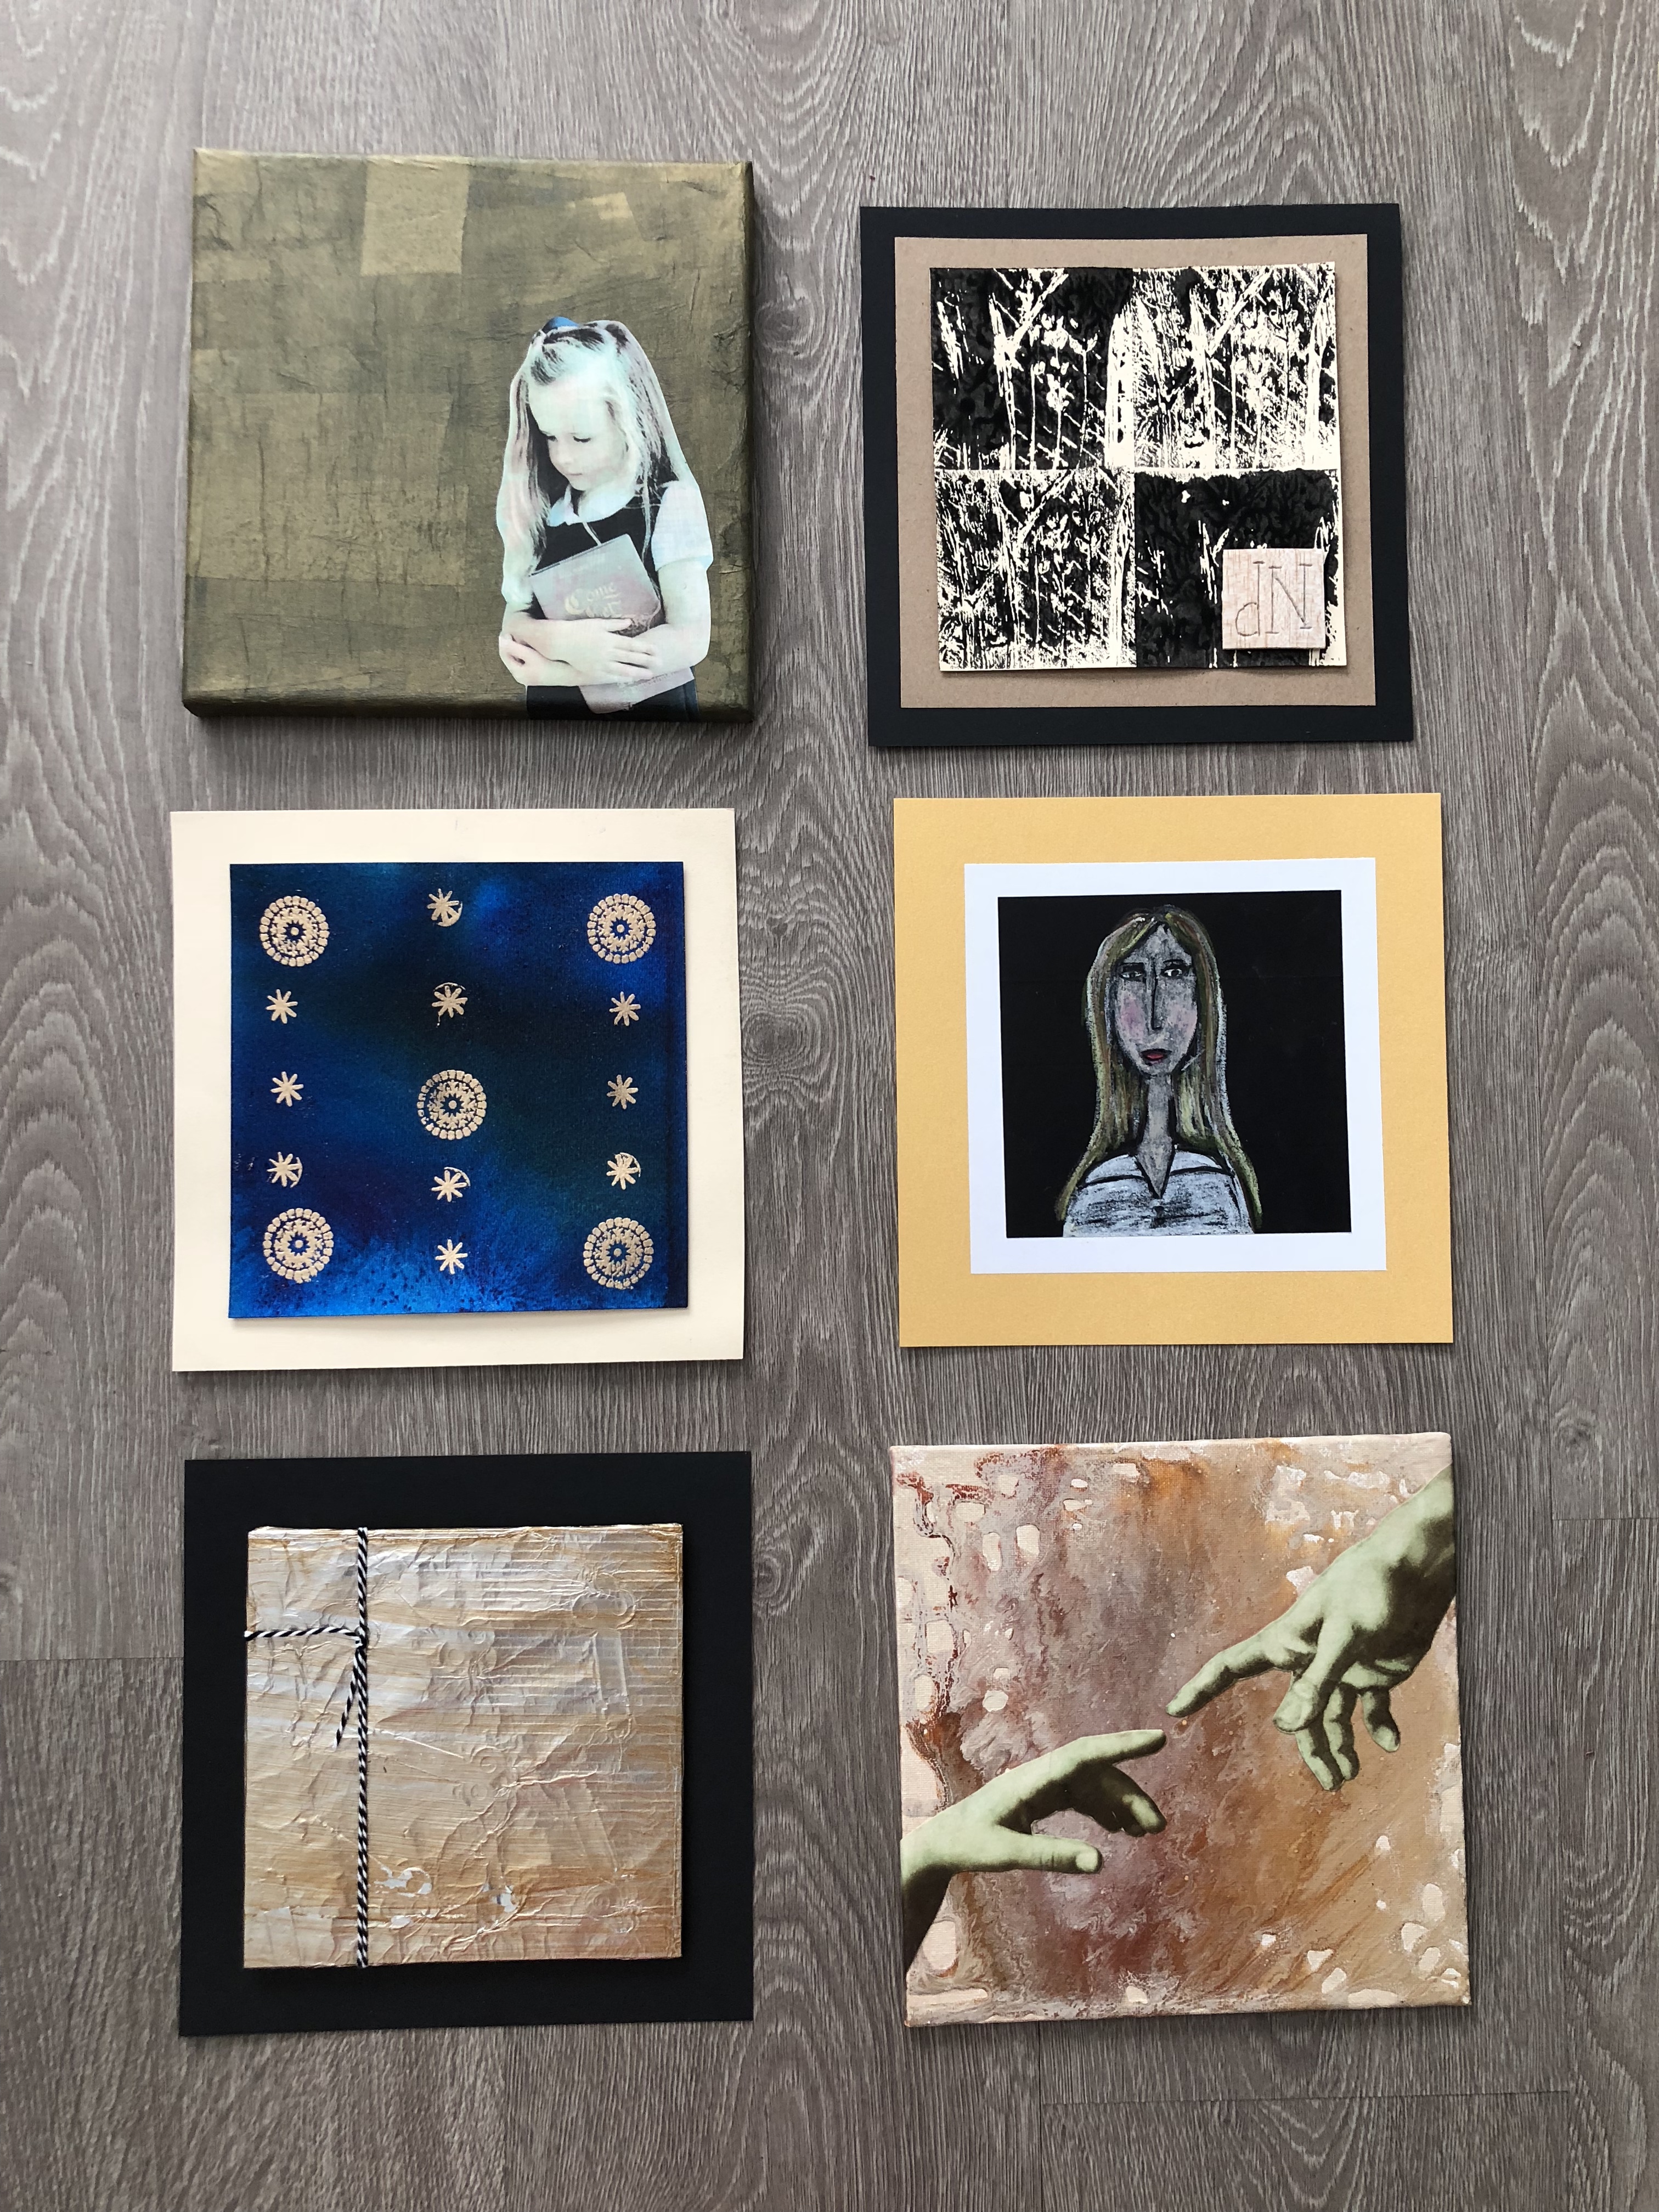
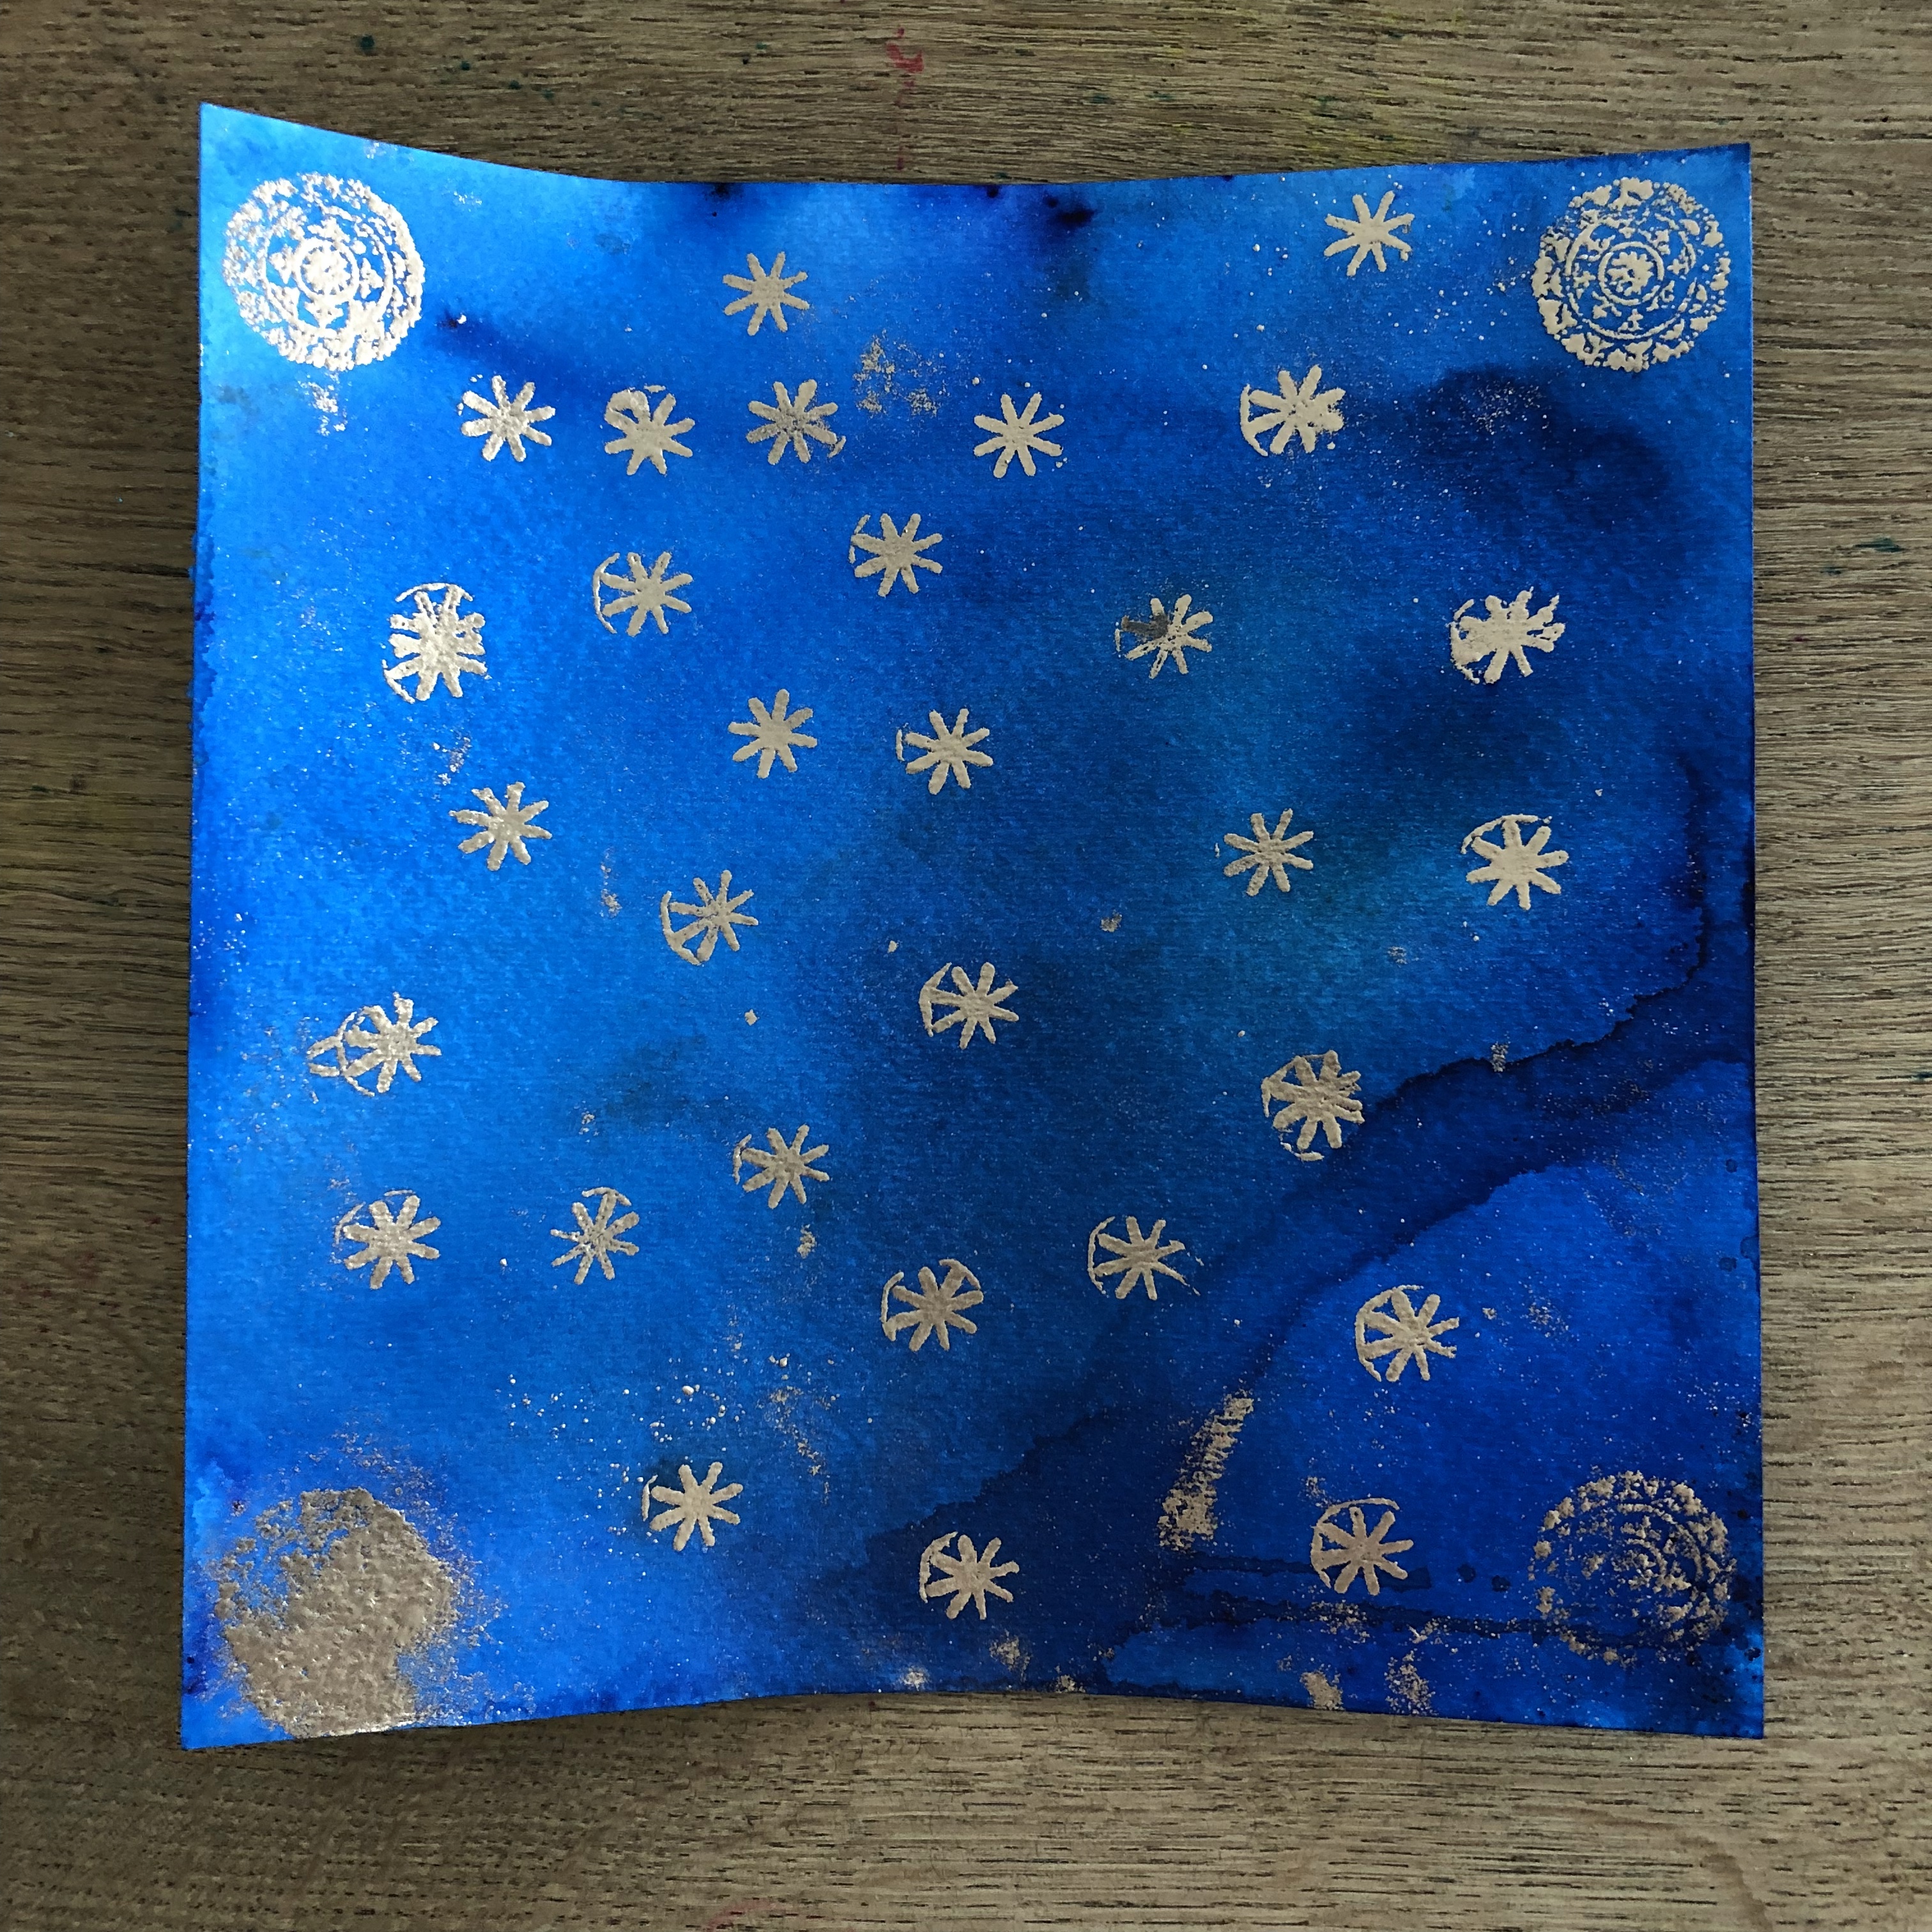
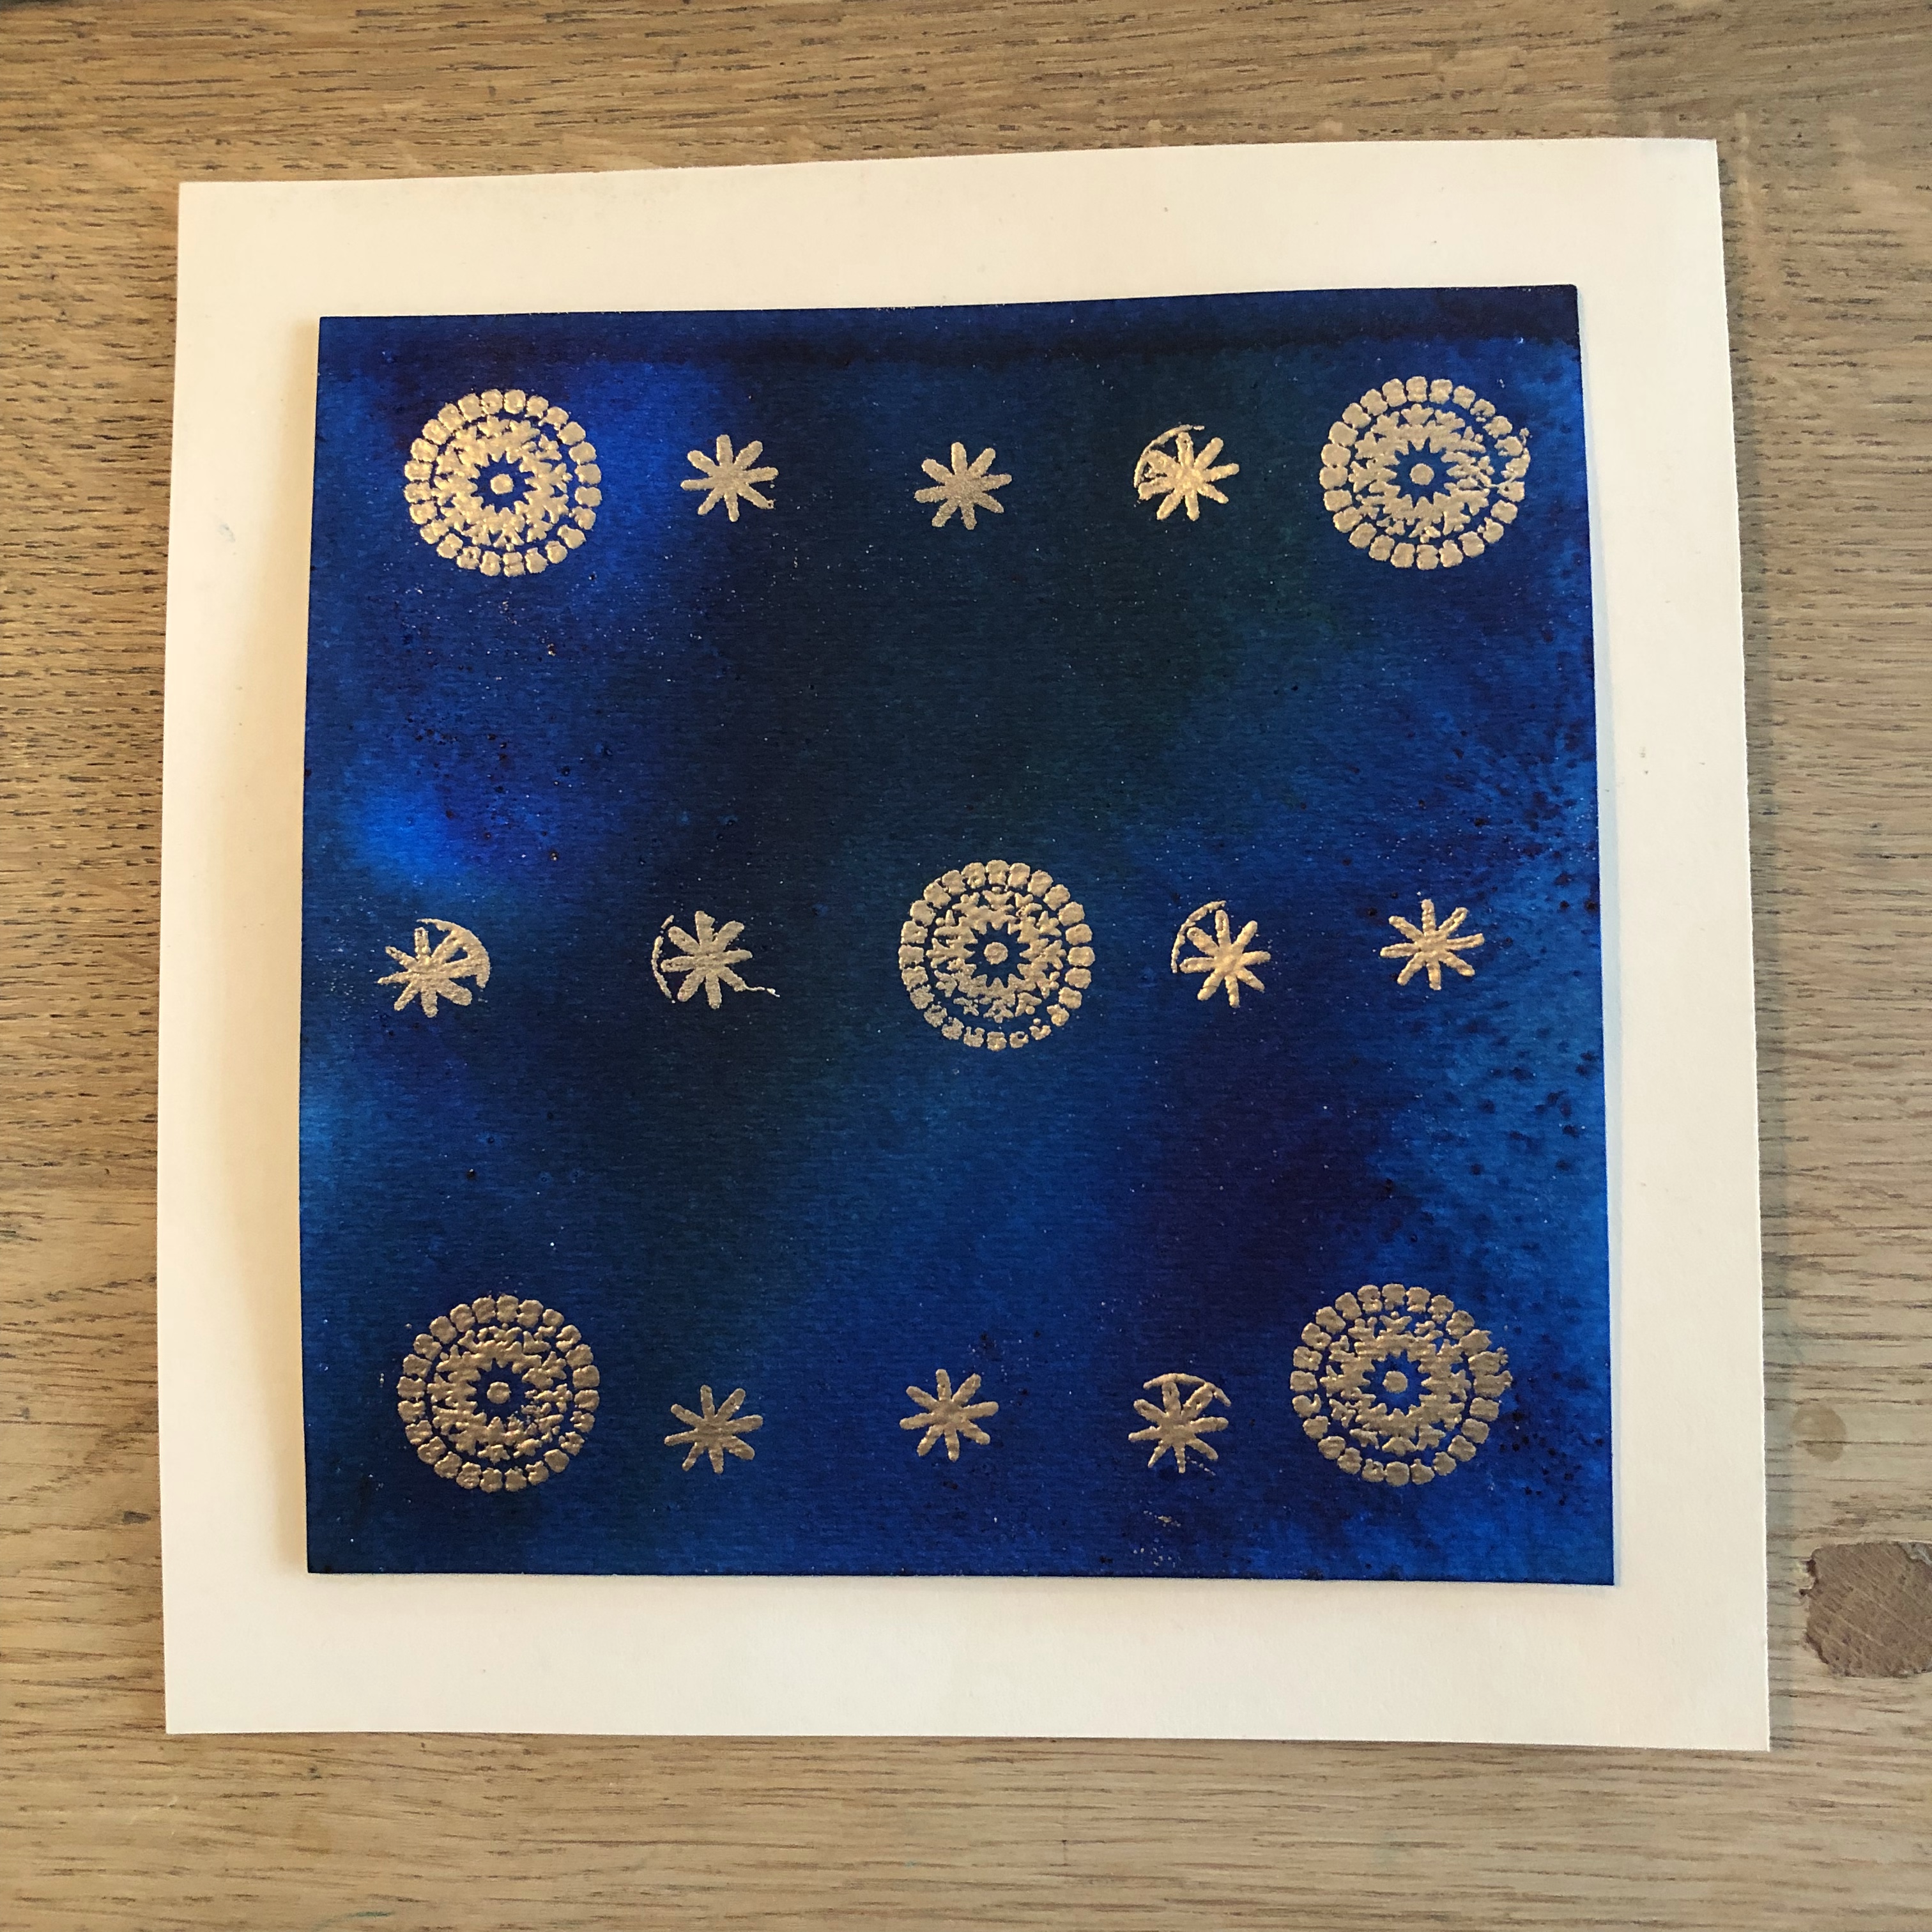
NO. 1 GIOTTO c1270-1337


THE PROJECT + THE ARTIST
- Inspired by Giotto’s Scrovegni Chapel ceiling in Padua, which is covered in 14th-century frescoes

MATERIALS
- cut 6 x 6 watercolor paper 140 pounds cold press
- Brusho Watercolor crystals: turquoise, cobalt, grey [a little goes a long way]
- Spray bottles
- Star Stamps
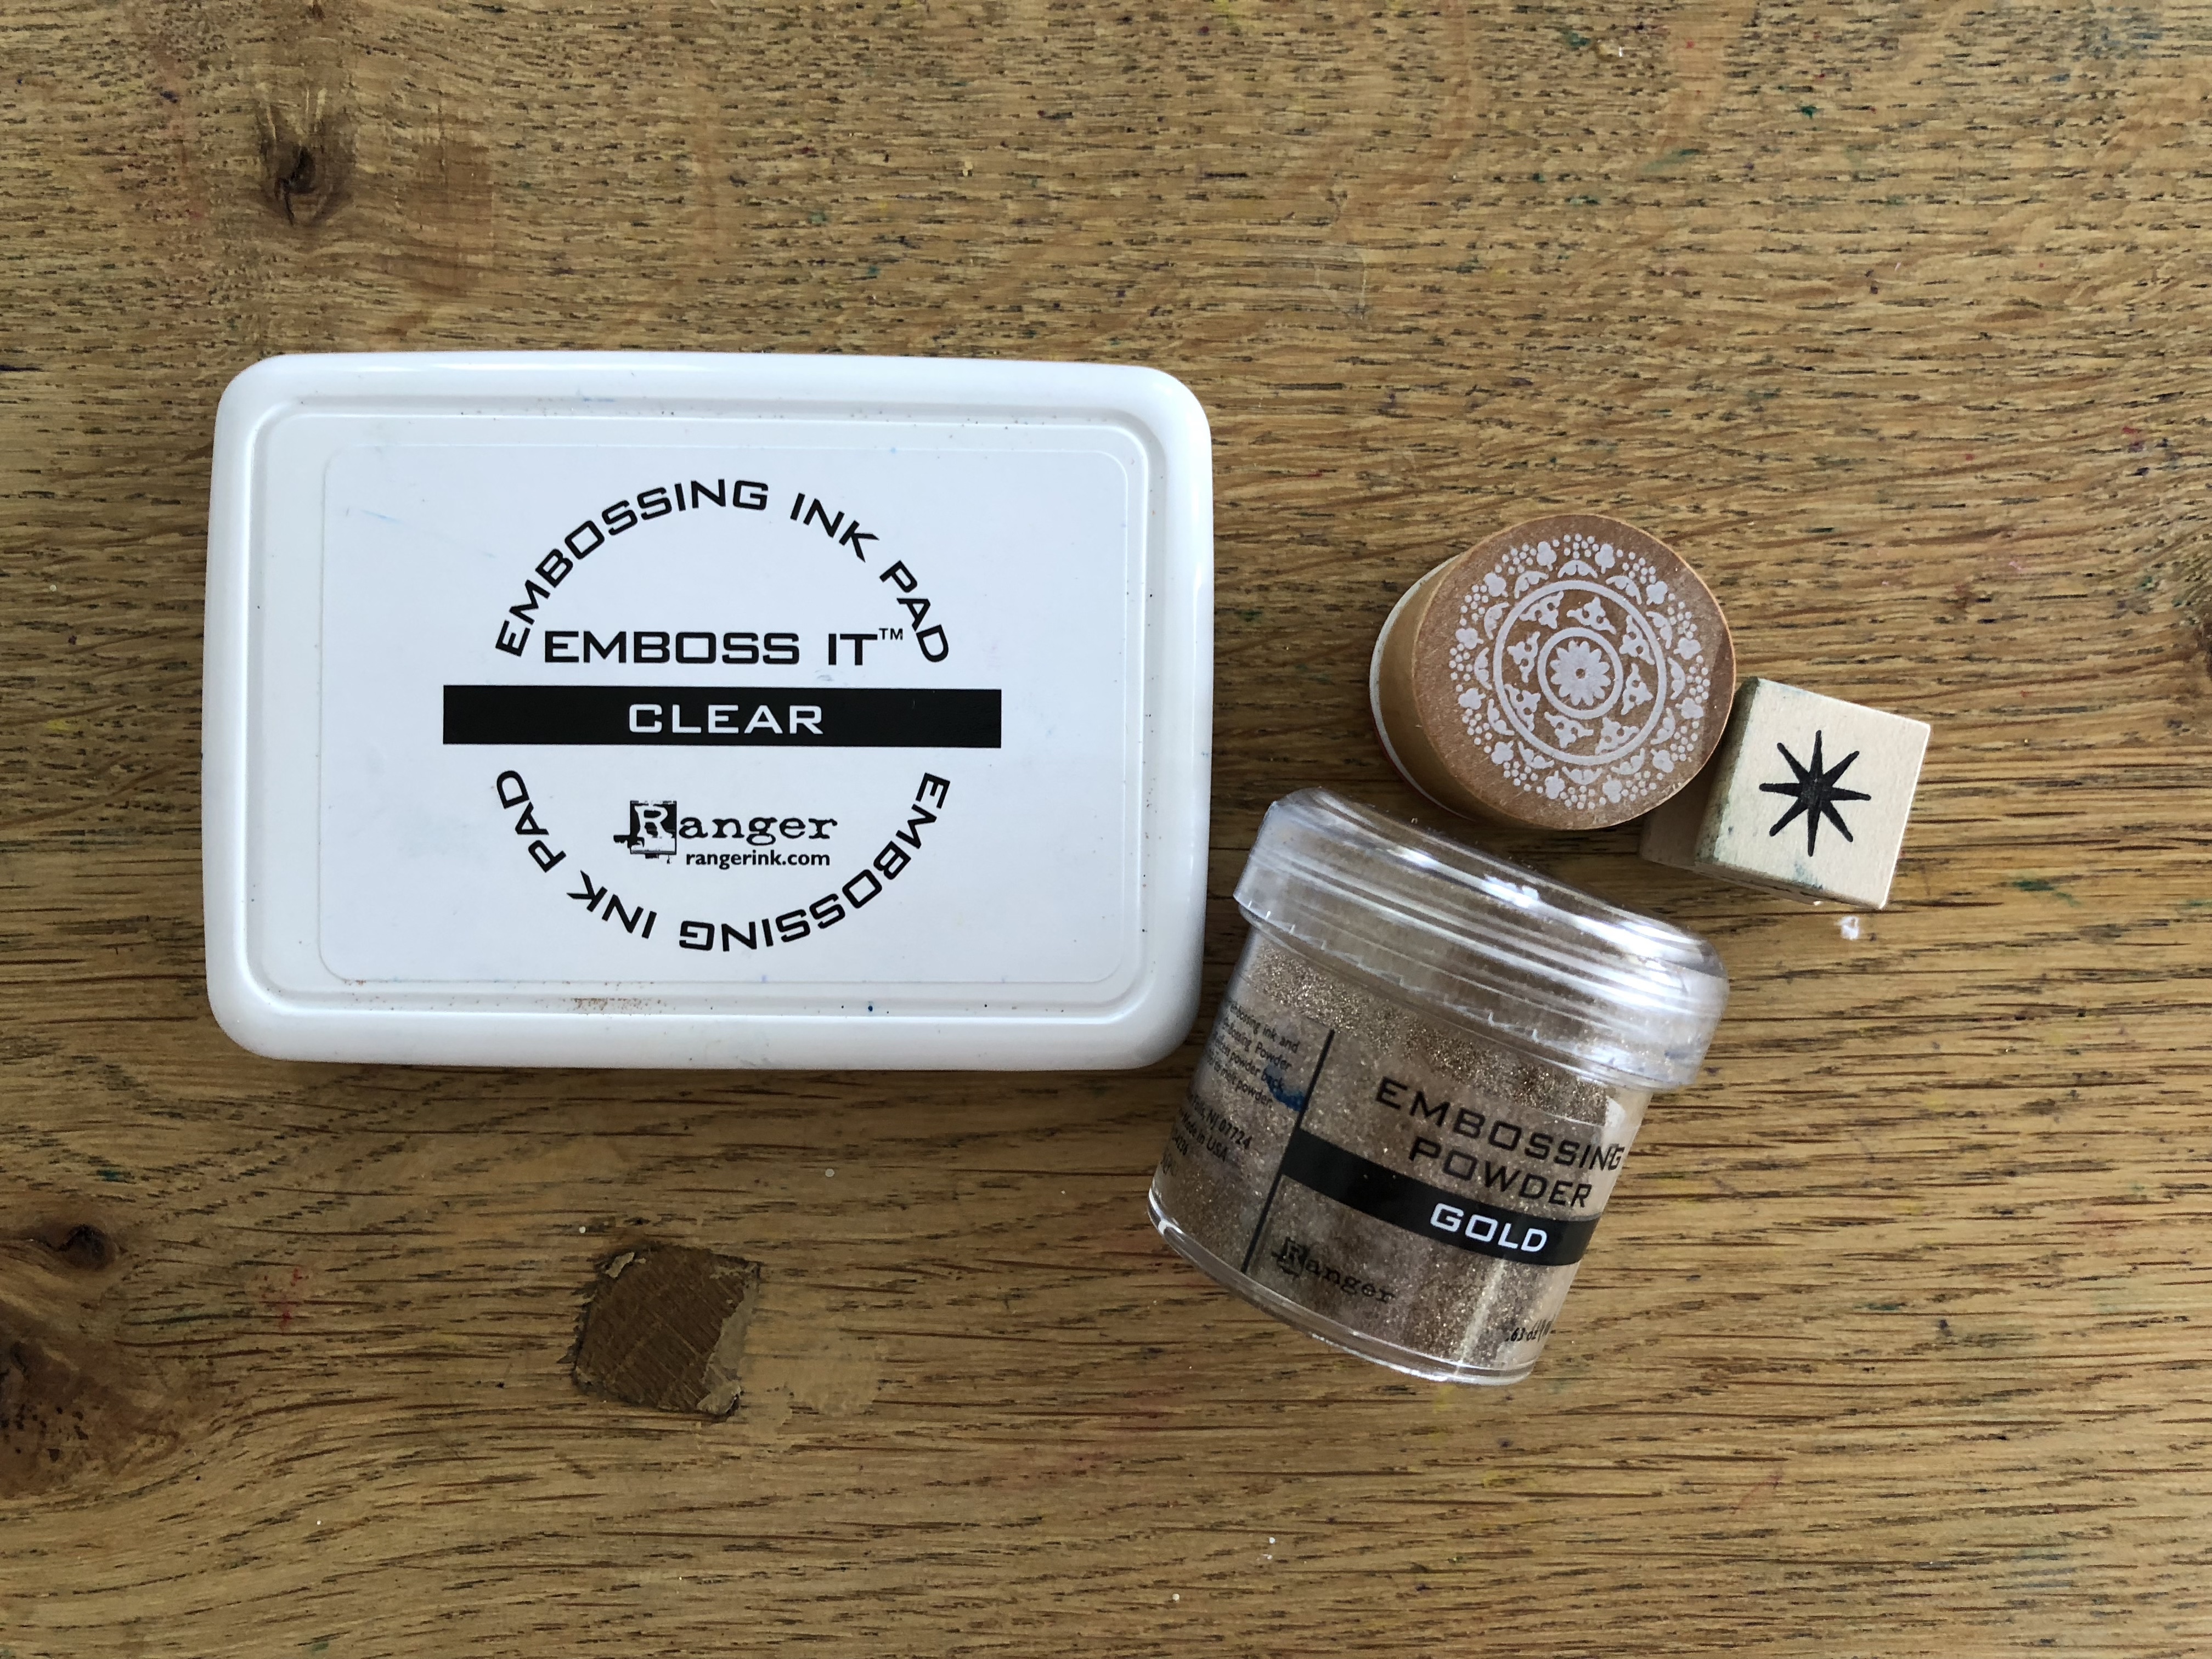
- Medalion Stamps
- Gold embossing powder (a little goes a long way + be sure to reuse dusted off powder)
- Embossing ink
- Art Dryers
- 8 x 8 Ivory card stock for mounting
- 3M foam tape
- Spice shakers for crystals [tape off all holes, but 1 or 2 to prevent over shaking]
- Pencils for writing name
- paper towels
- paper plates

STEP NO.1
- see video for creating the blue background with watercolor crystals
- Start by lightly misting watercolor paper, gently sprinkle turquoise crystals, followed by cobalt blue and a tiny bit of gray. Continue to spray and sprinkle until Page is completely covered.
VIDEO FOR APPLYING WATERCOLOR CRYSTALS
STEP NO.2
- Set up another station for drying + dry projects with an art dryer
STEP NO.3
- Set up another station for stamping and embossing
- See video for stamping + embossing
VIDEO FOR EMBOSSING
[NOTE THIS VIDEO WAS MADE FOR DIFFERENT PROJECT, BUT THE PROCESS IS THE SAME]
STEP NO. 3
- Return to drying station to raise embossing
- Mount project to ivory card-stock with 3M foam tape
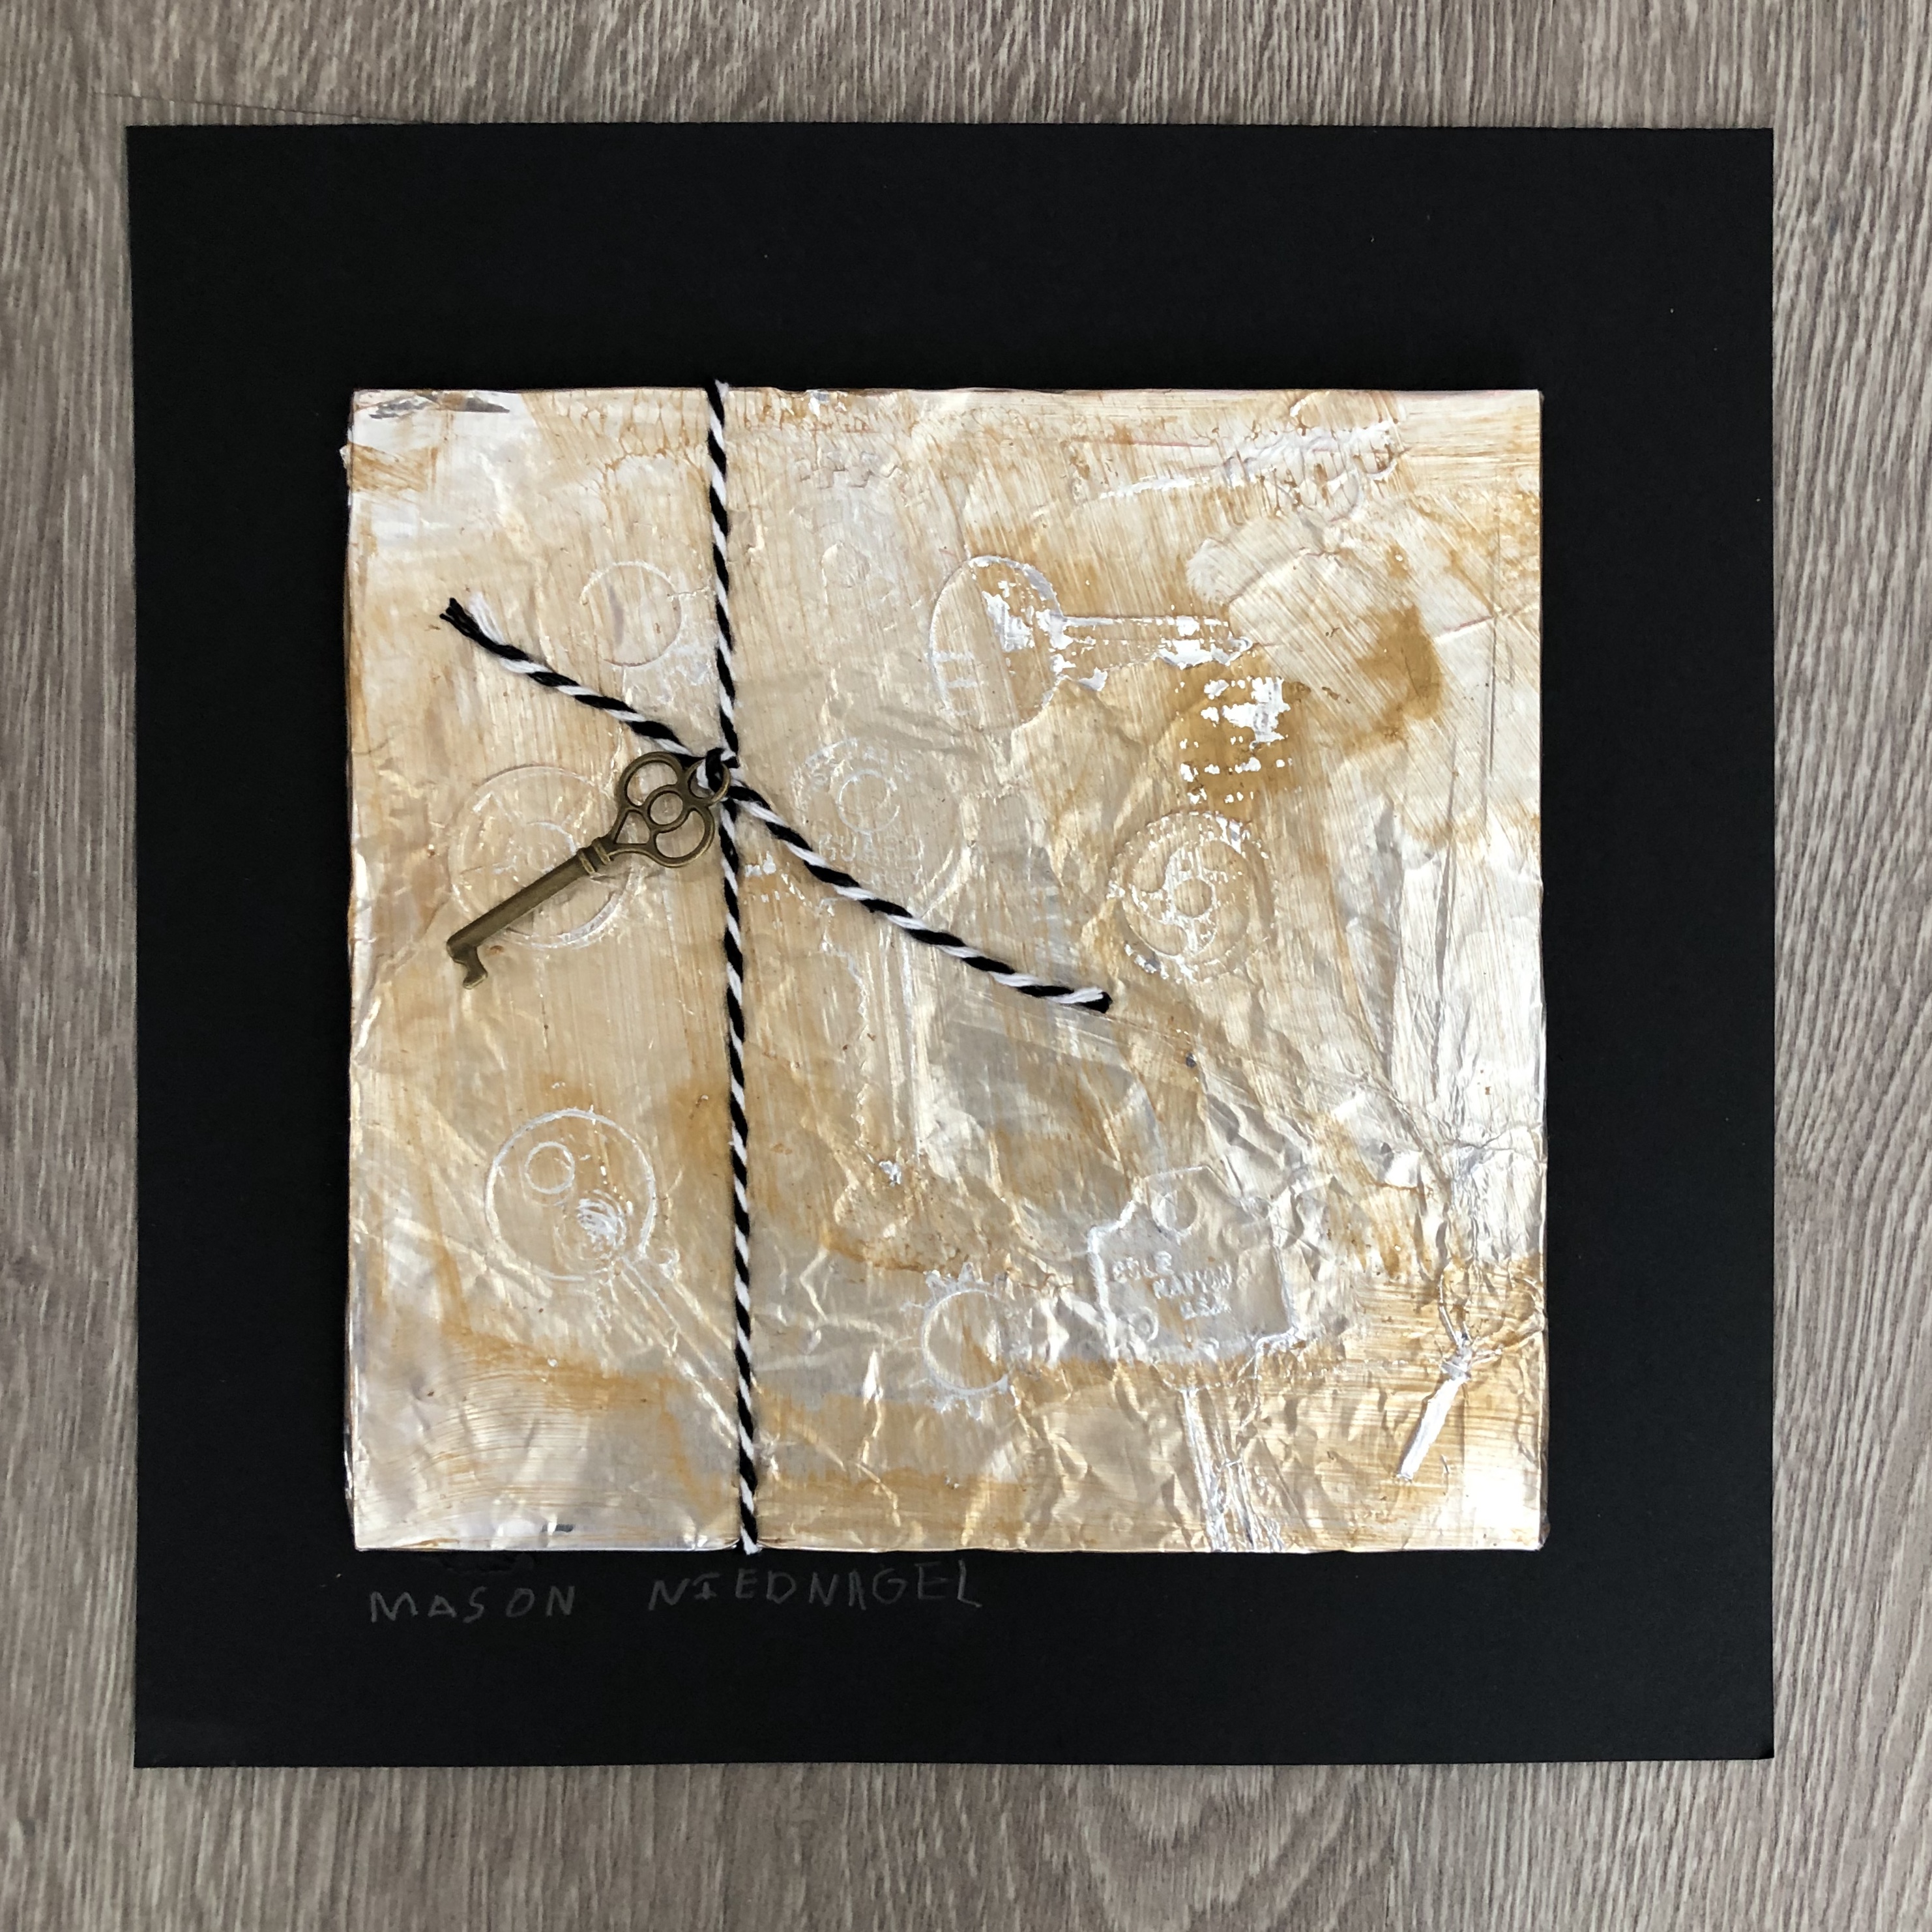
NO. 2 GHIBERTI 1378-1455
THE PROJECT + THE ARTIST
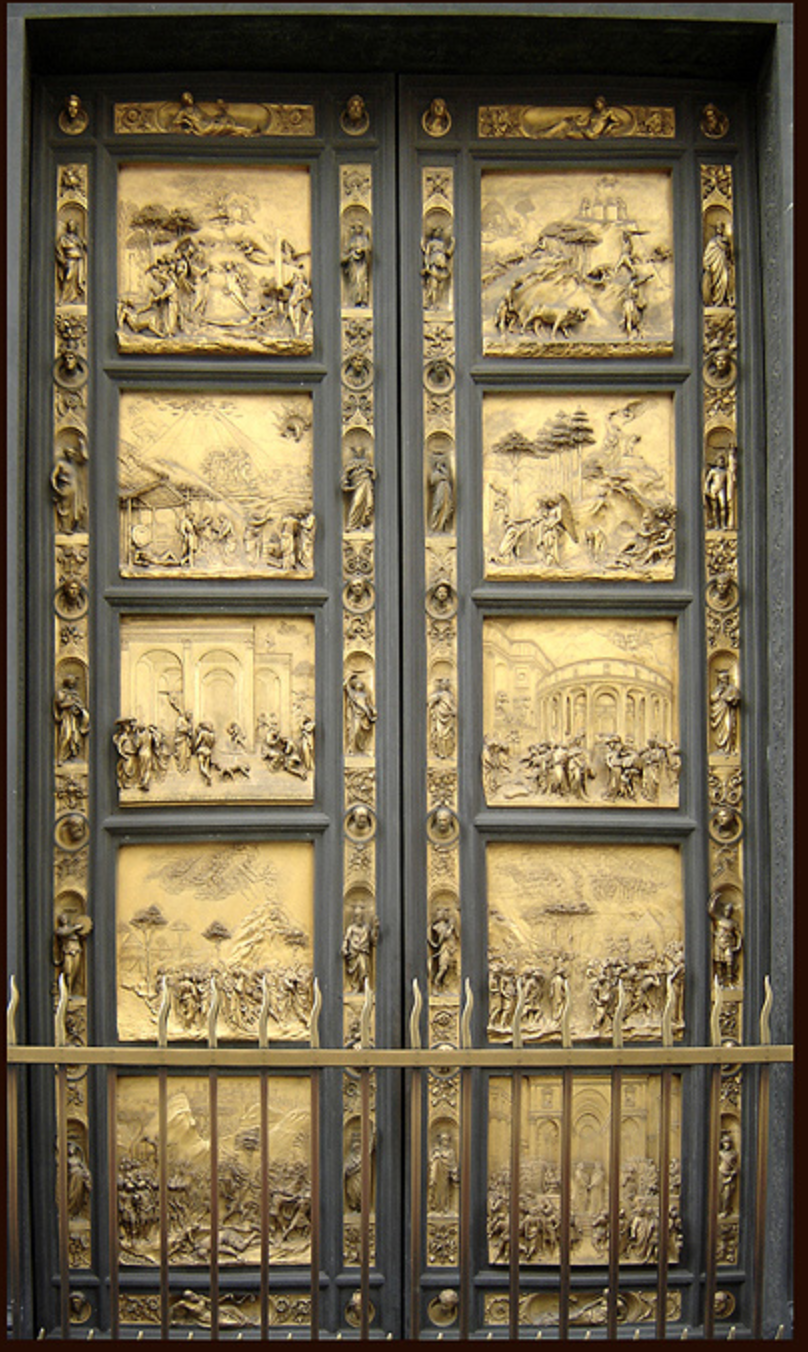
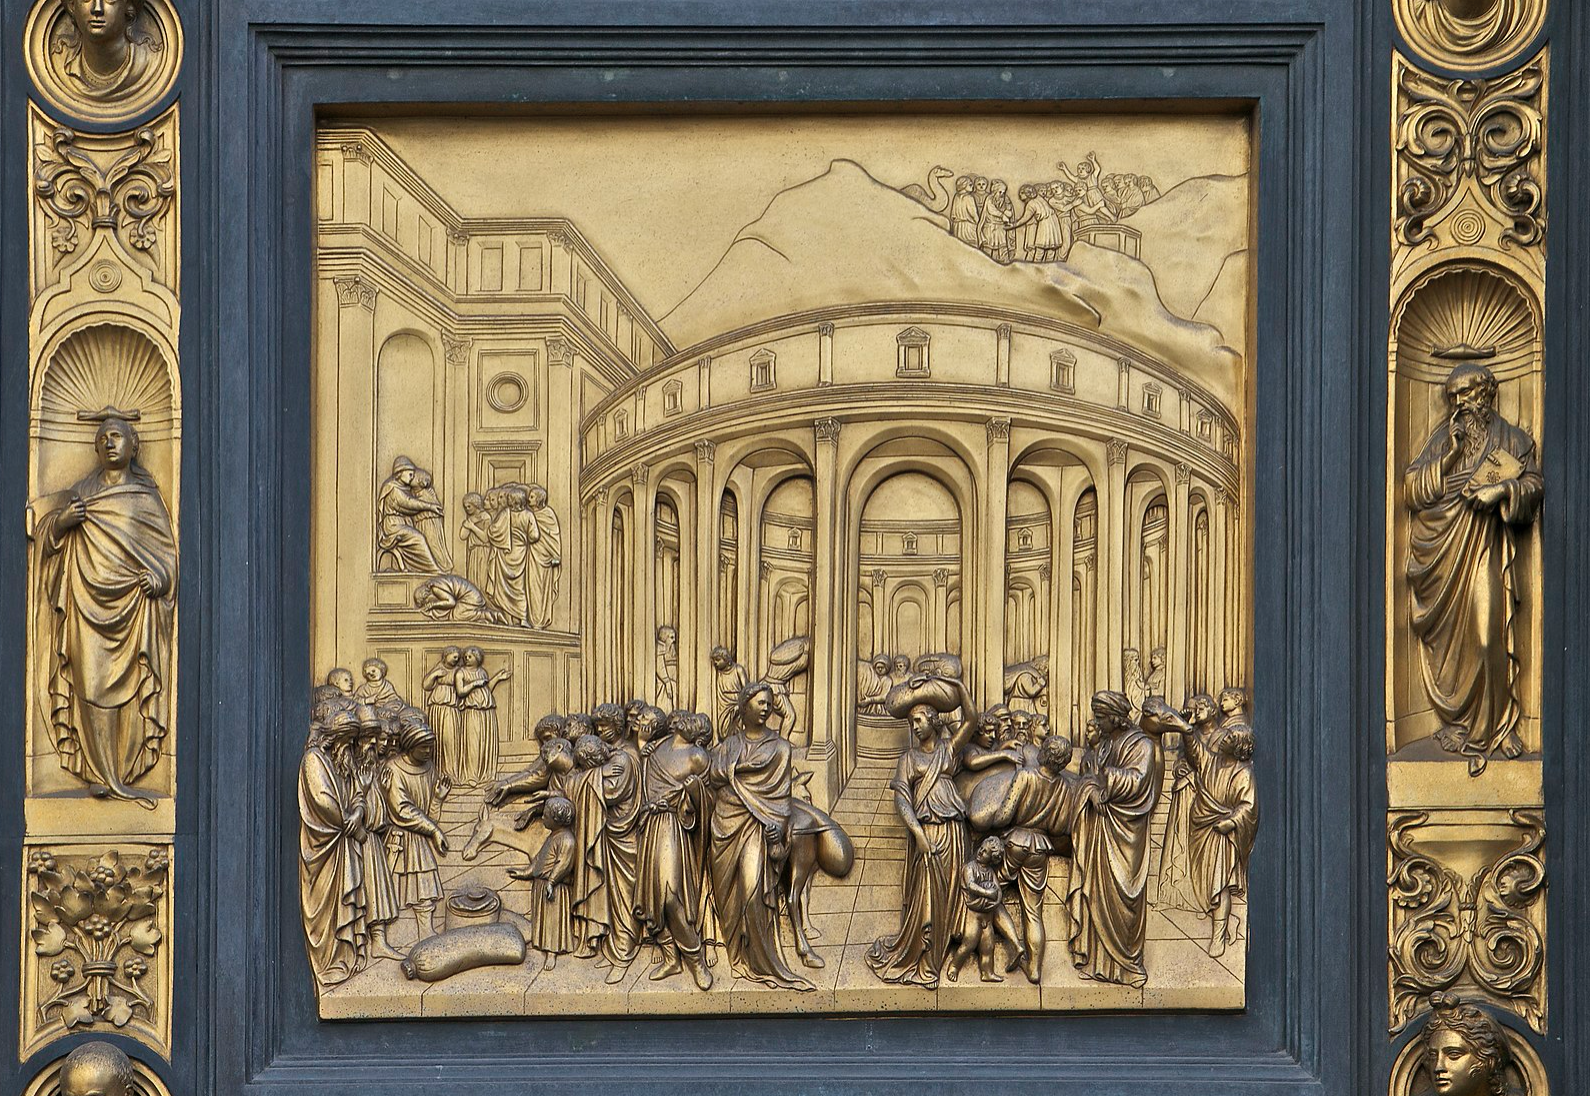
- Inspired by the relief panels on Ghiberti’s bronze doors on the Florence Baptistry
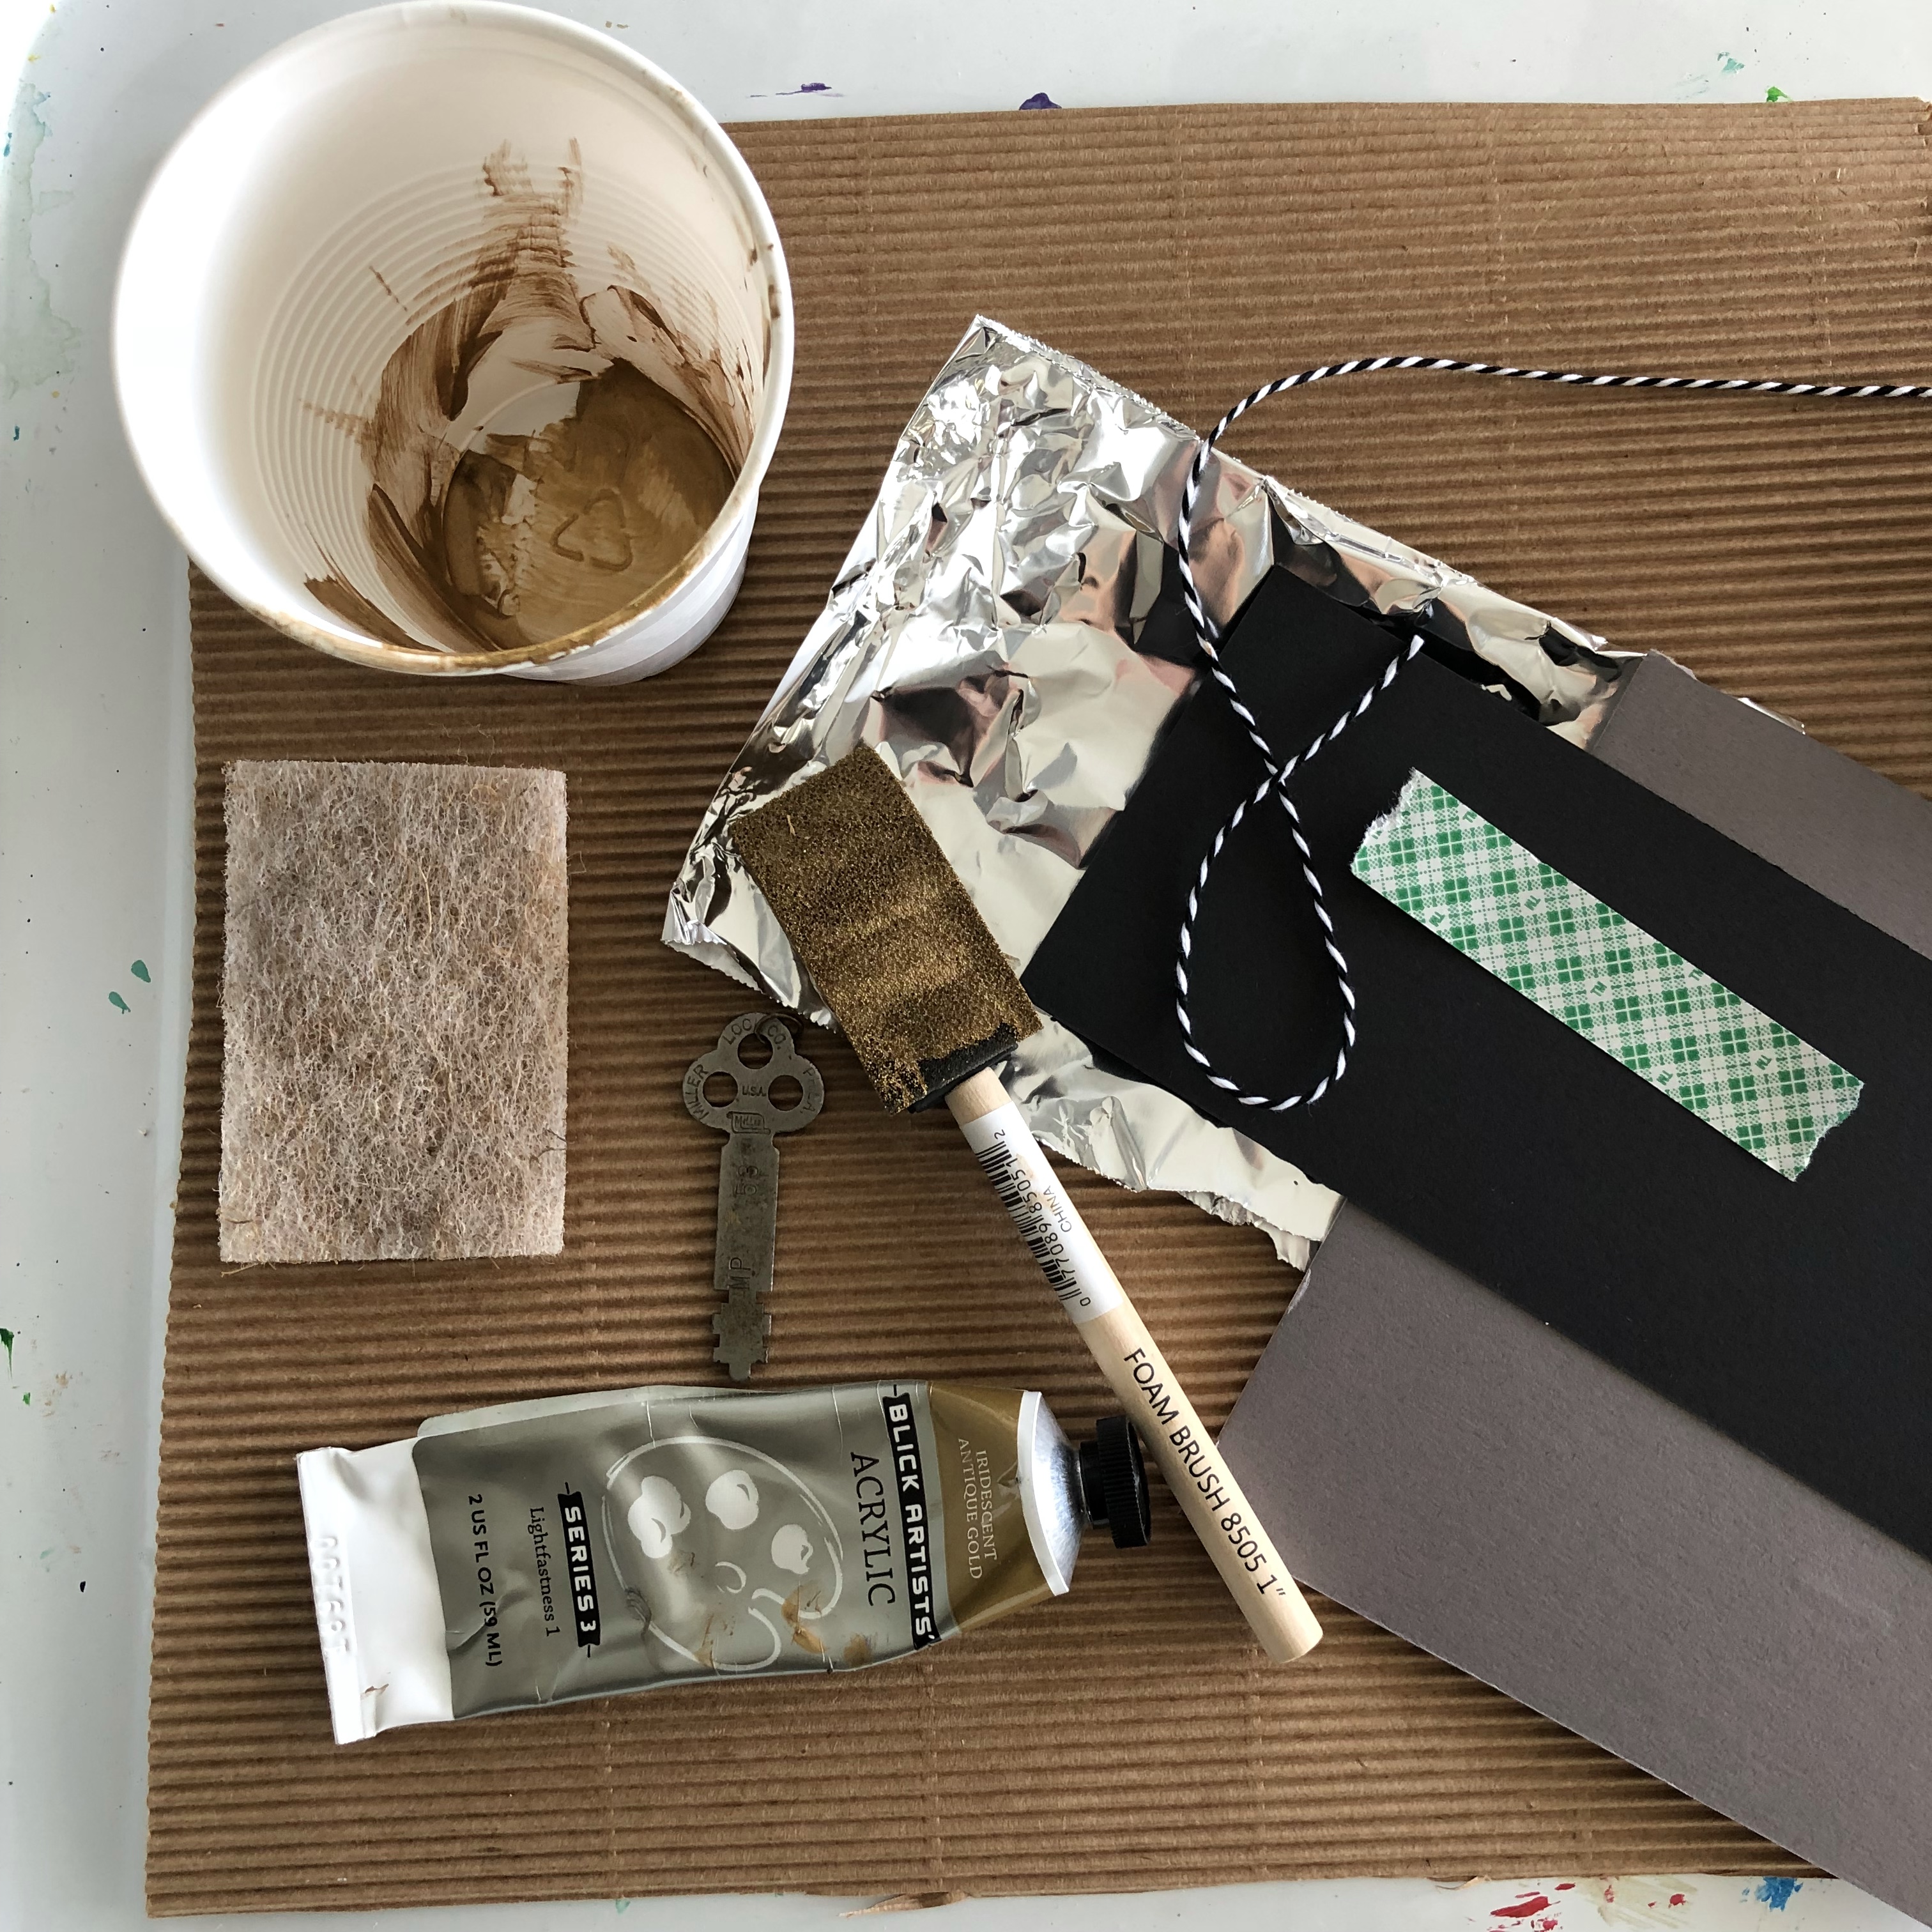
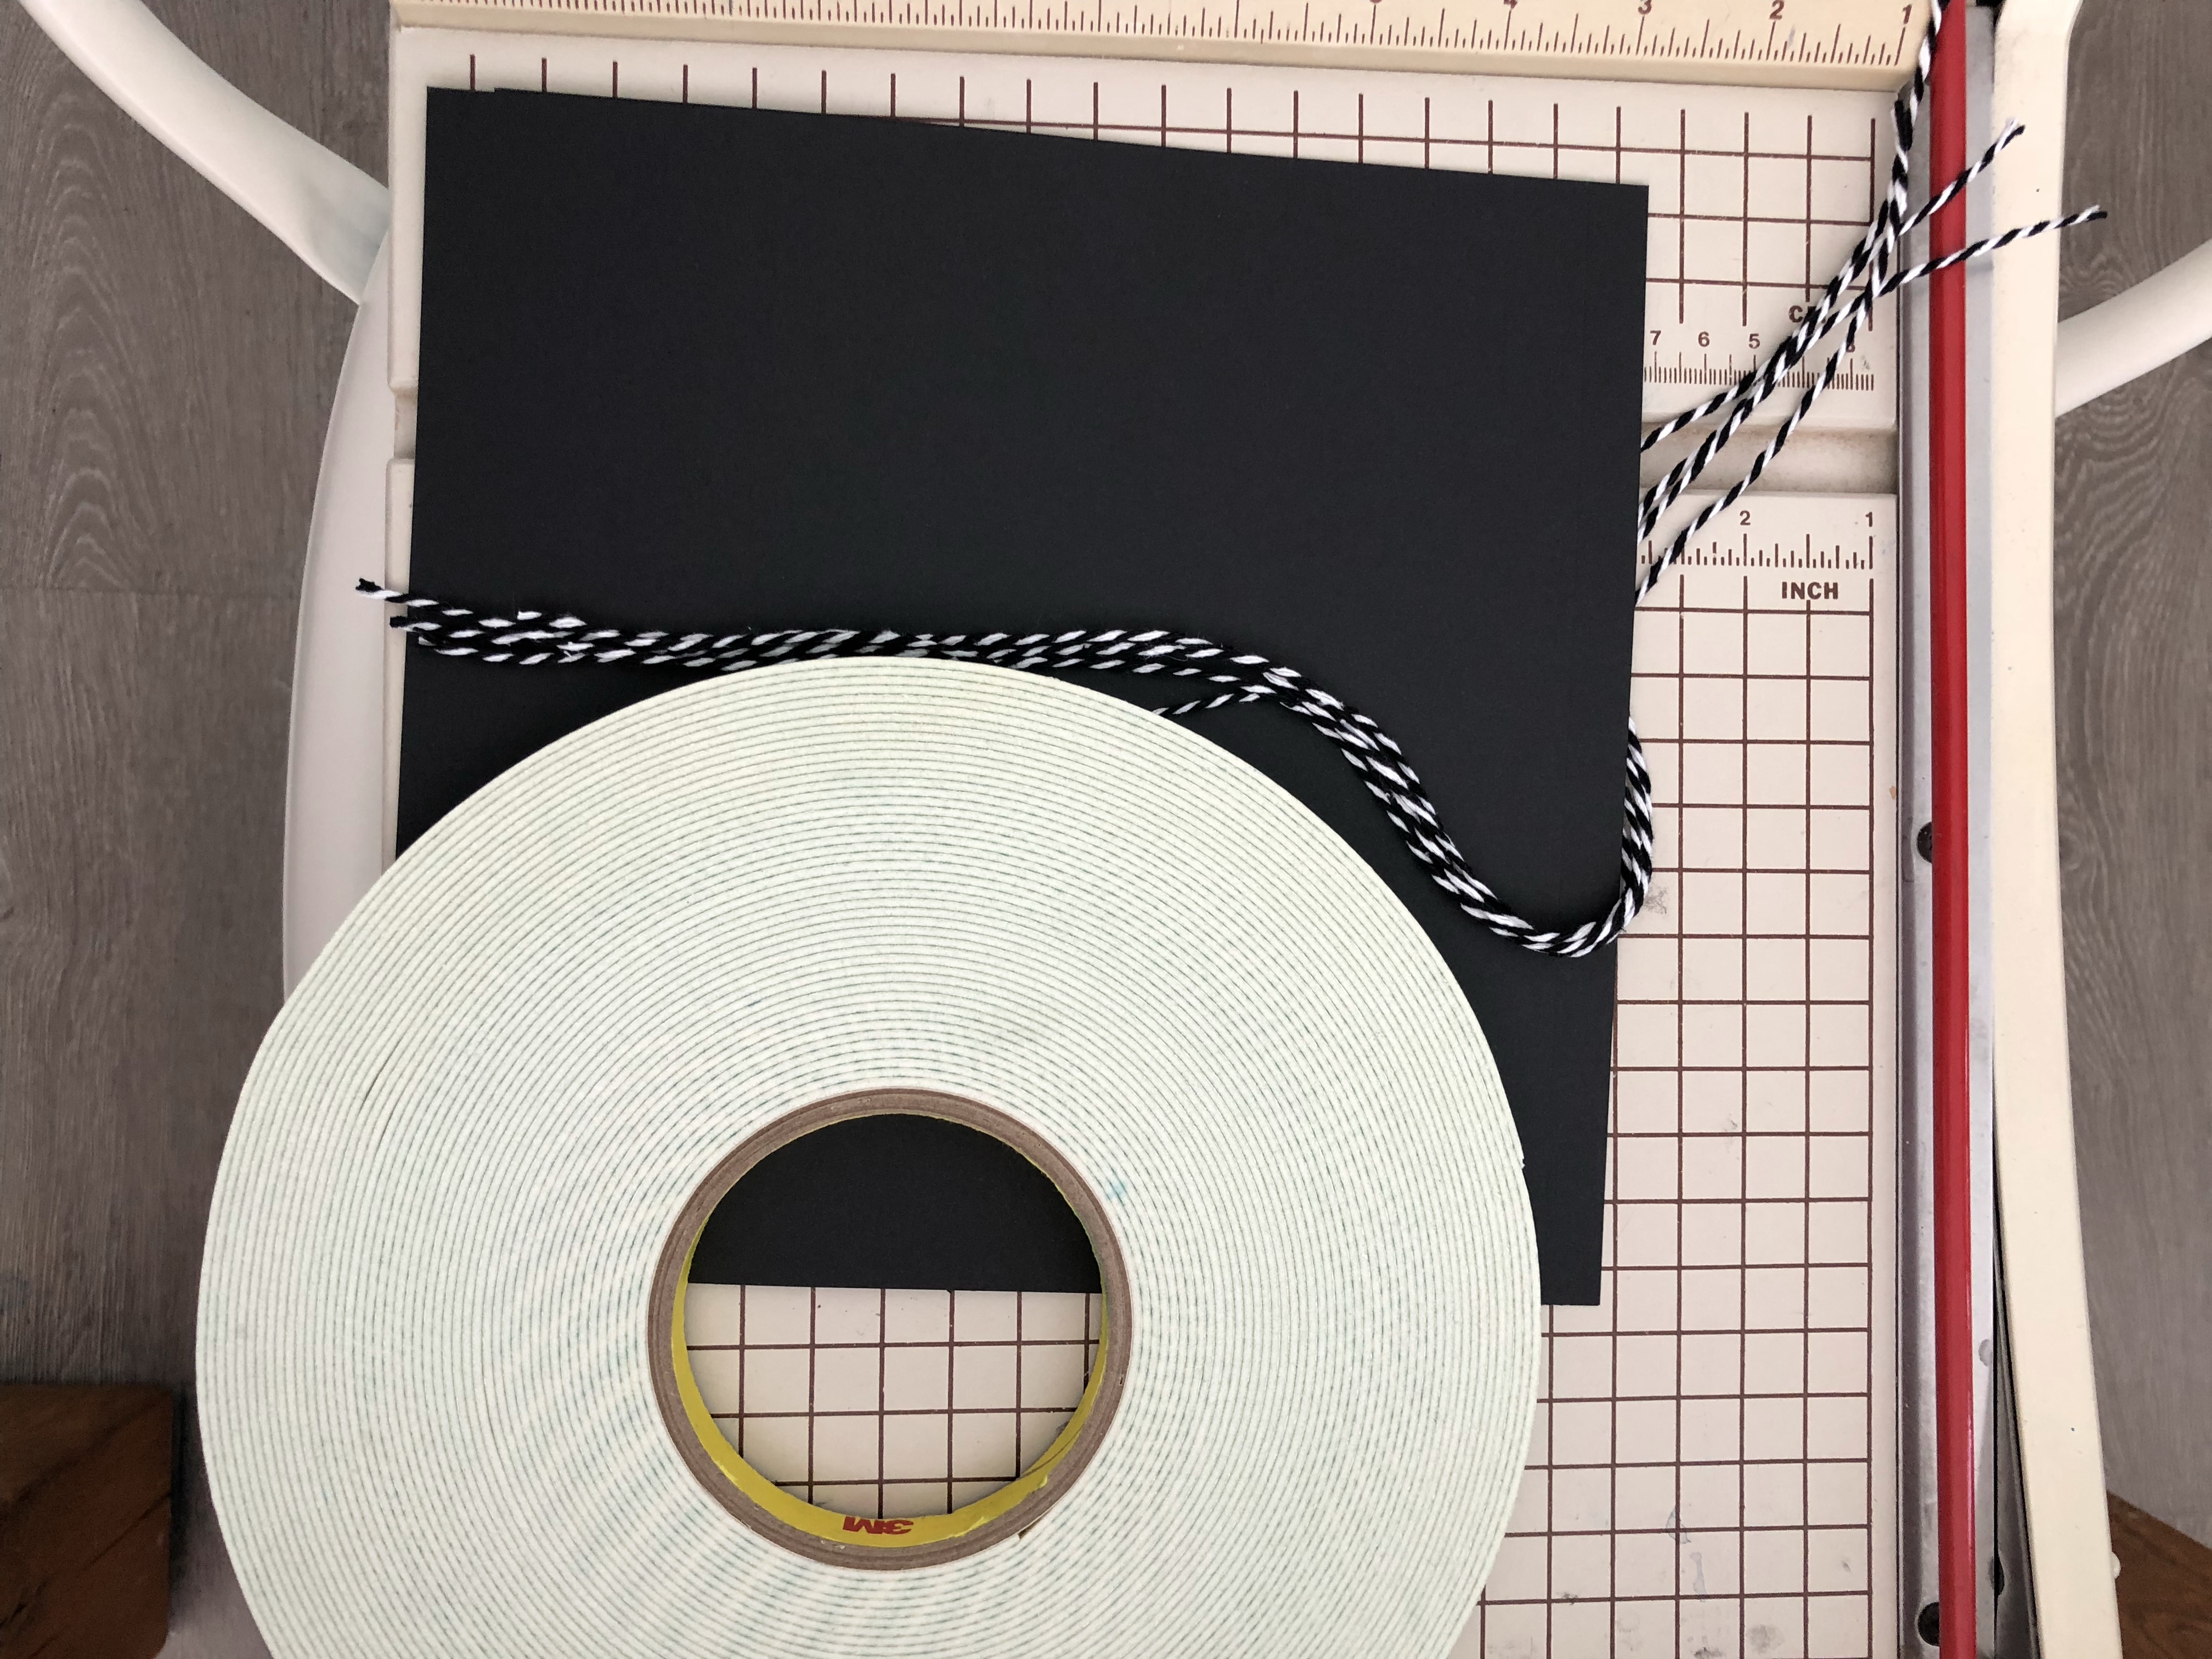
MATERIALS
- Cut mat board or cardboard 6×6
- Exacto knife to cut mat board and 12″ ruler
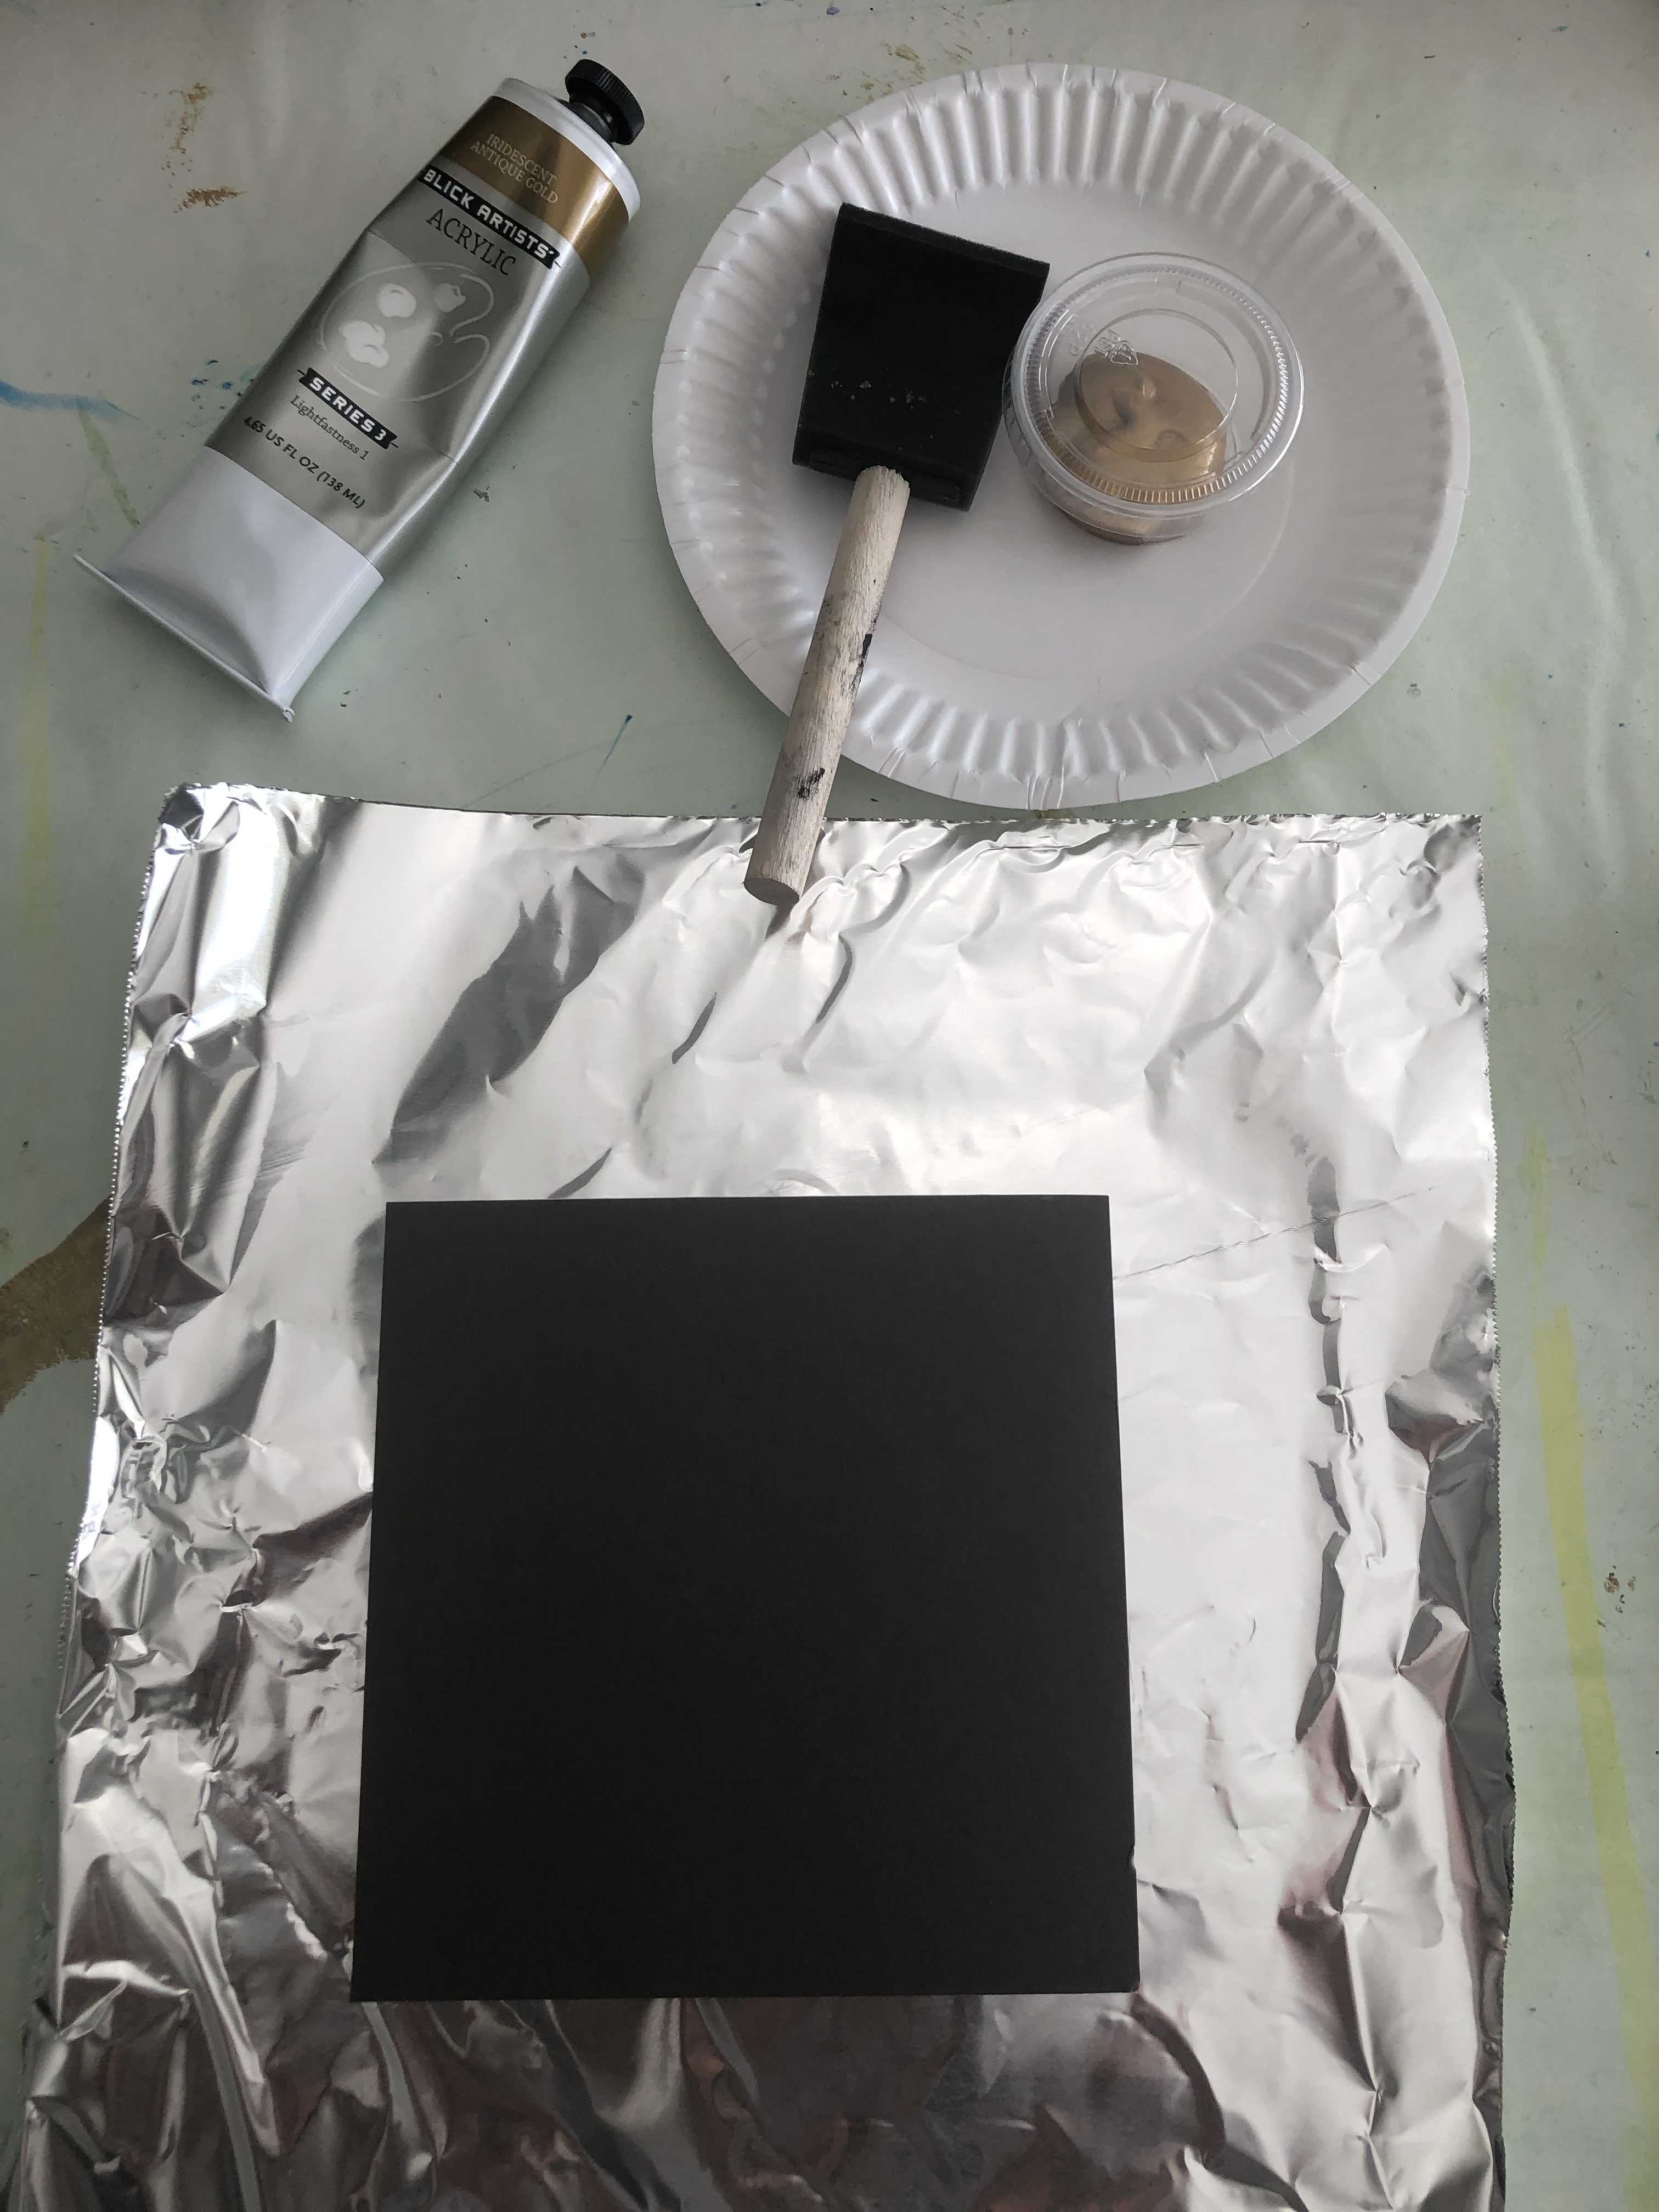
- Foil
- Gold acrylic paint
- 2oz containers/condiment cupsI (put paint in containers filled 1/2 way up)
- Sponge paintbrush
- Art Dryers
- scouring pads
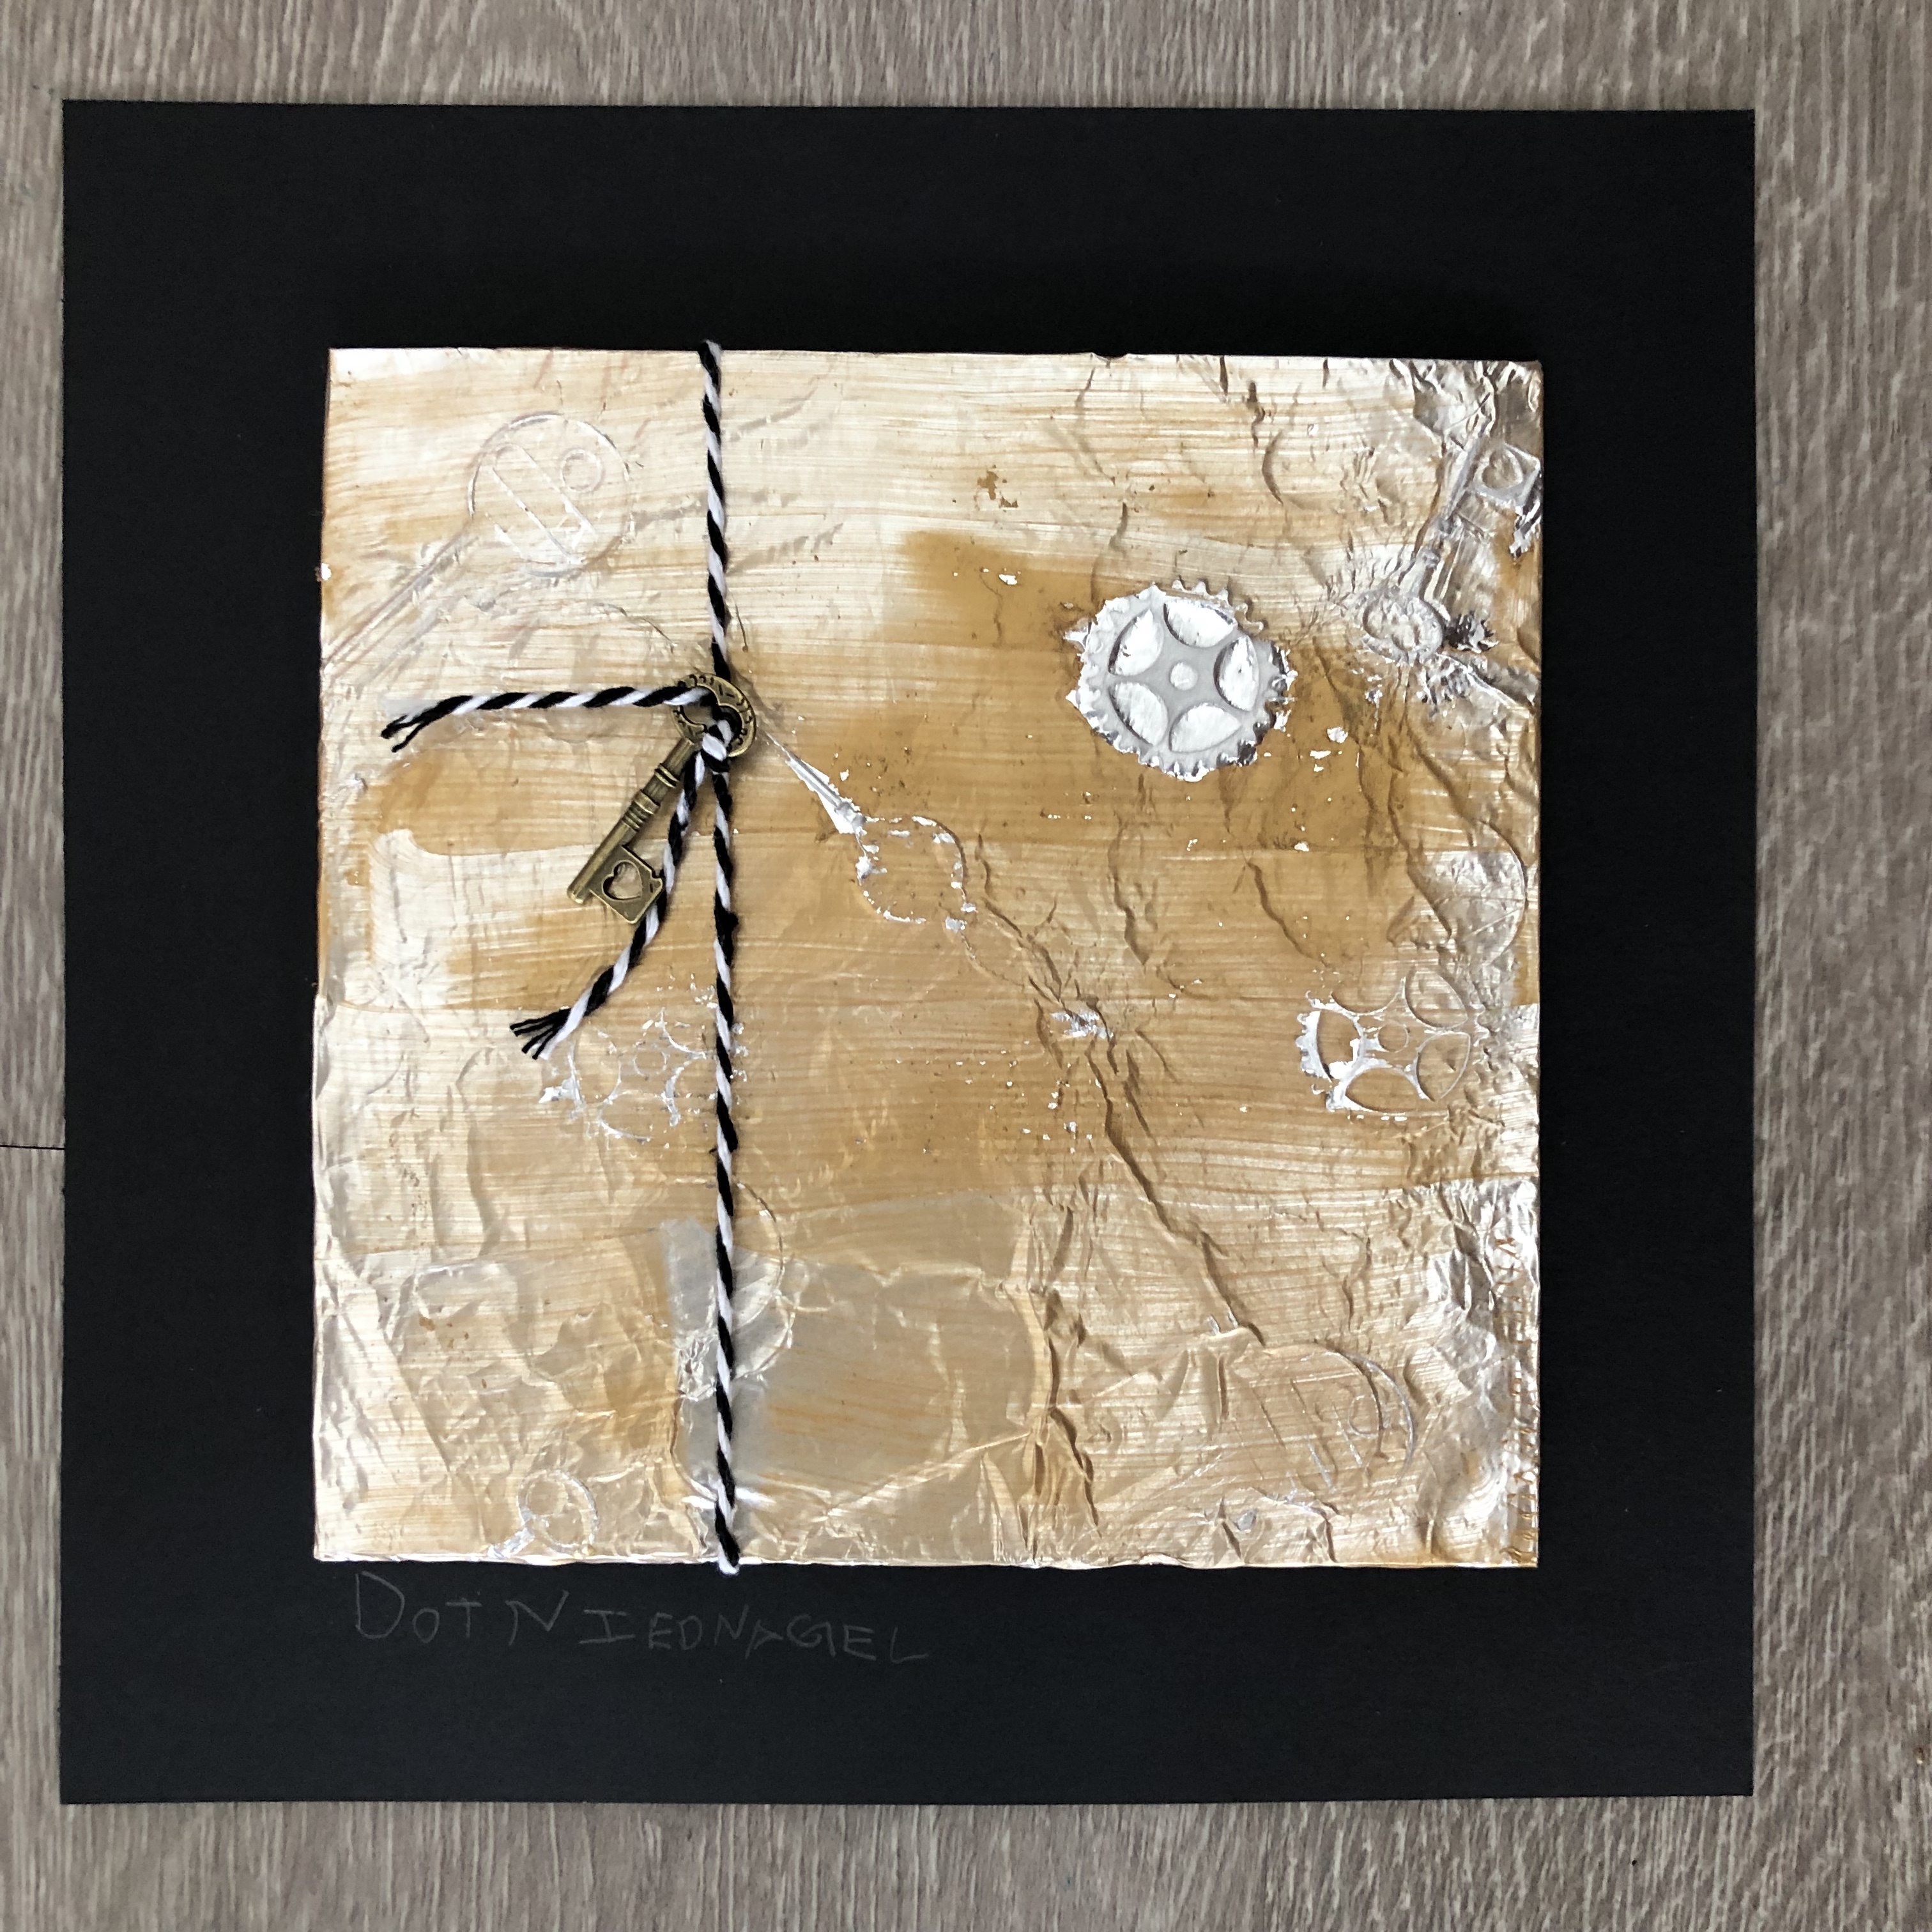
- keys + clock gears (use keys to represent the “KEY” to the baptistry doors and clock gears to represent the Renaissance “TIME” period)
- black and white butcher’s twine
- scotch tape
- 3M foam tape
- cut 8×8 black card stock

STEPS
- Place foil with the shiny side up
- Use the matte board as to template to paint the square shape
- With a foam paintbrush paint shiny side of foil with a very thin layer of gold acrylic paint
- Dry acrylic paint with dryer, this goes quickly

- Keep Paint side up
- Place keys and gears under the foil
- Rub on top with the scour pad to make a relief


- Wrap foil around matt board like a present
- tape in place with scotch tape
- Tie bakers twine on the side to represent the door divisions
- Tie a on a key
- Use foam tape to mount relief to 8×8 black card stock
NO. 3 ANGELICO C.1395-1455

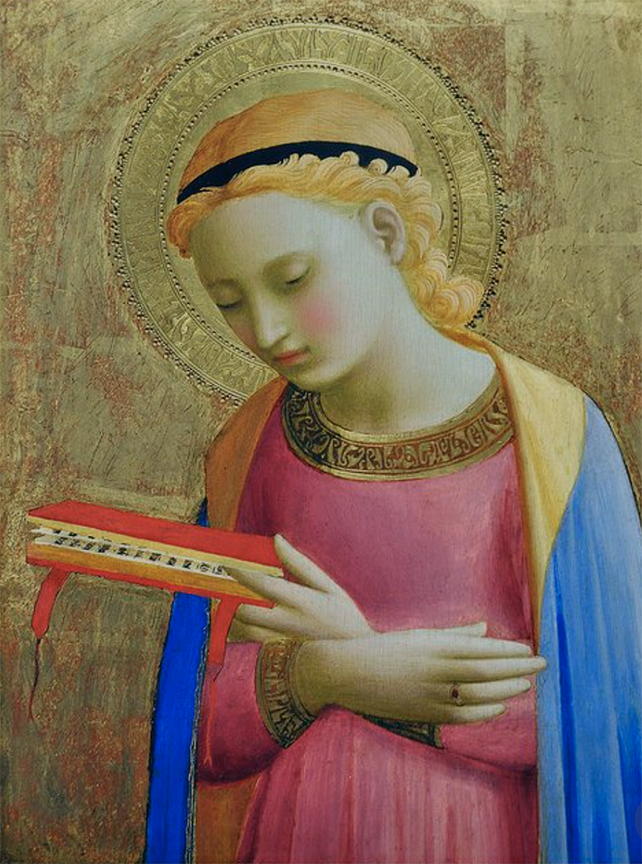
THE PROJECT + THE ARTIST
- Inspired by poses, composition, and gold palette in the paintings of Agelico
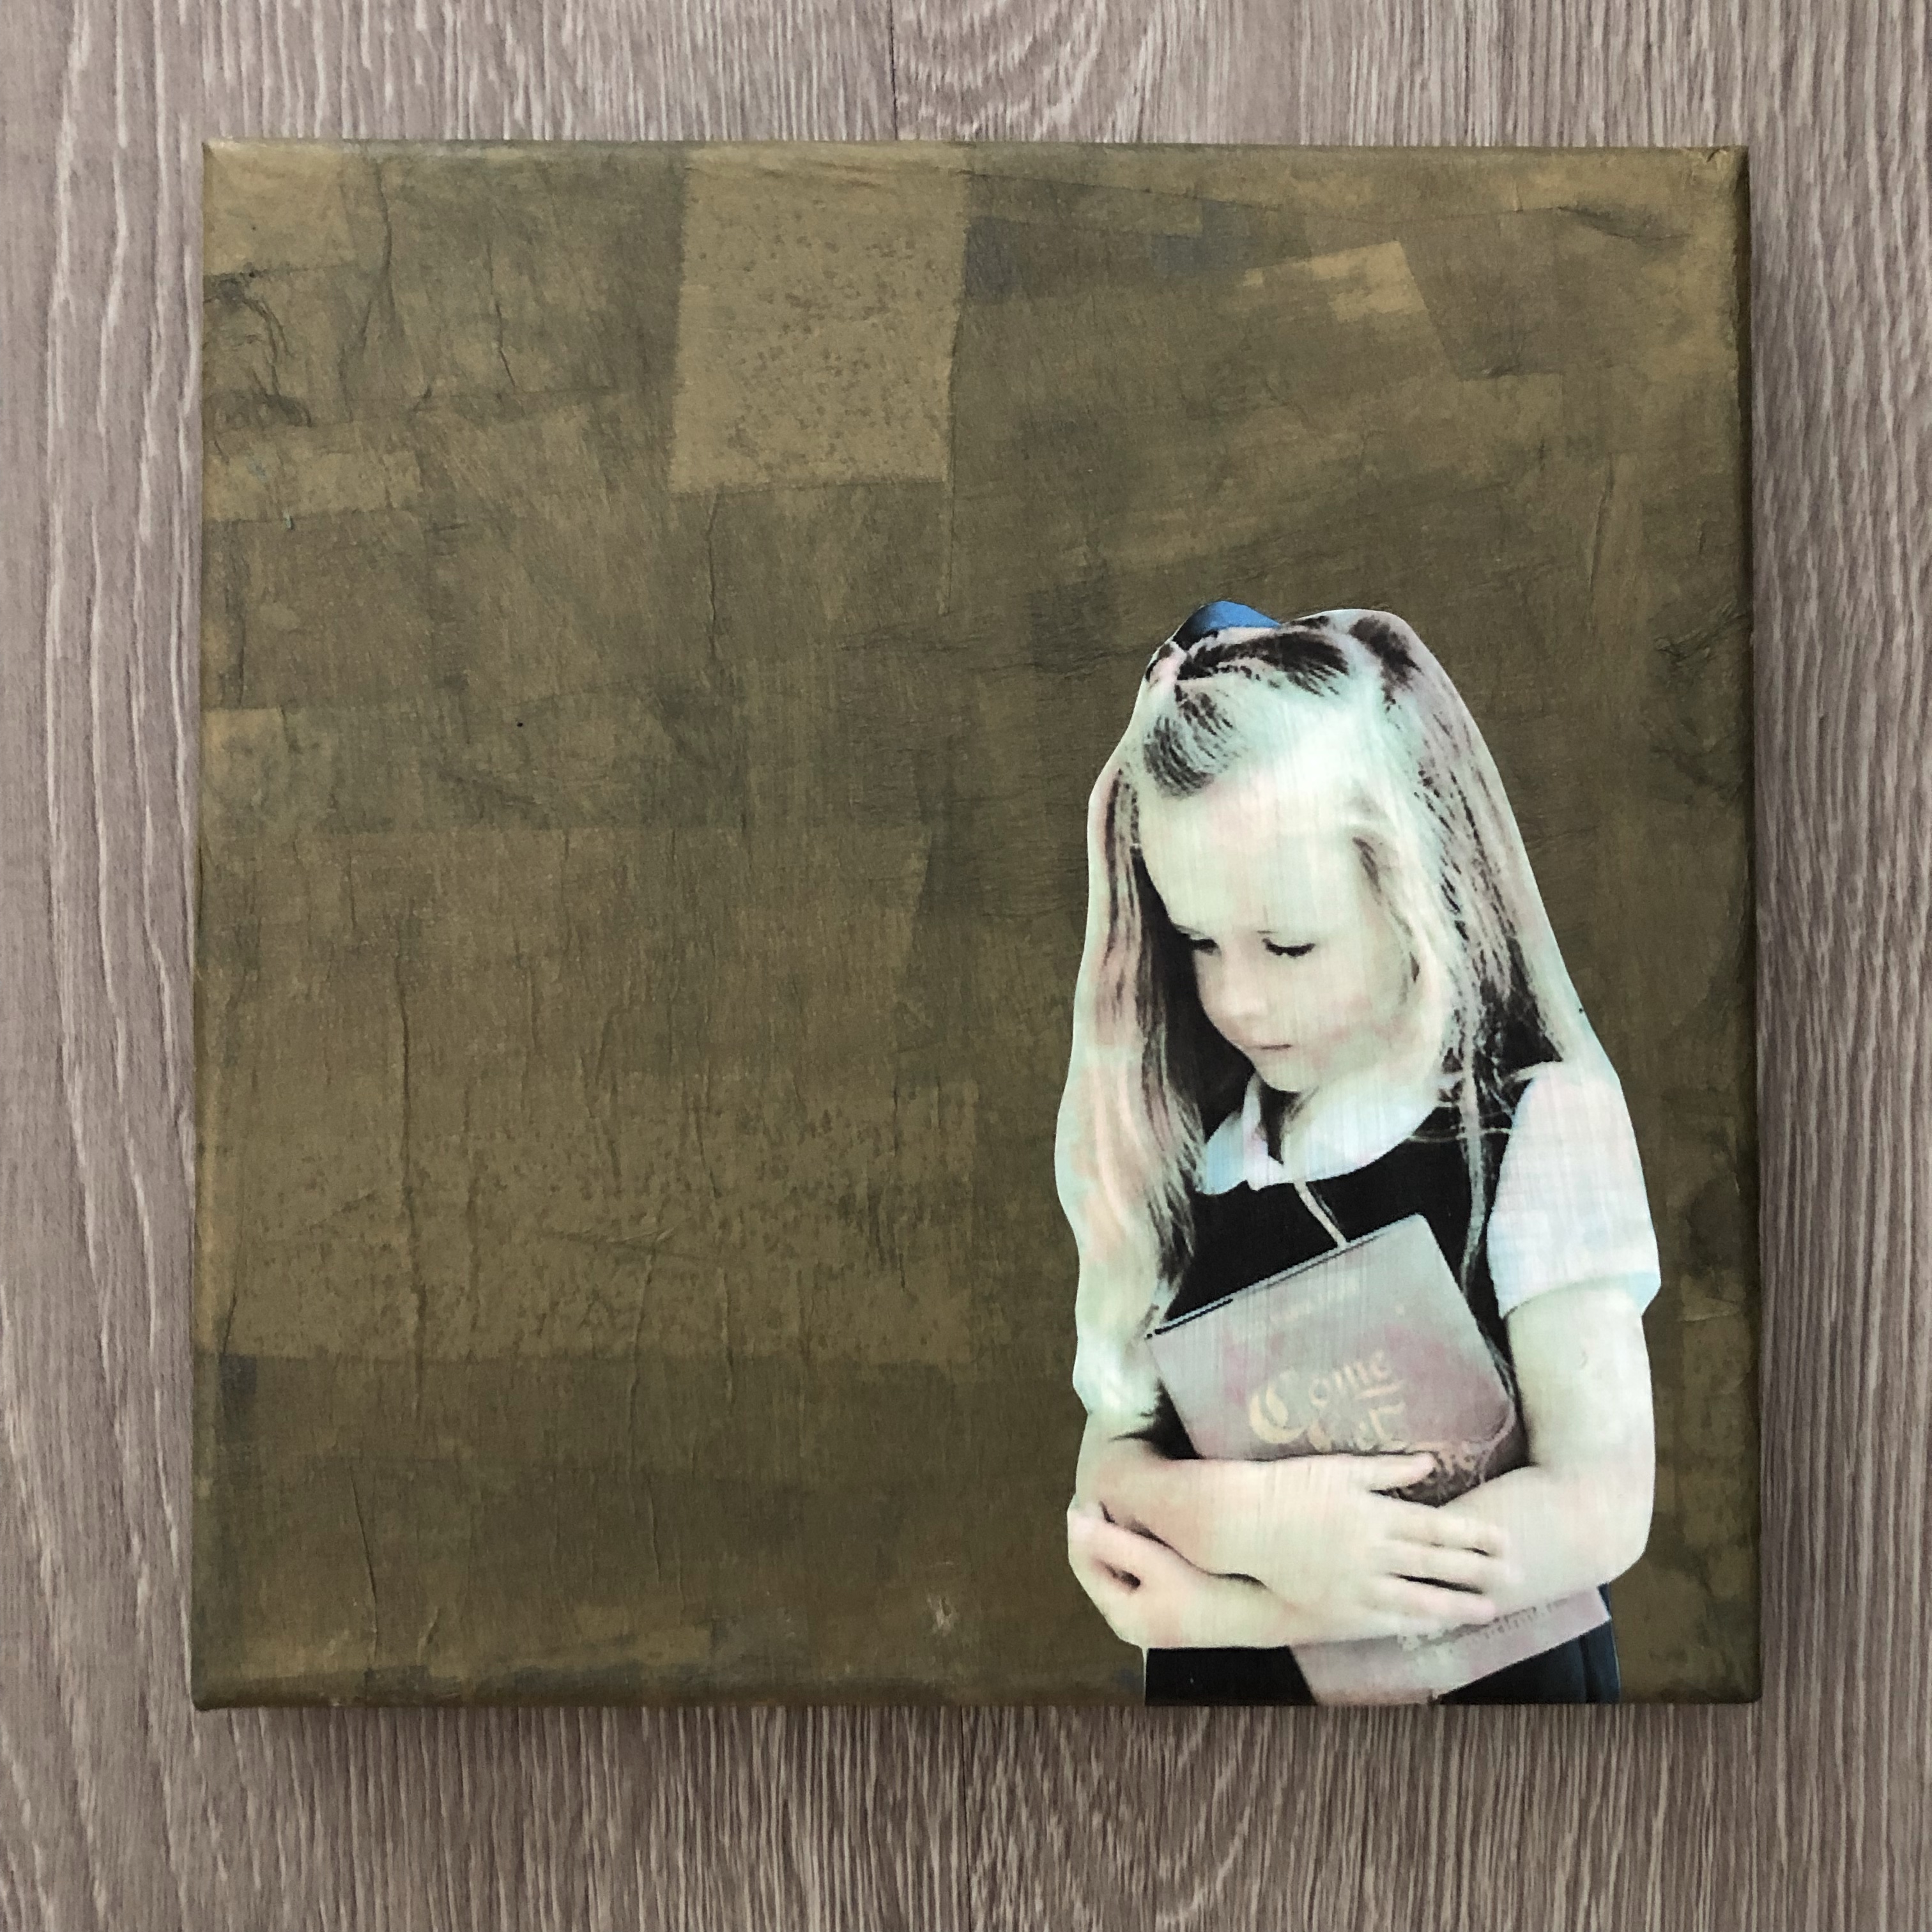

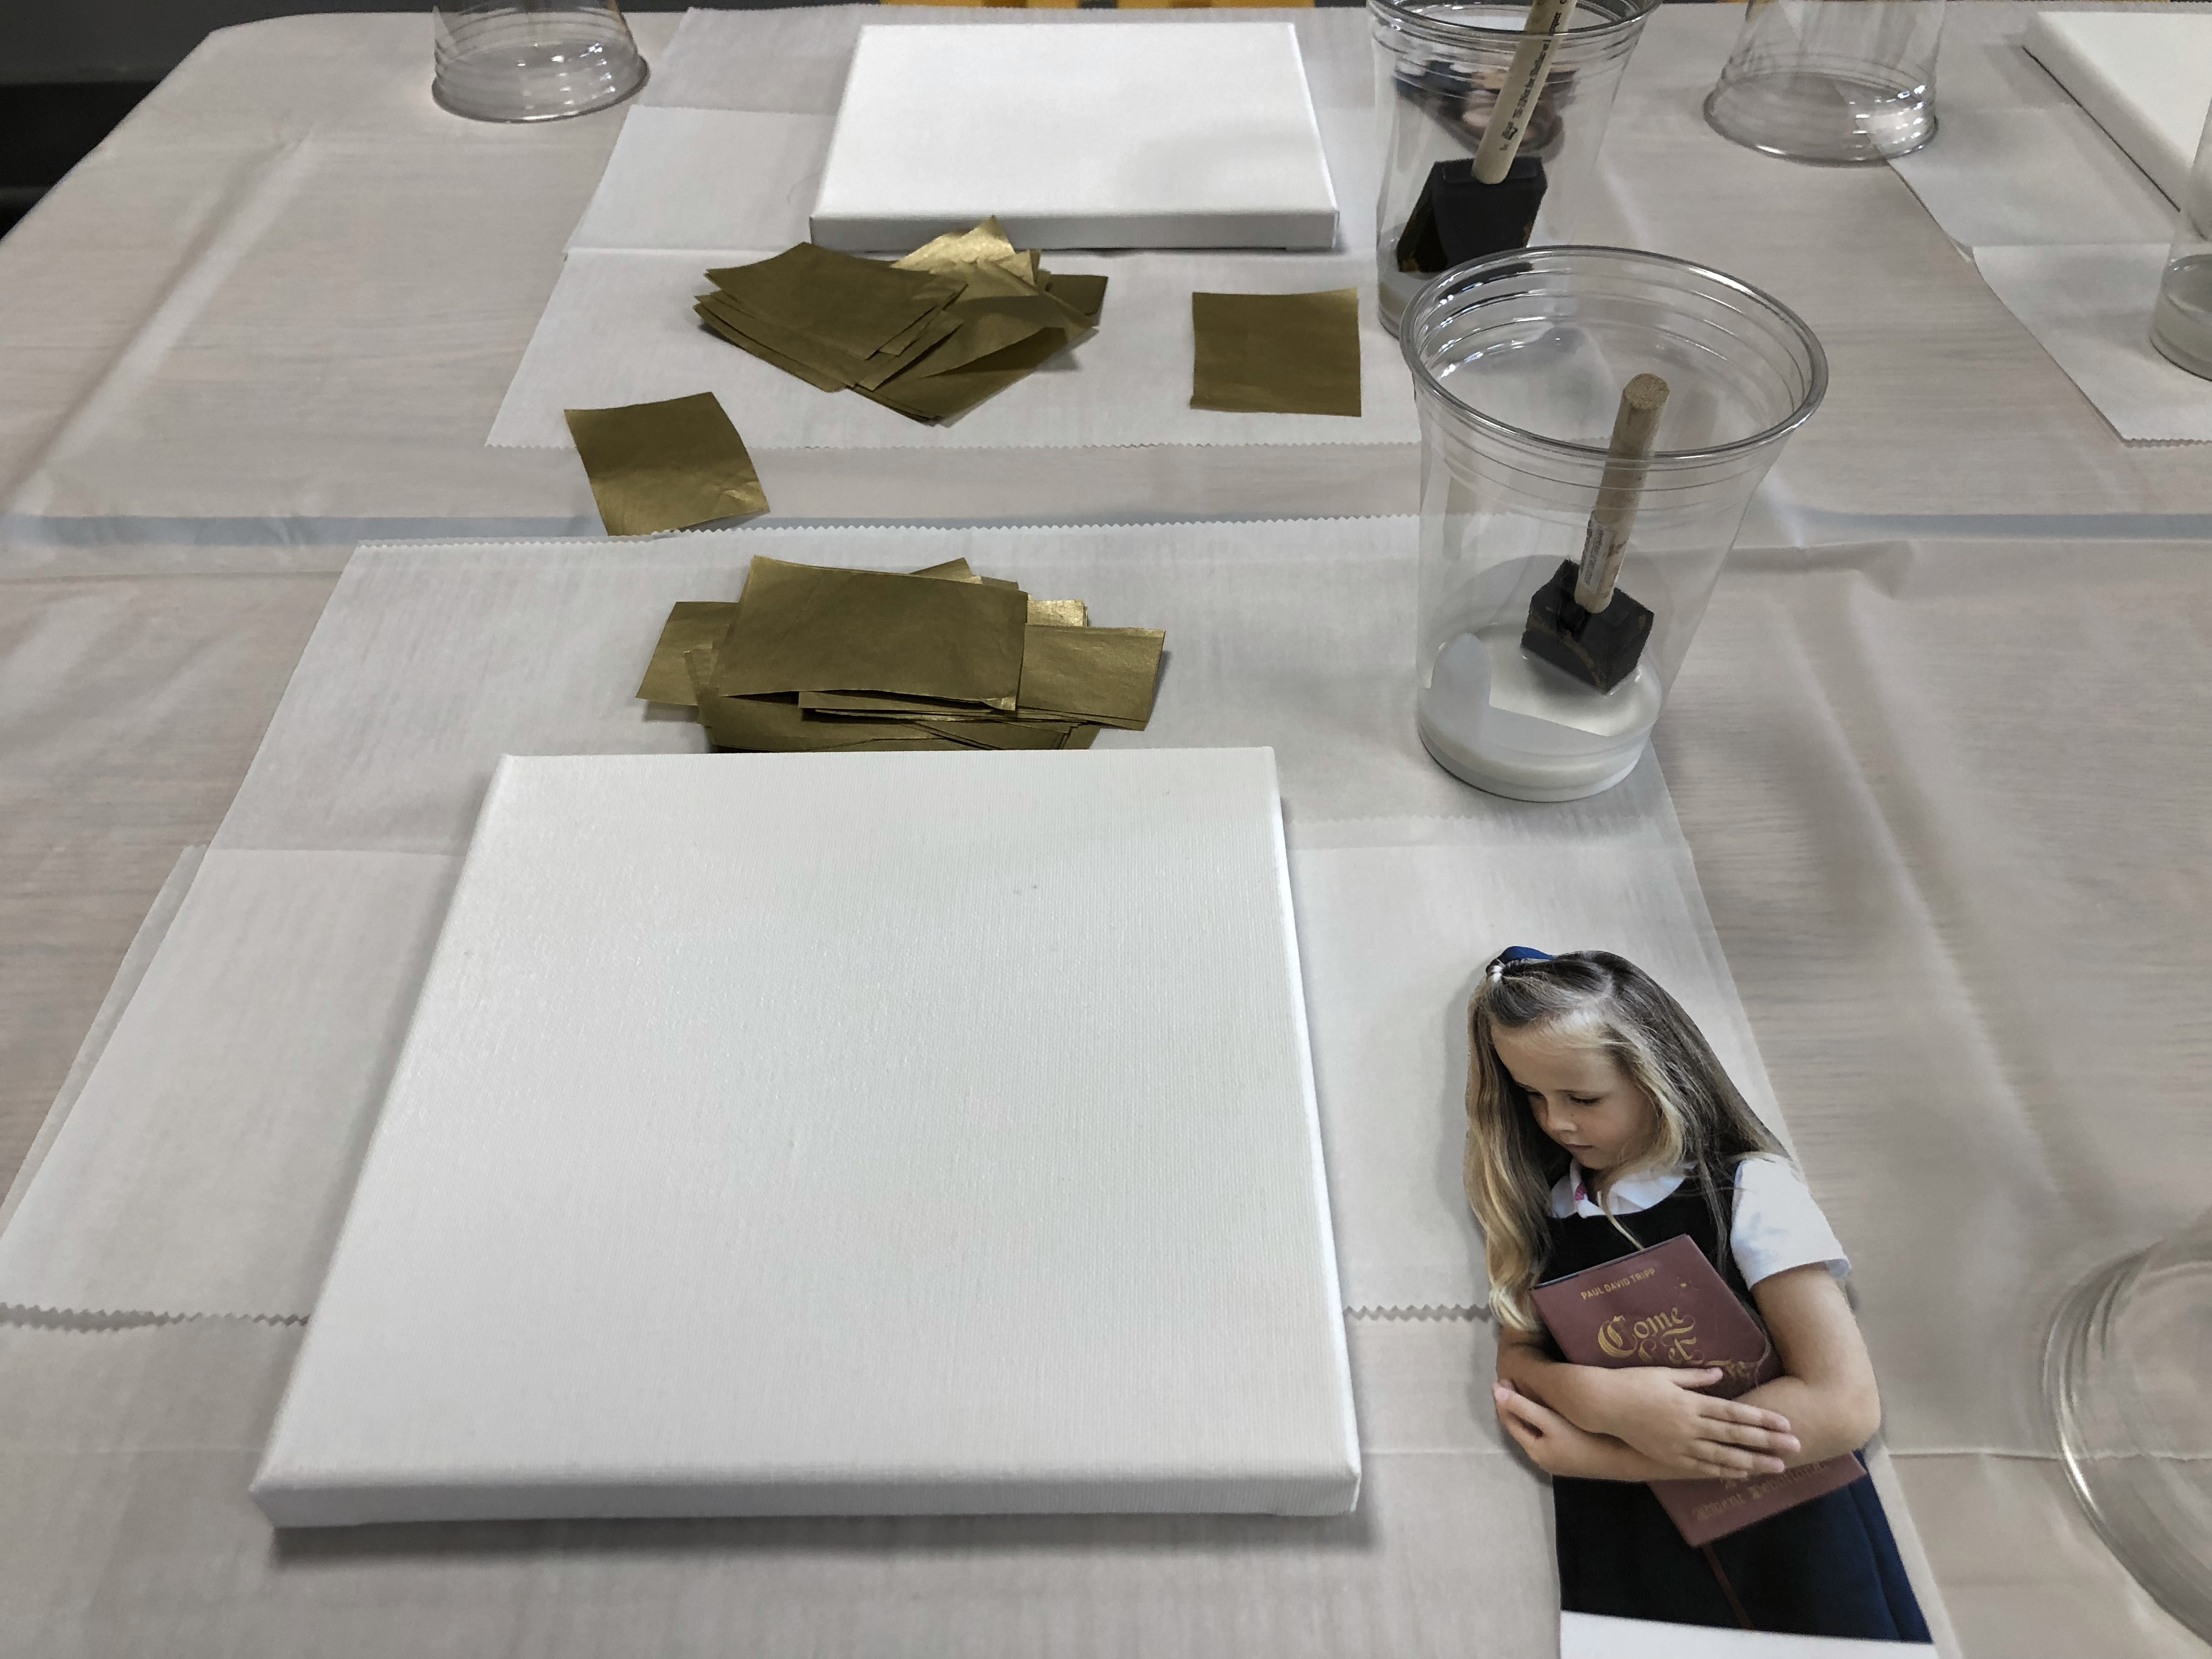
MATERIALS
- Color photo printed and cut of each student from a basic printer on standard lightweight paper
- Gold tissue paper cut into rectangles
- Matte medium + cups to contain it
- Sponge brush
- 8″ x 8″ Canvas
- Parchment paper to work on
- Cups to dry on so it doesn’t adhere to work surface

STEPS
- photograph each student in a pose inspired by Angelico’s paintings [note: keep in mind when you pose and photograph your students they will be cut out … hands are difficult to cut out]
- print photos from a basic printer on standard lightweight
- pre-cut photos prior to class
- pre-cut gold tissue paper in small recatngles prior to class
- lay down a layer of matte medium with a sponge brush on the canvas
- start placing pieces of of gold tissue paper in the corners and edges wrapping around the canvas
- move towards the middle of the canvas placing gold tissue and using matte medium to adhere it
- once the canvas is completely covered lay down a layer of matte medium on top
- place photograph on the right side and lay down a layer of matte medium to adhere it
- let dry on top of cups to avoid adhering the project to anything under it
- use an art dryer to dry as necessary

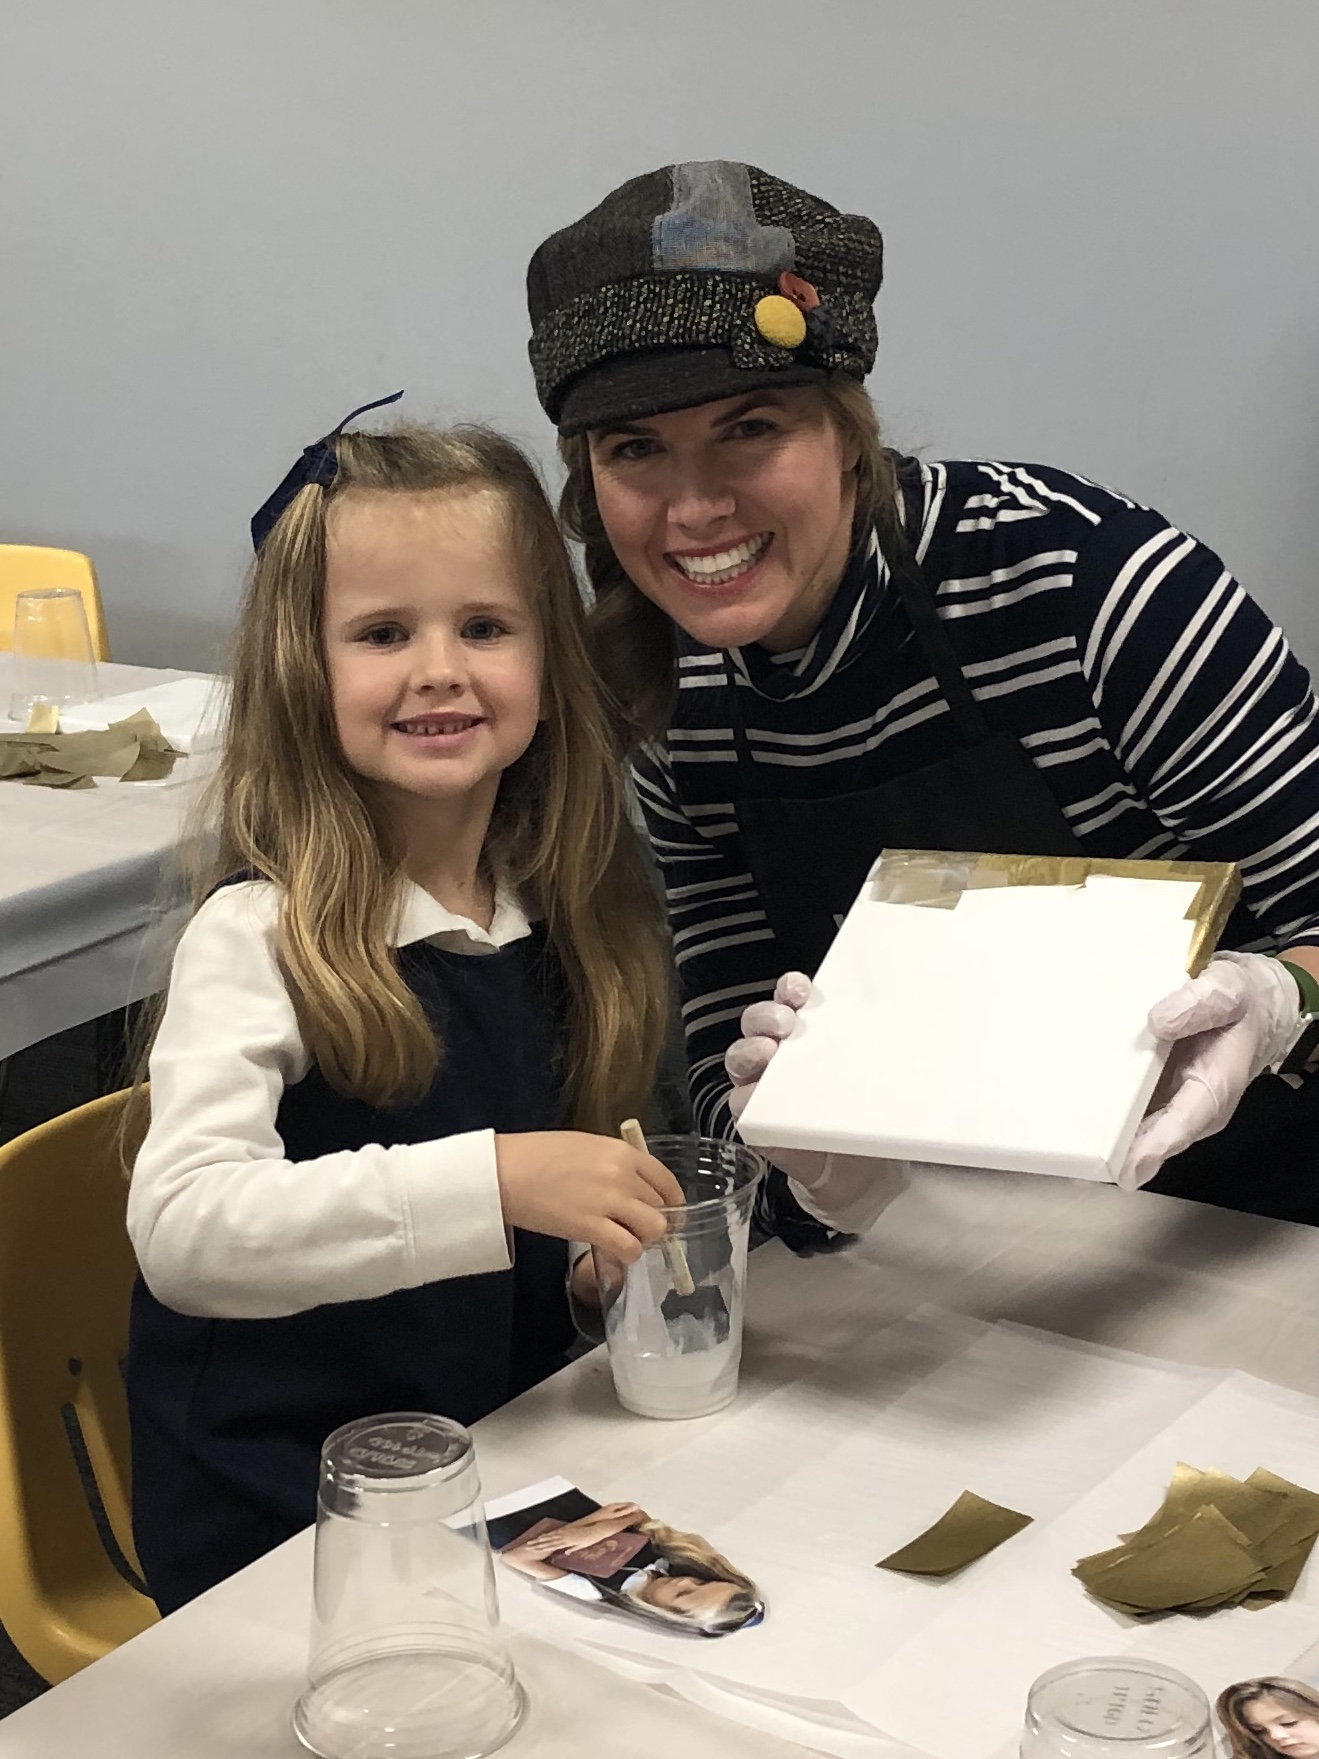
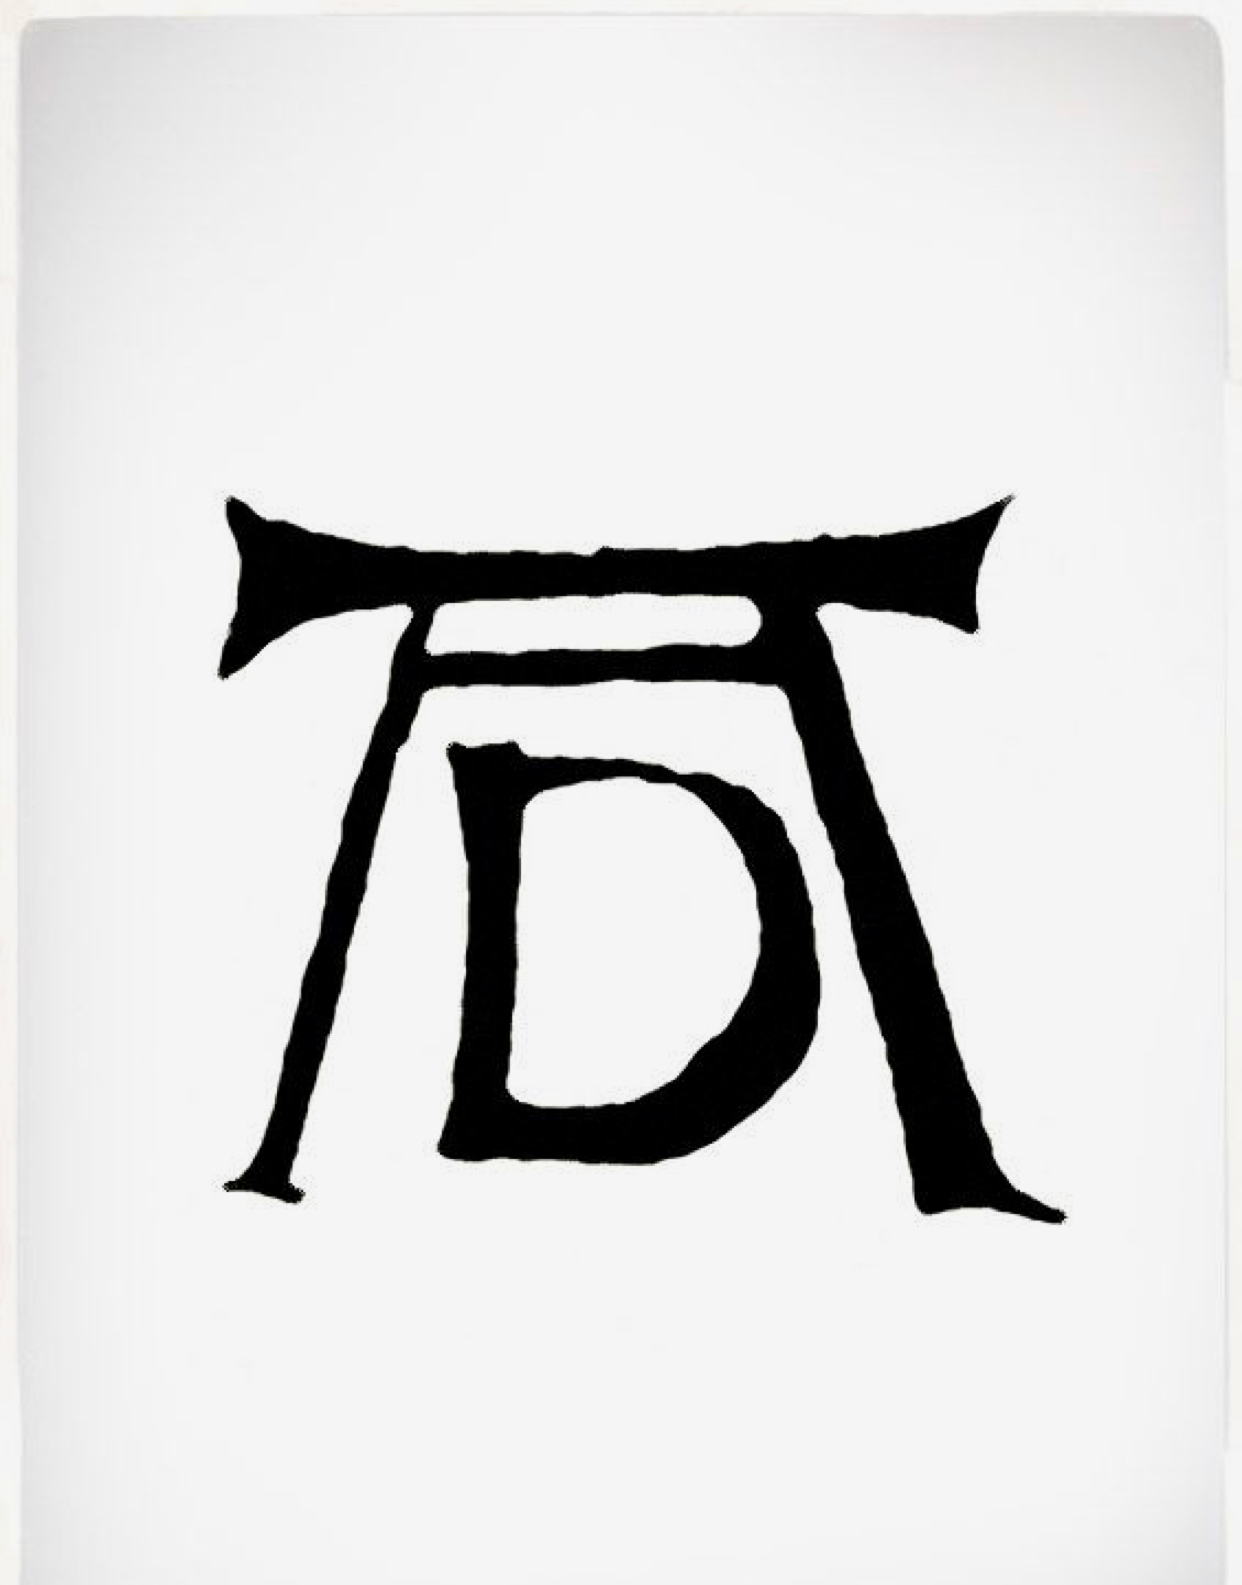
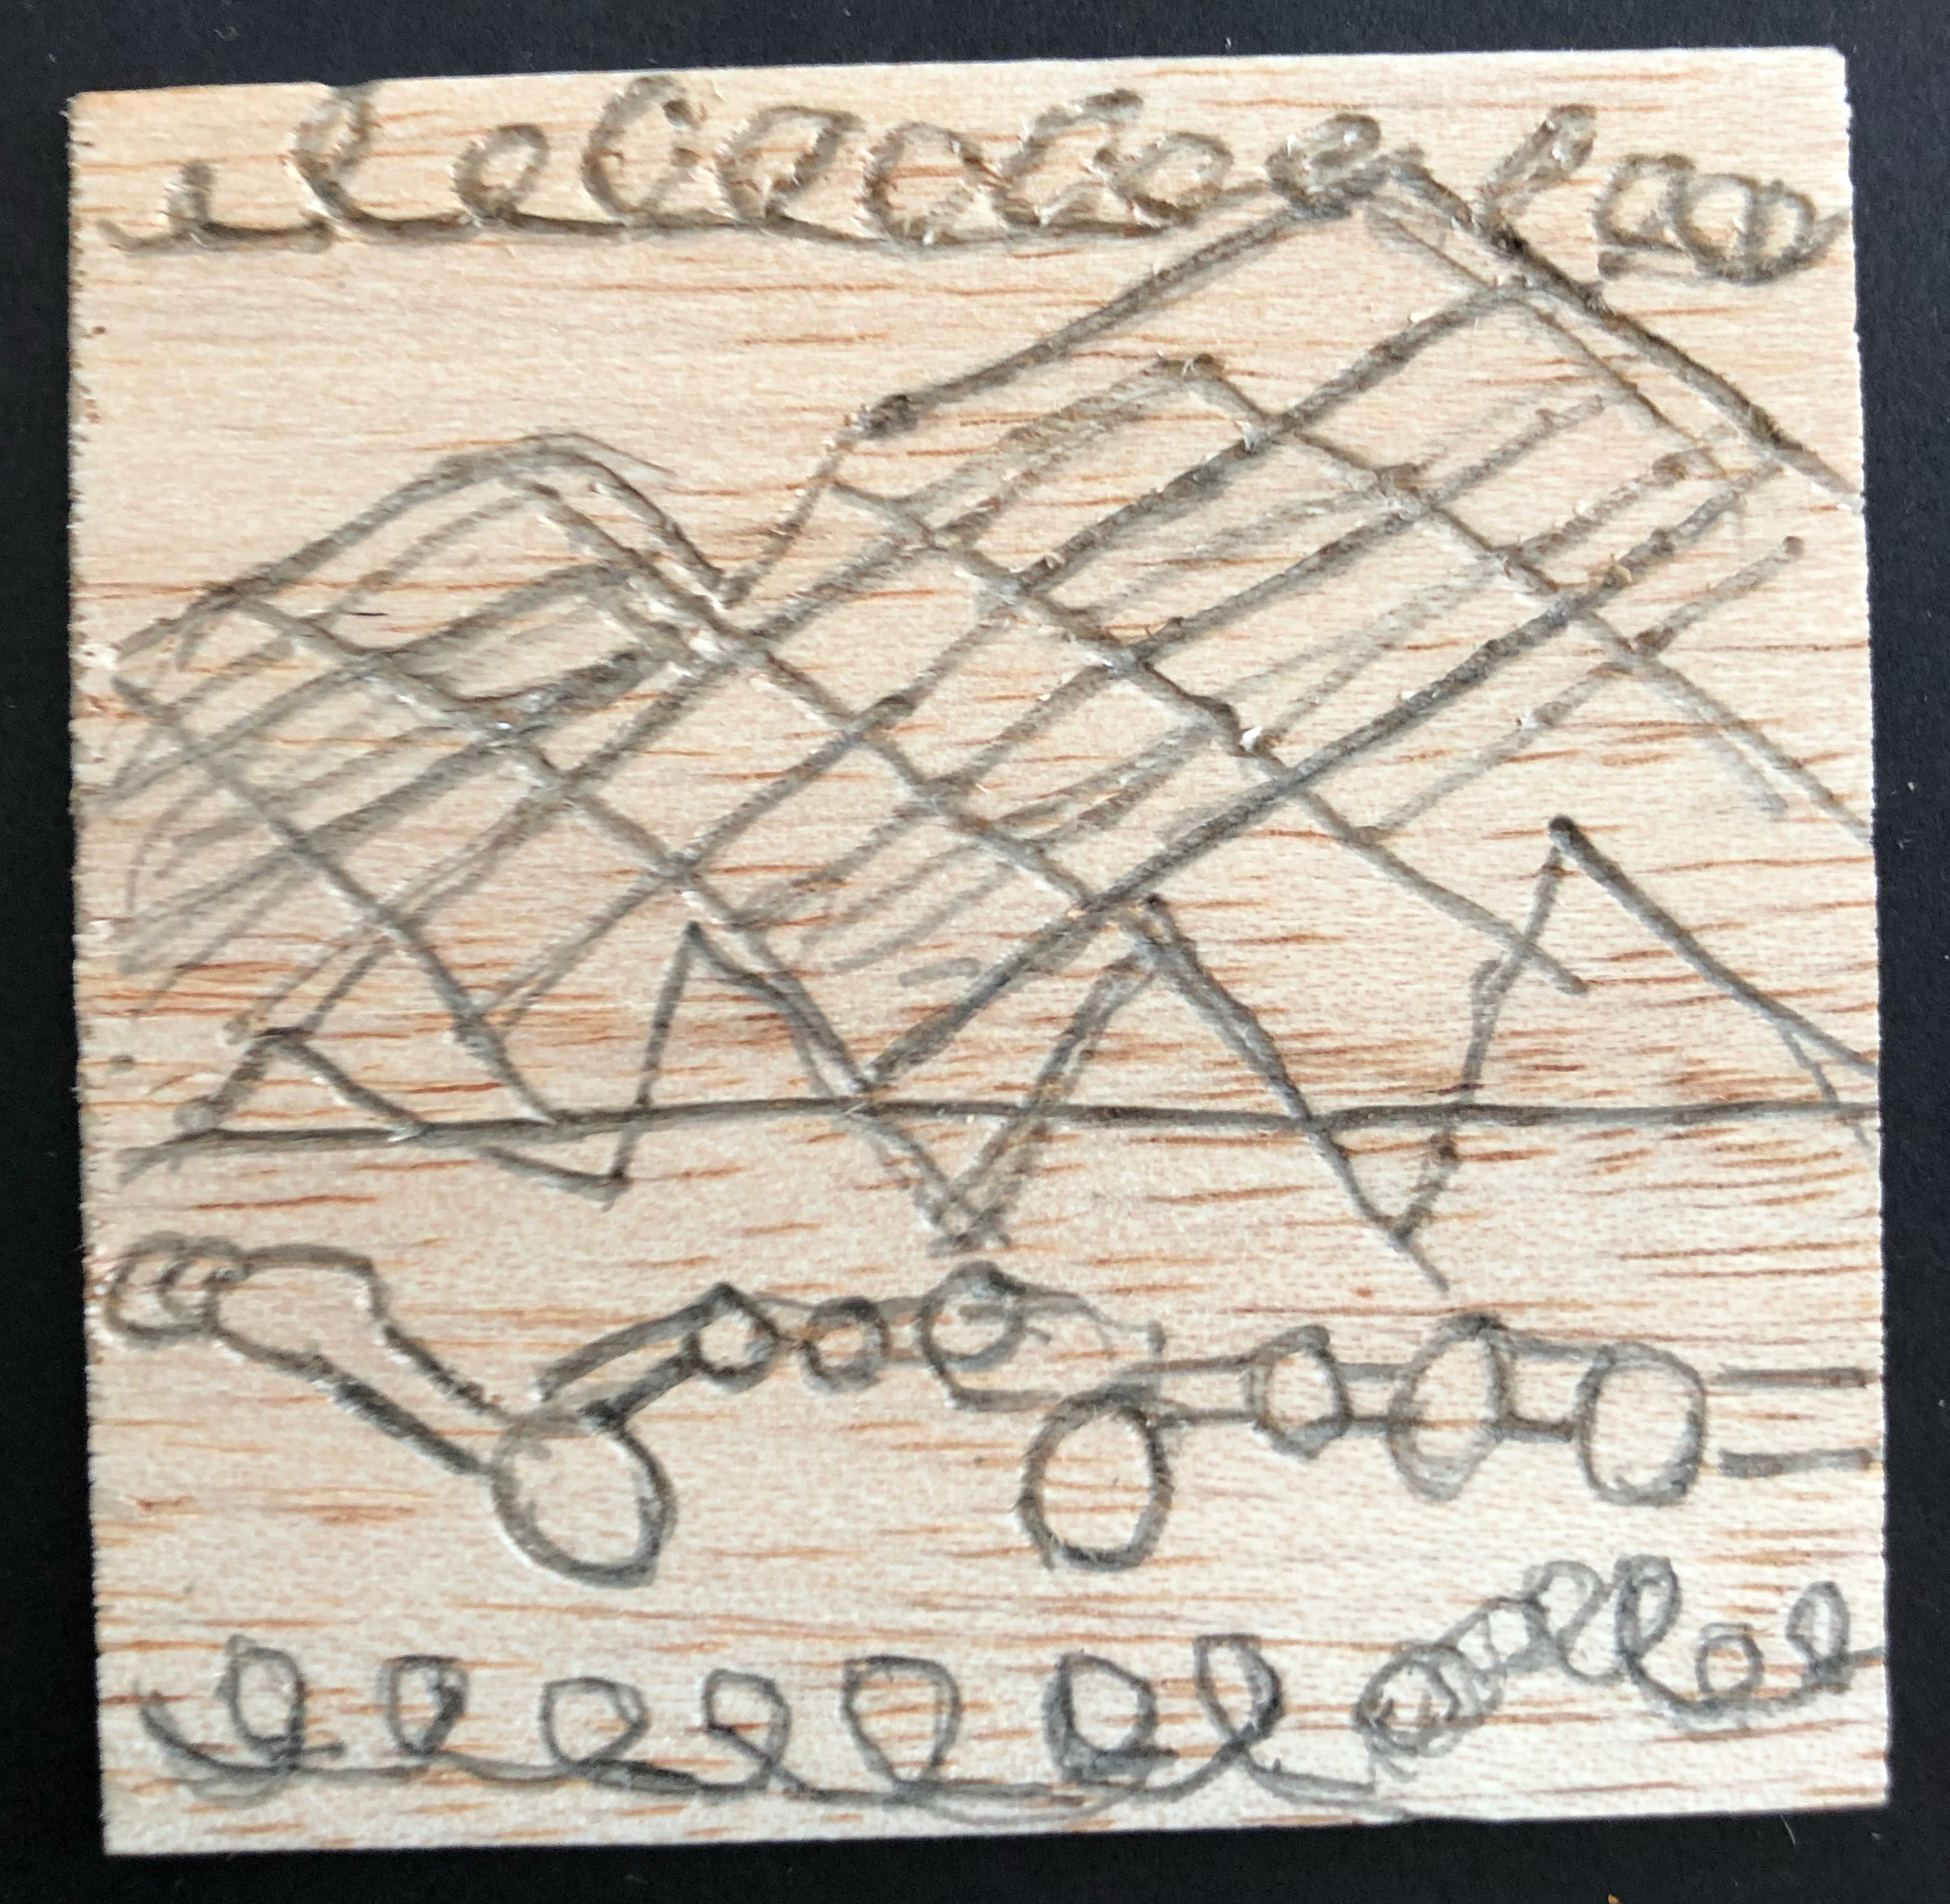
NO. 4 DURER 1471-1528

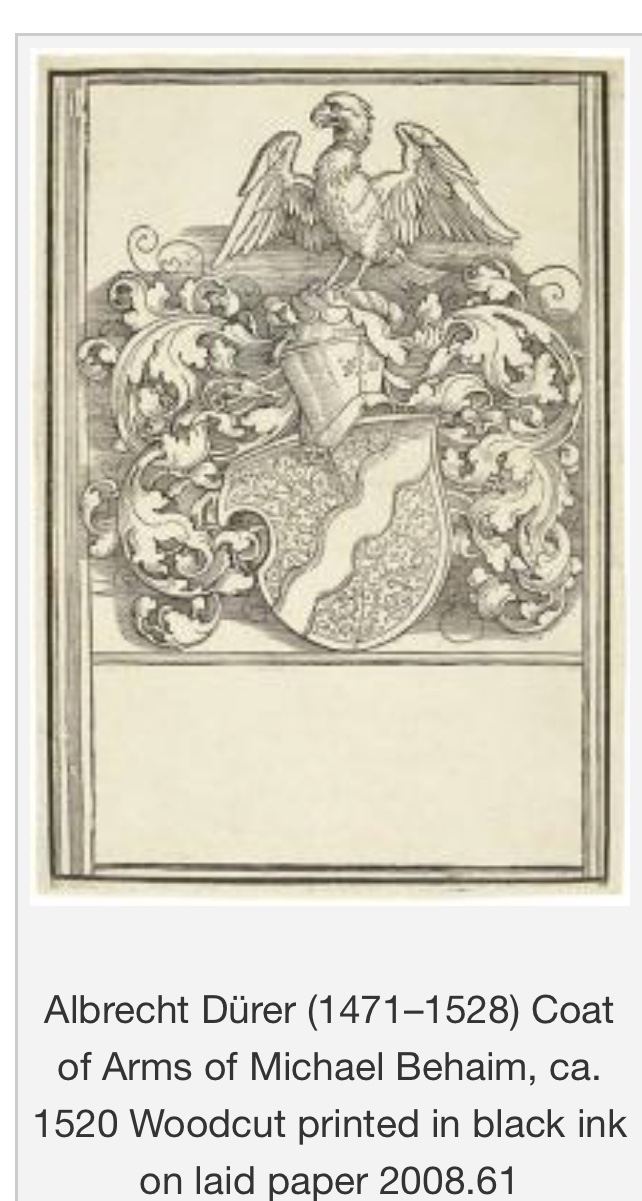

THE PROJECT + THE ARTIST
- Inspired by Durer’s woodcuts
- a noteworthy passage in Dürer’s theoretical writings: “Thus it comes that a man may draw something with his pen on a half-sheet of paper in one day, or dig something in a little piece of wood with his tool, that will be finer and better than any big thing by another who industriously worked a whole year at it.”
- Fun note: Duer was the first artist to have his own logo!


MATERIALS
- Ivory card stock cut to 6” x 6”
- Black card stock cut to 8” x 8”
- Brown paper cut to 7” x 7” [Pre glue butcher paper w/ spray glue or glue stick onto black card-stock]
- Cut 3”x3” squares of balsa wood with a heavy duty paper cutter, scissors, or exacto knife and ruler …. 36” x 3” strips are available at Blick
- Cut a small rectangle of Balsa wood for logo
- Pencil
- Black tempera paint + cup or plate to hold the paint
- Sponge brush
- 3M foam tape
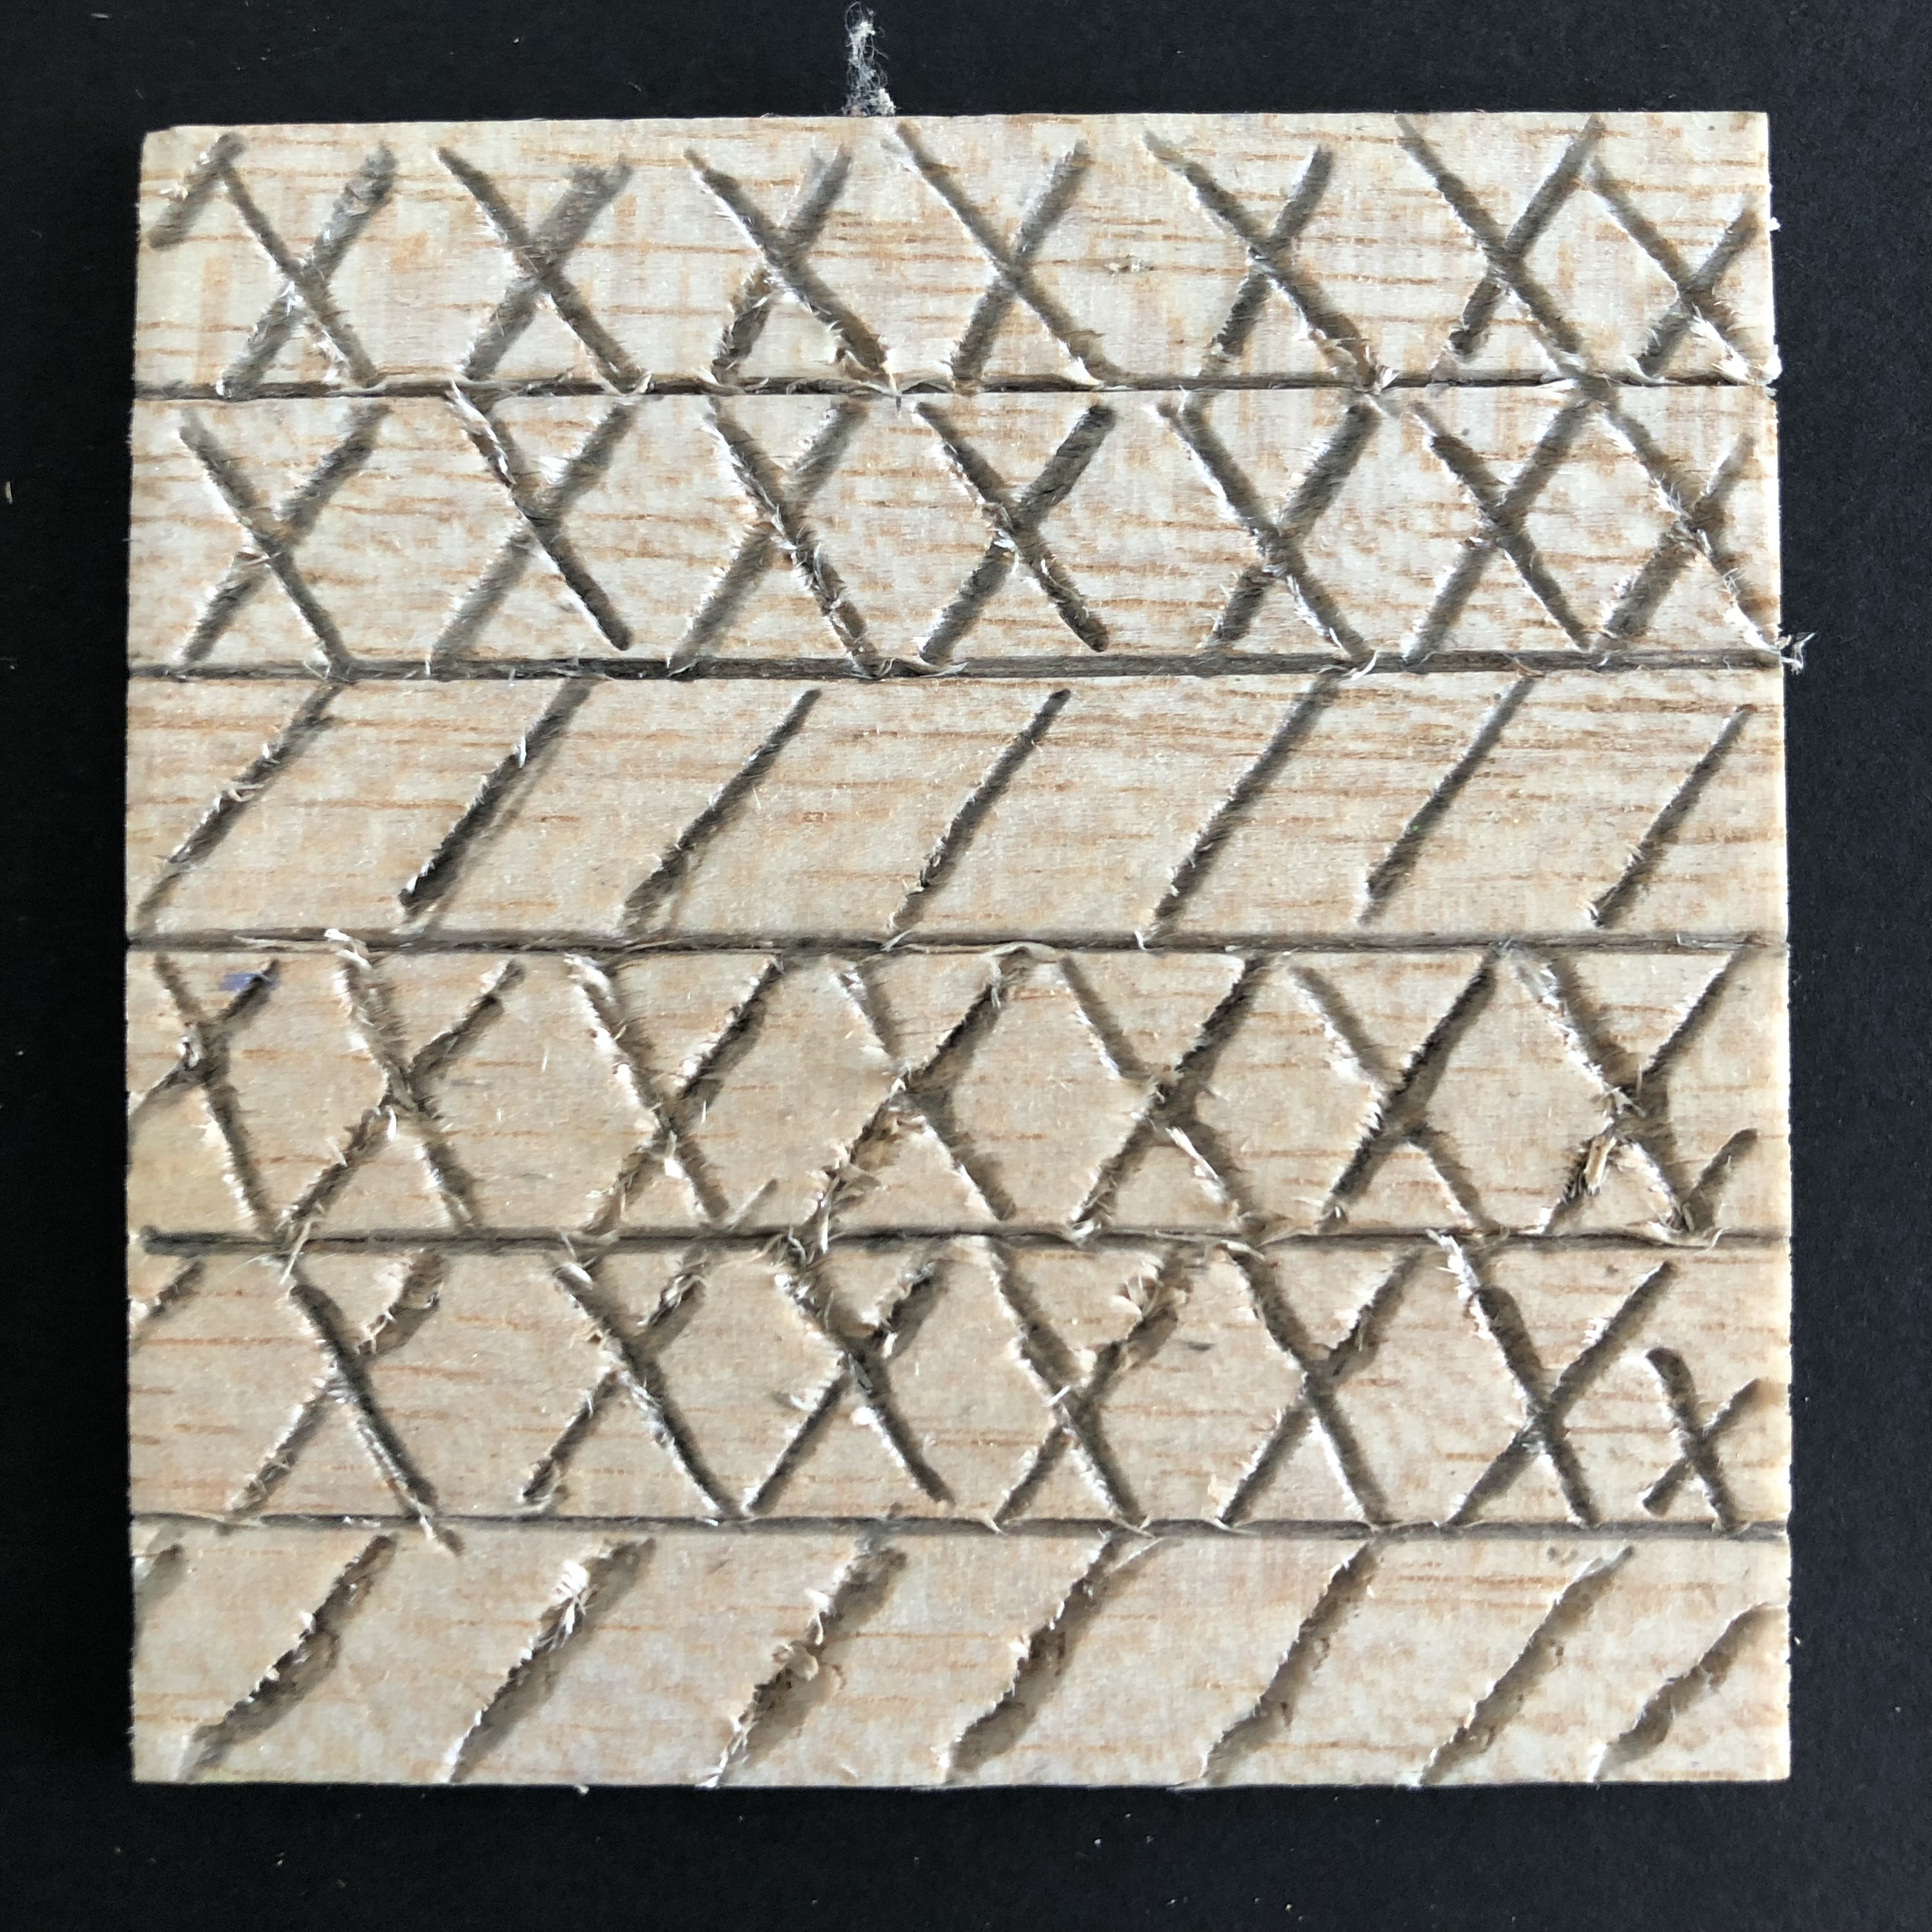

STEPS
- Pre-cut all paper prior to class
- Glue brown paper to black cardstock w/ spray glue or glue stick prior to class
- Pre-cut balsa wood pieces prior to class
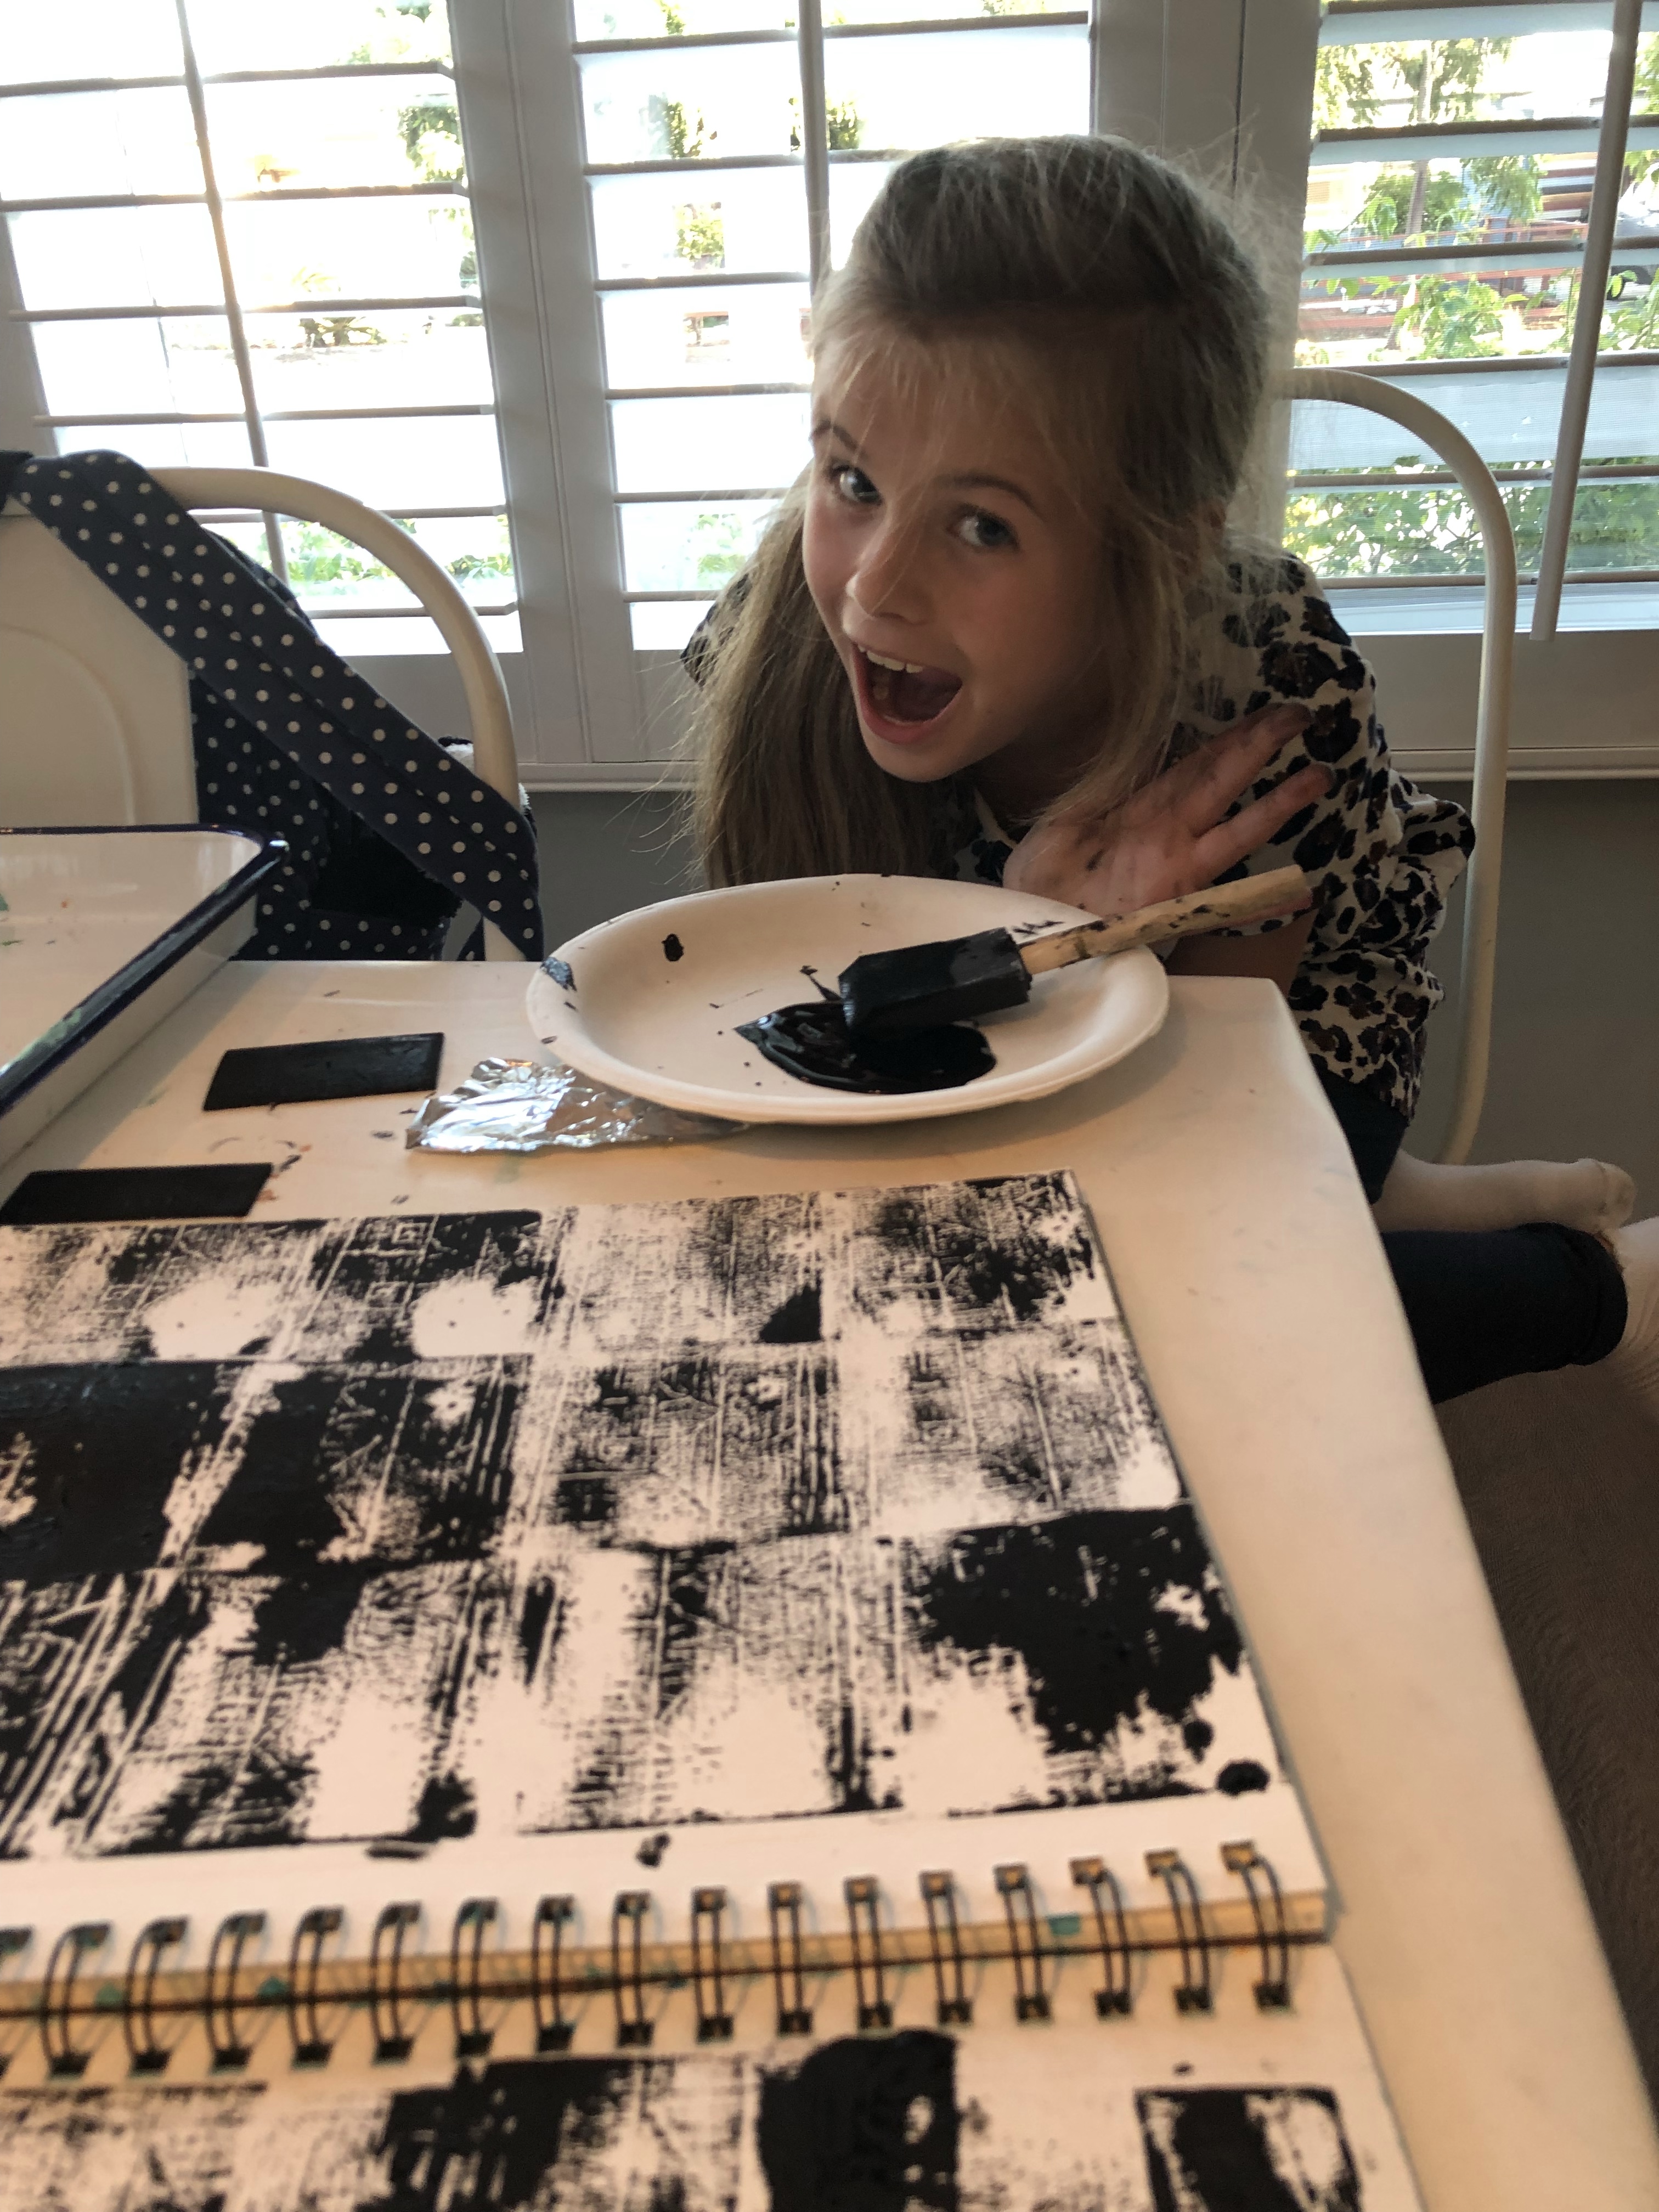
- Carve a design with a pencil into 3”x3” balsa wood
- Paint over balsa wood carving with black paint and sponge brush
- Stamp balsa wood onto ivory cardstock: Make a pattern…. dark to light, light to dark …. on the 1st stamping paint balsa wood and stamp, on the 2nd stamping use leftover paint (don’t paint again), on the 3rd stamping paint balsa wood and stamp, on the 4th stamping use leftover paint (don’t paint again).
- Carve a Duer inspired logo with initials on a small piece of Balsa wood + Use foam tape to attach
- Attach project to black and brown background with 3M foam tape


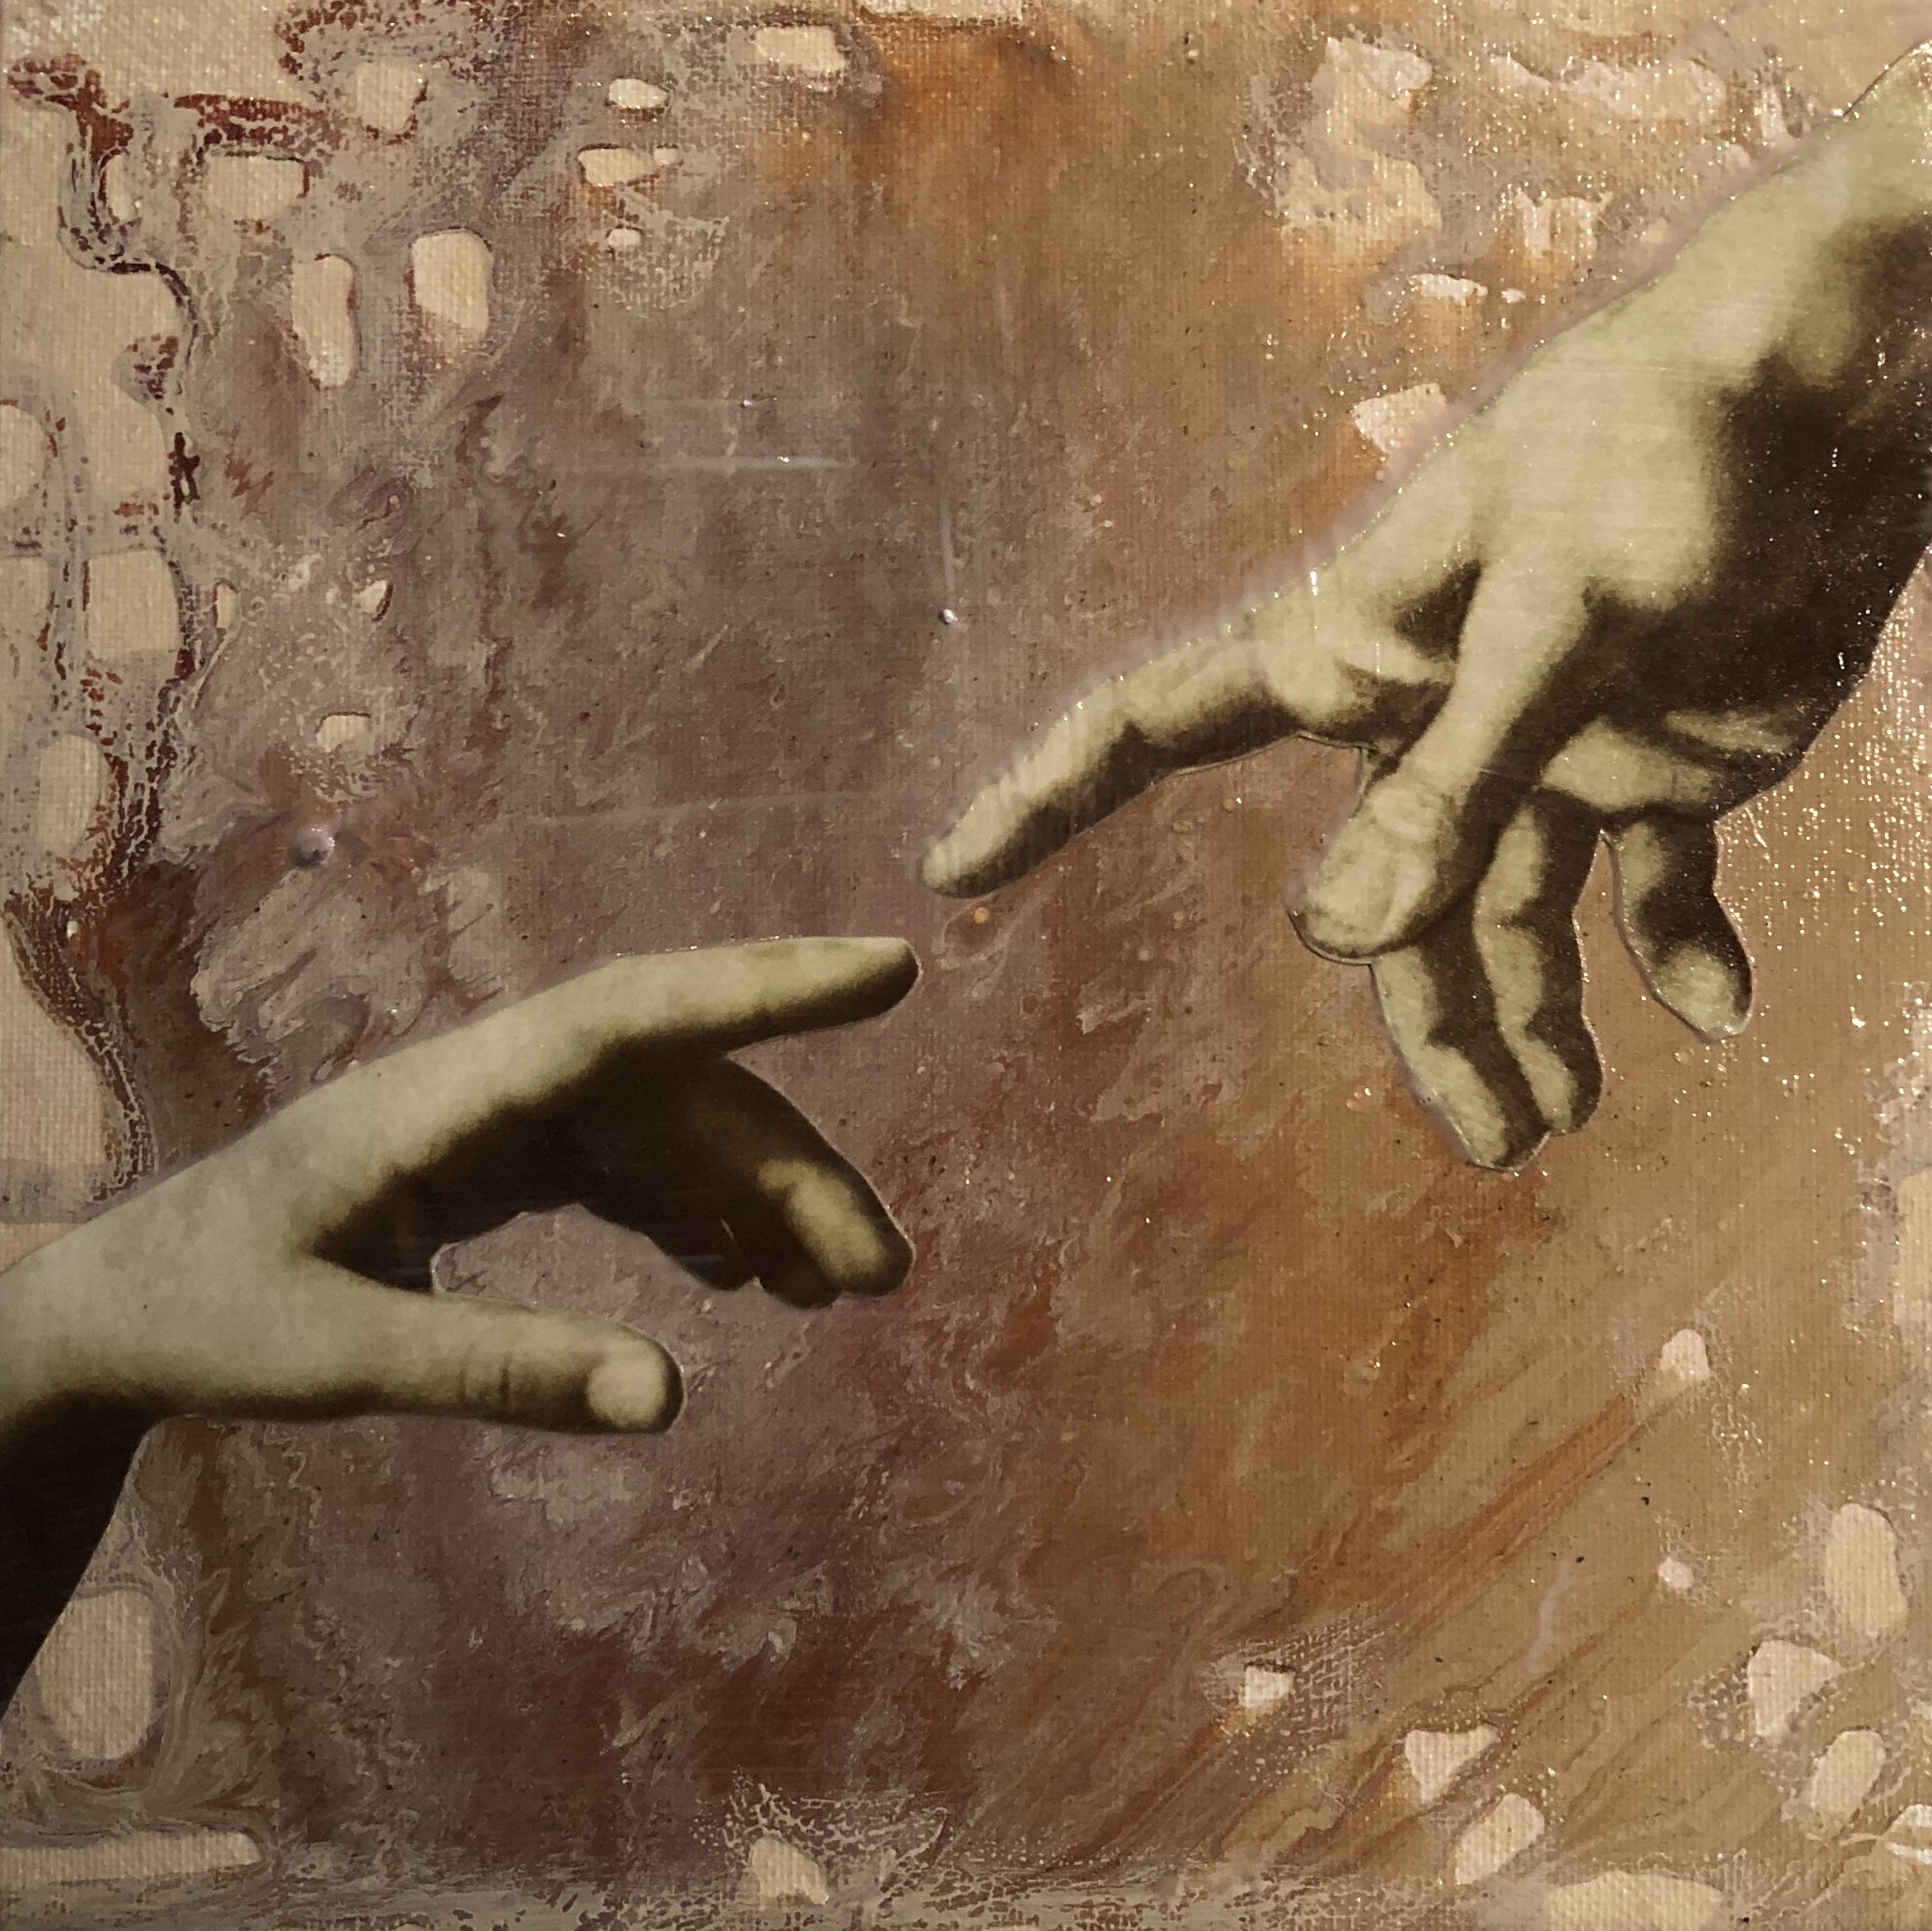
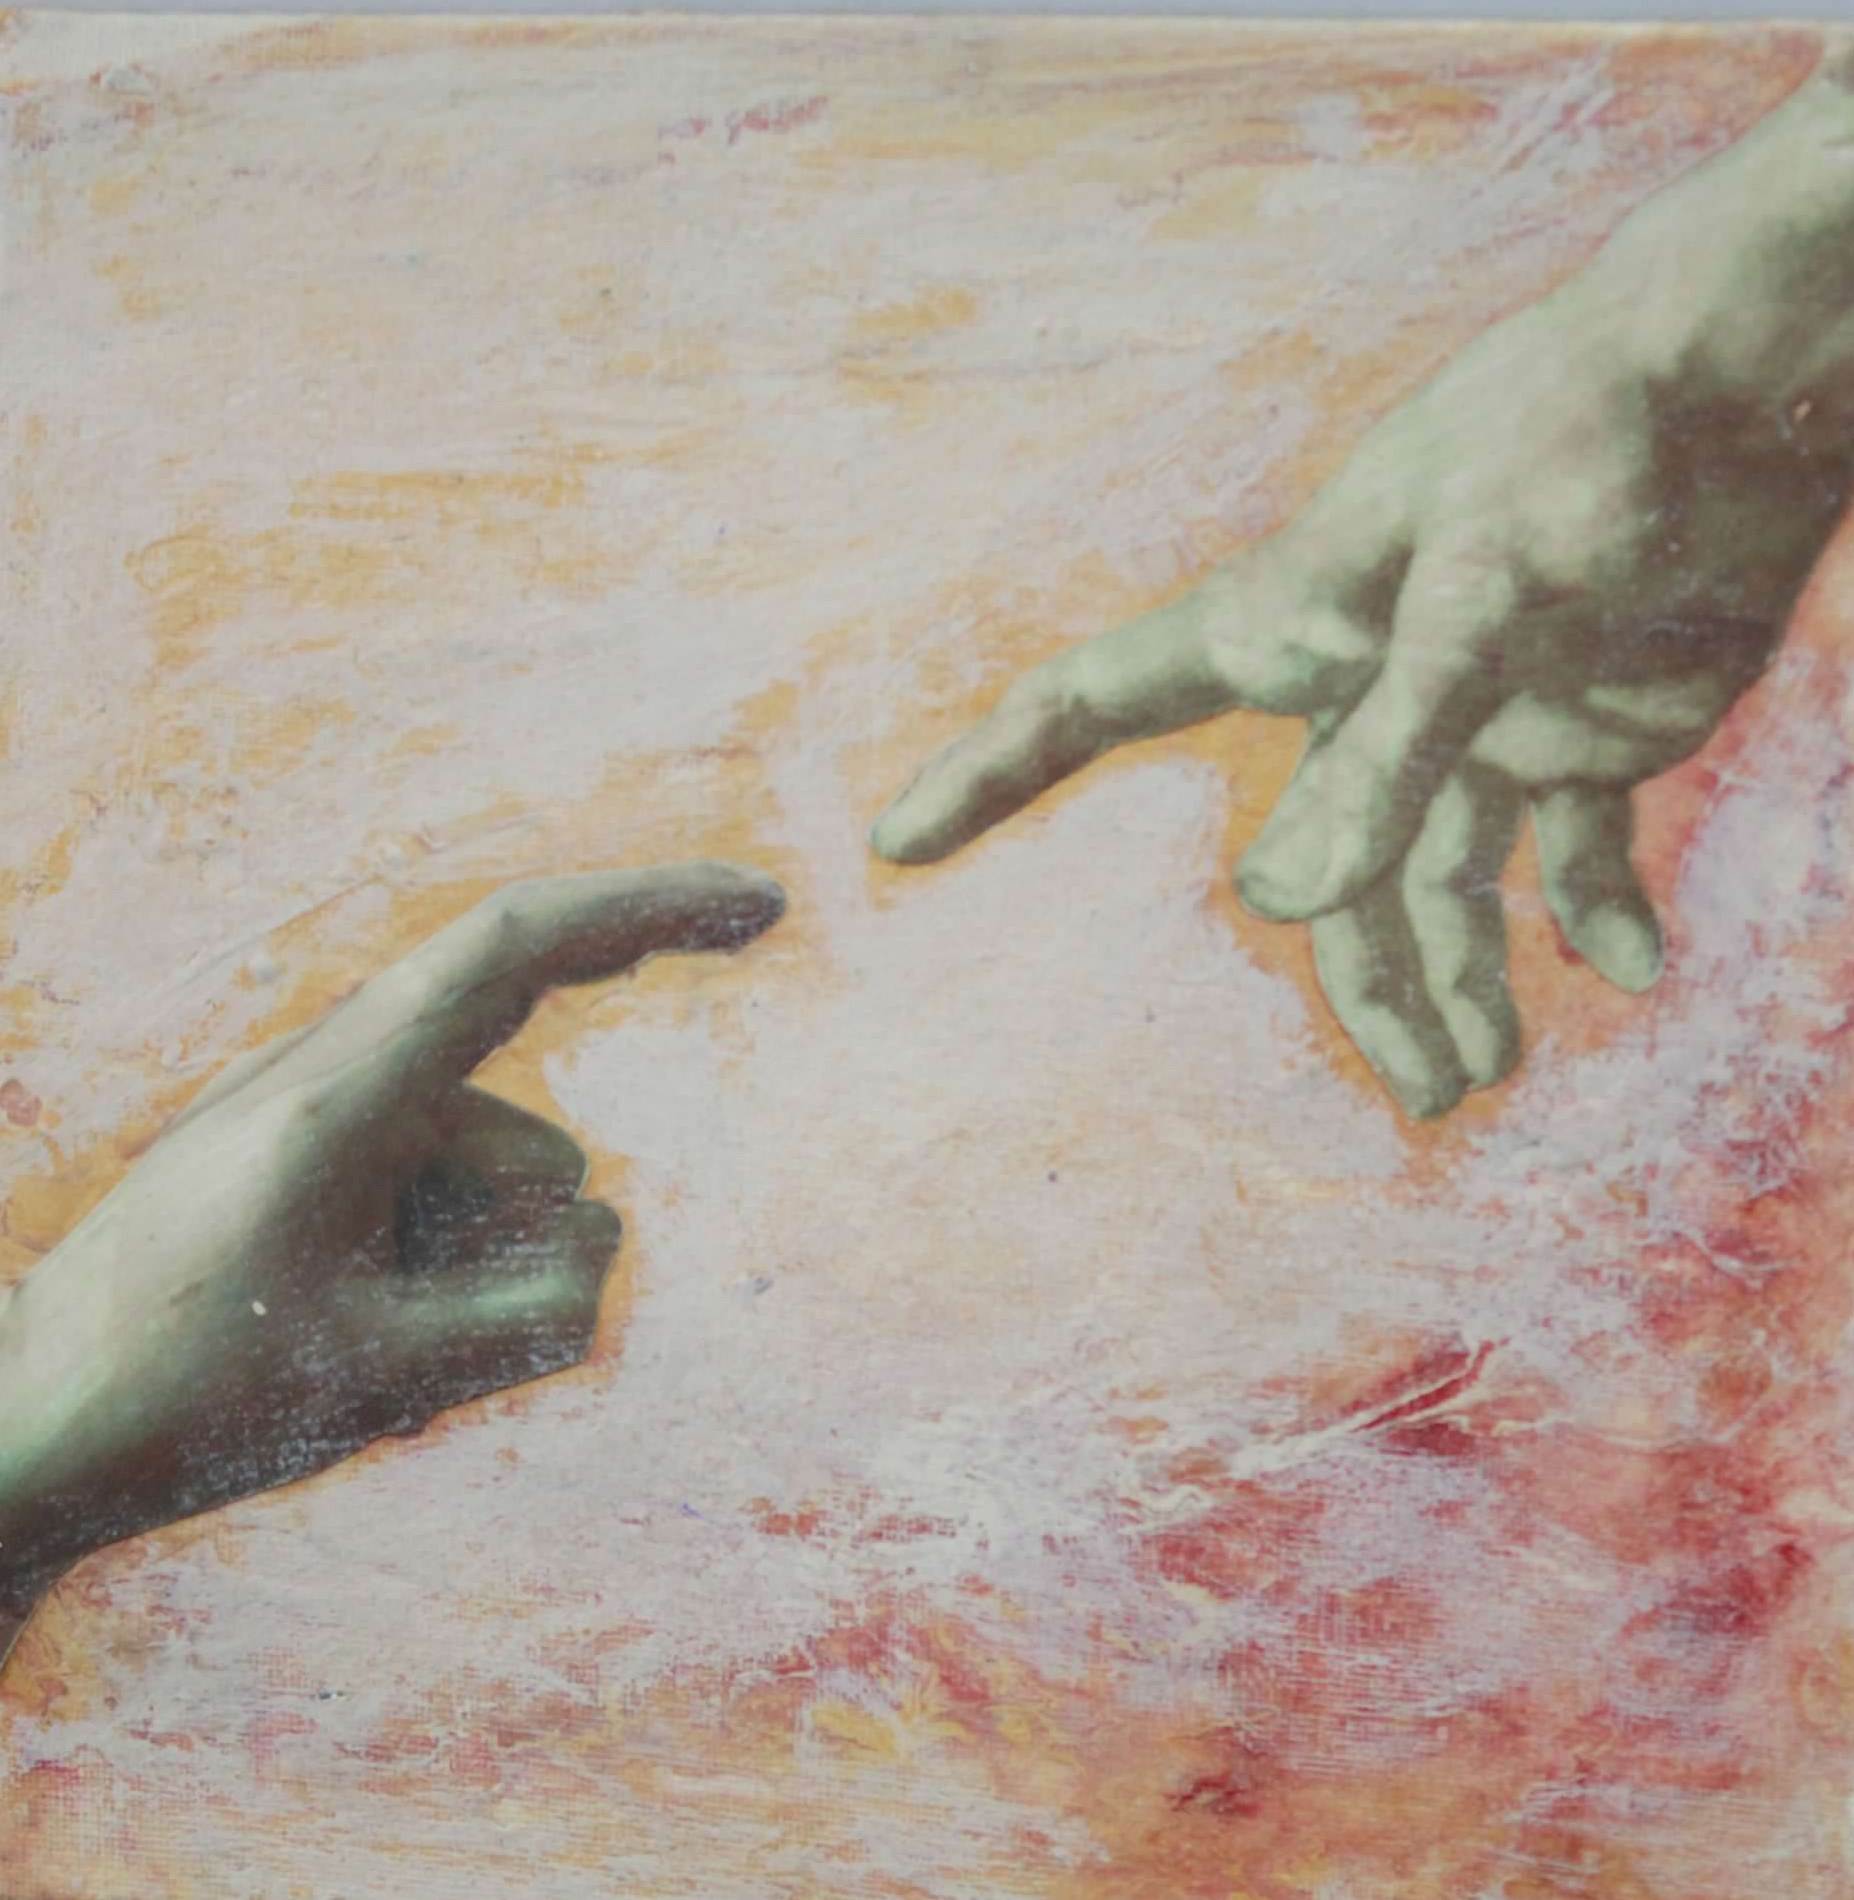
NO.5 MICHELANGELO 1475-1564
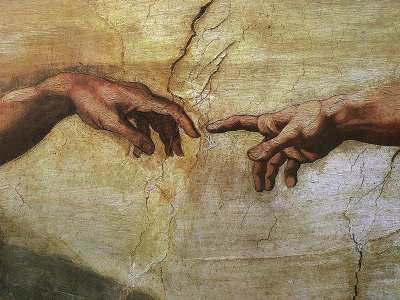


THE PROJECT + THE ARTIST
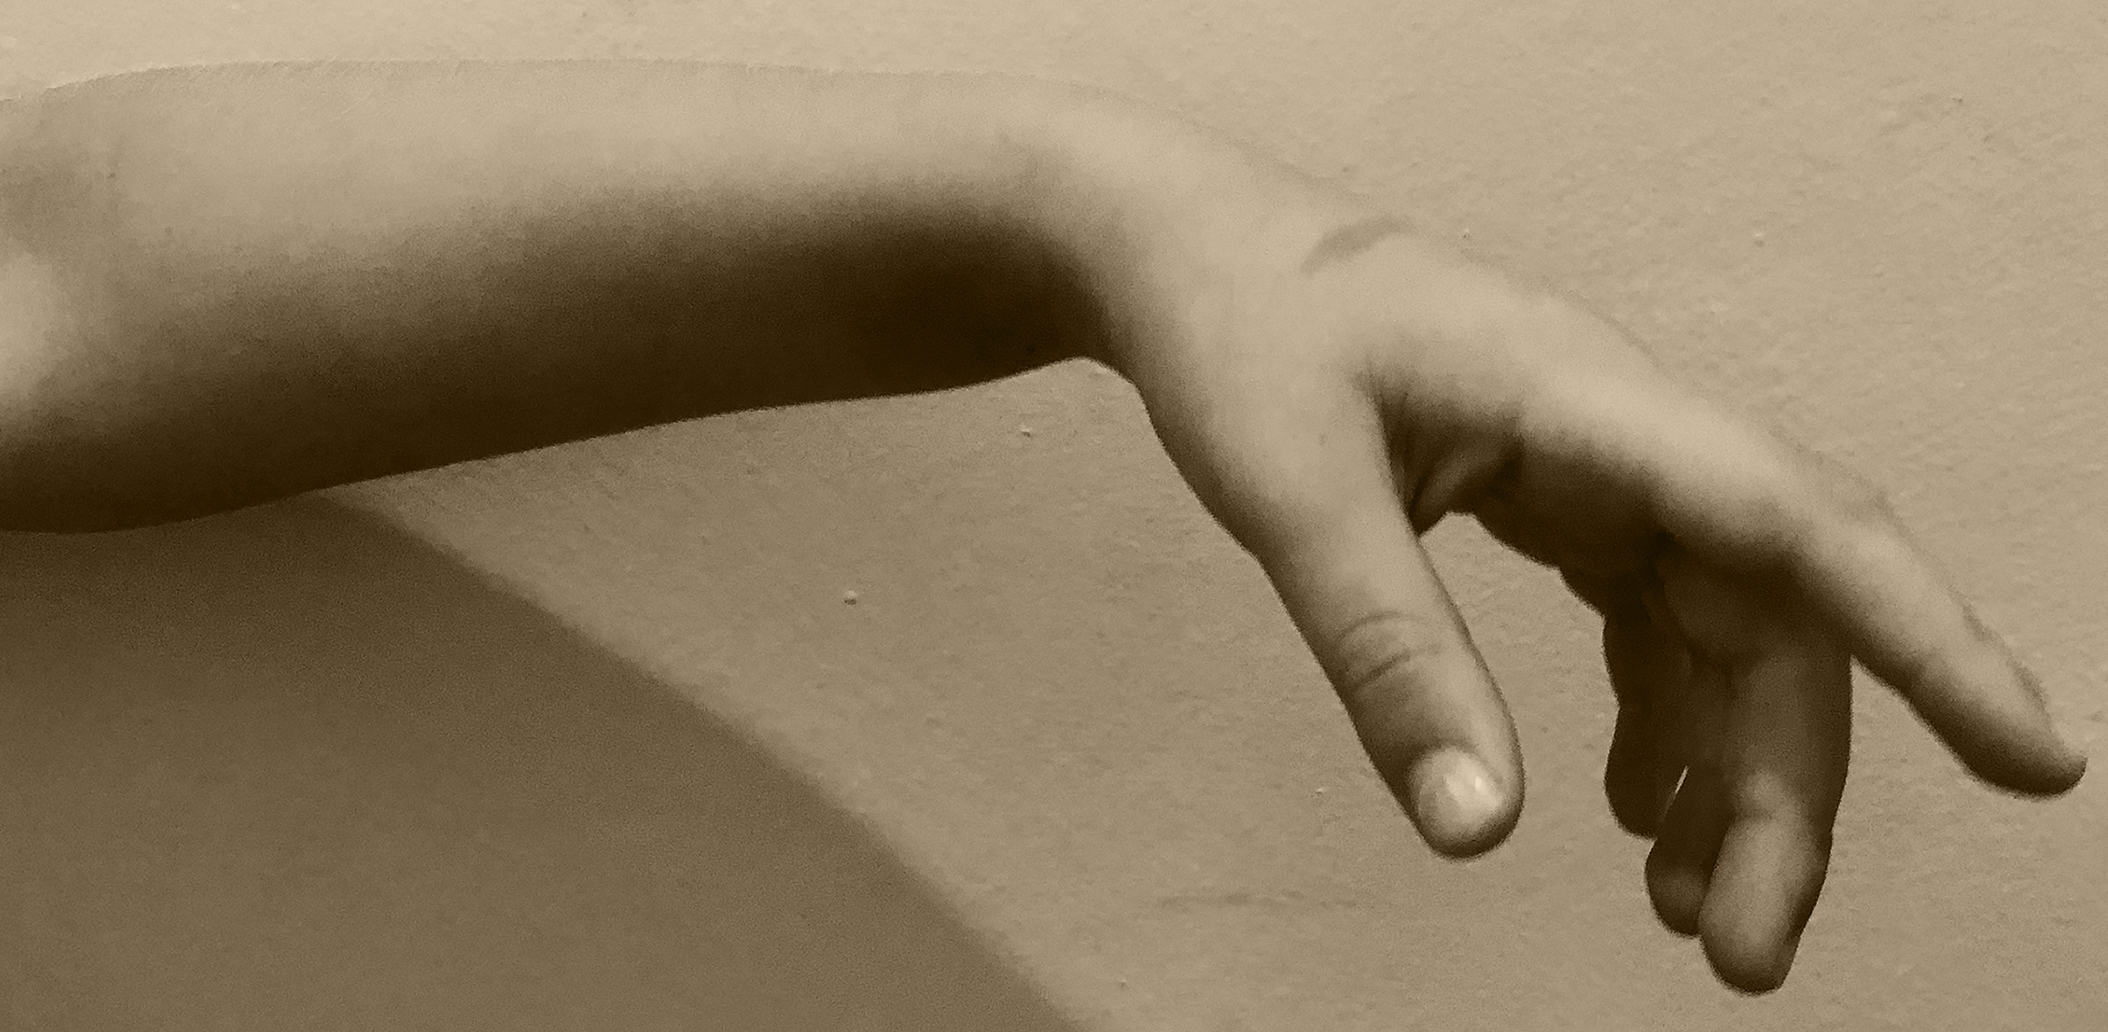
- Inspired by Michelangelo’s “Creation of Adam” hands on the Sistine Chapel ceiling
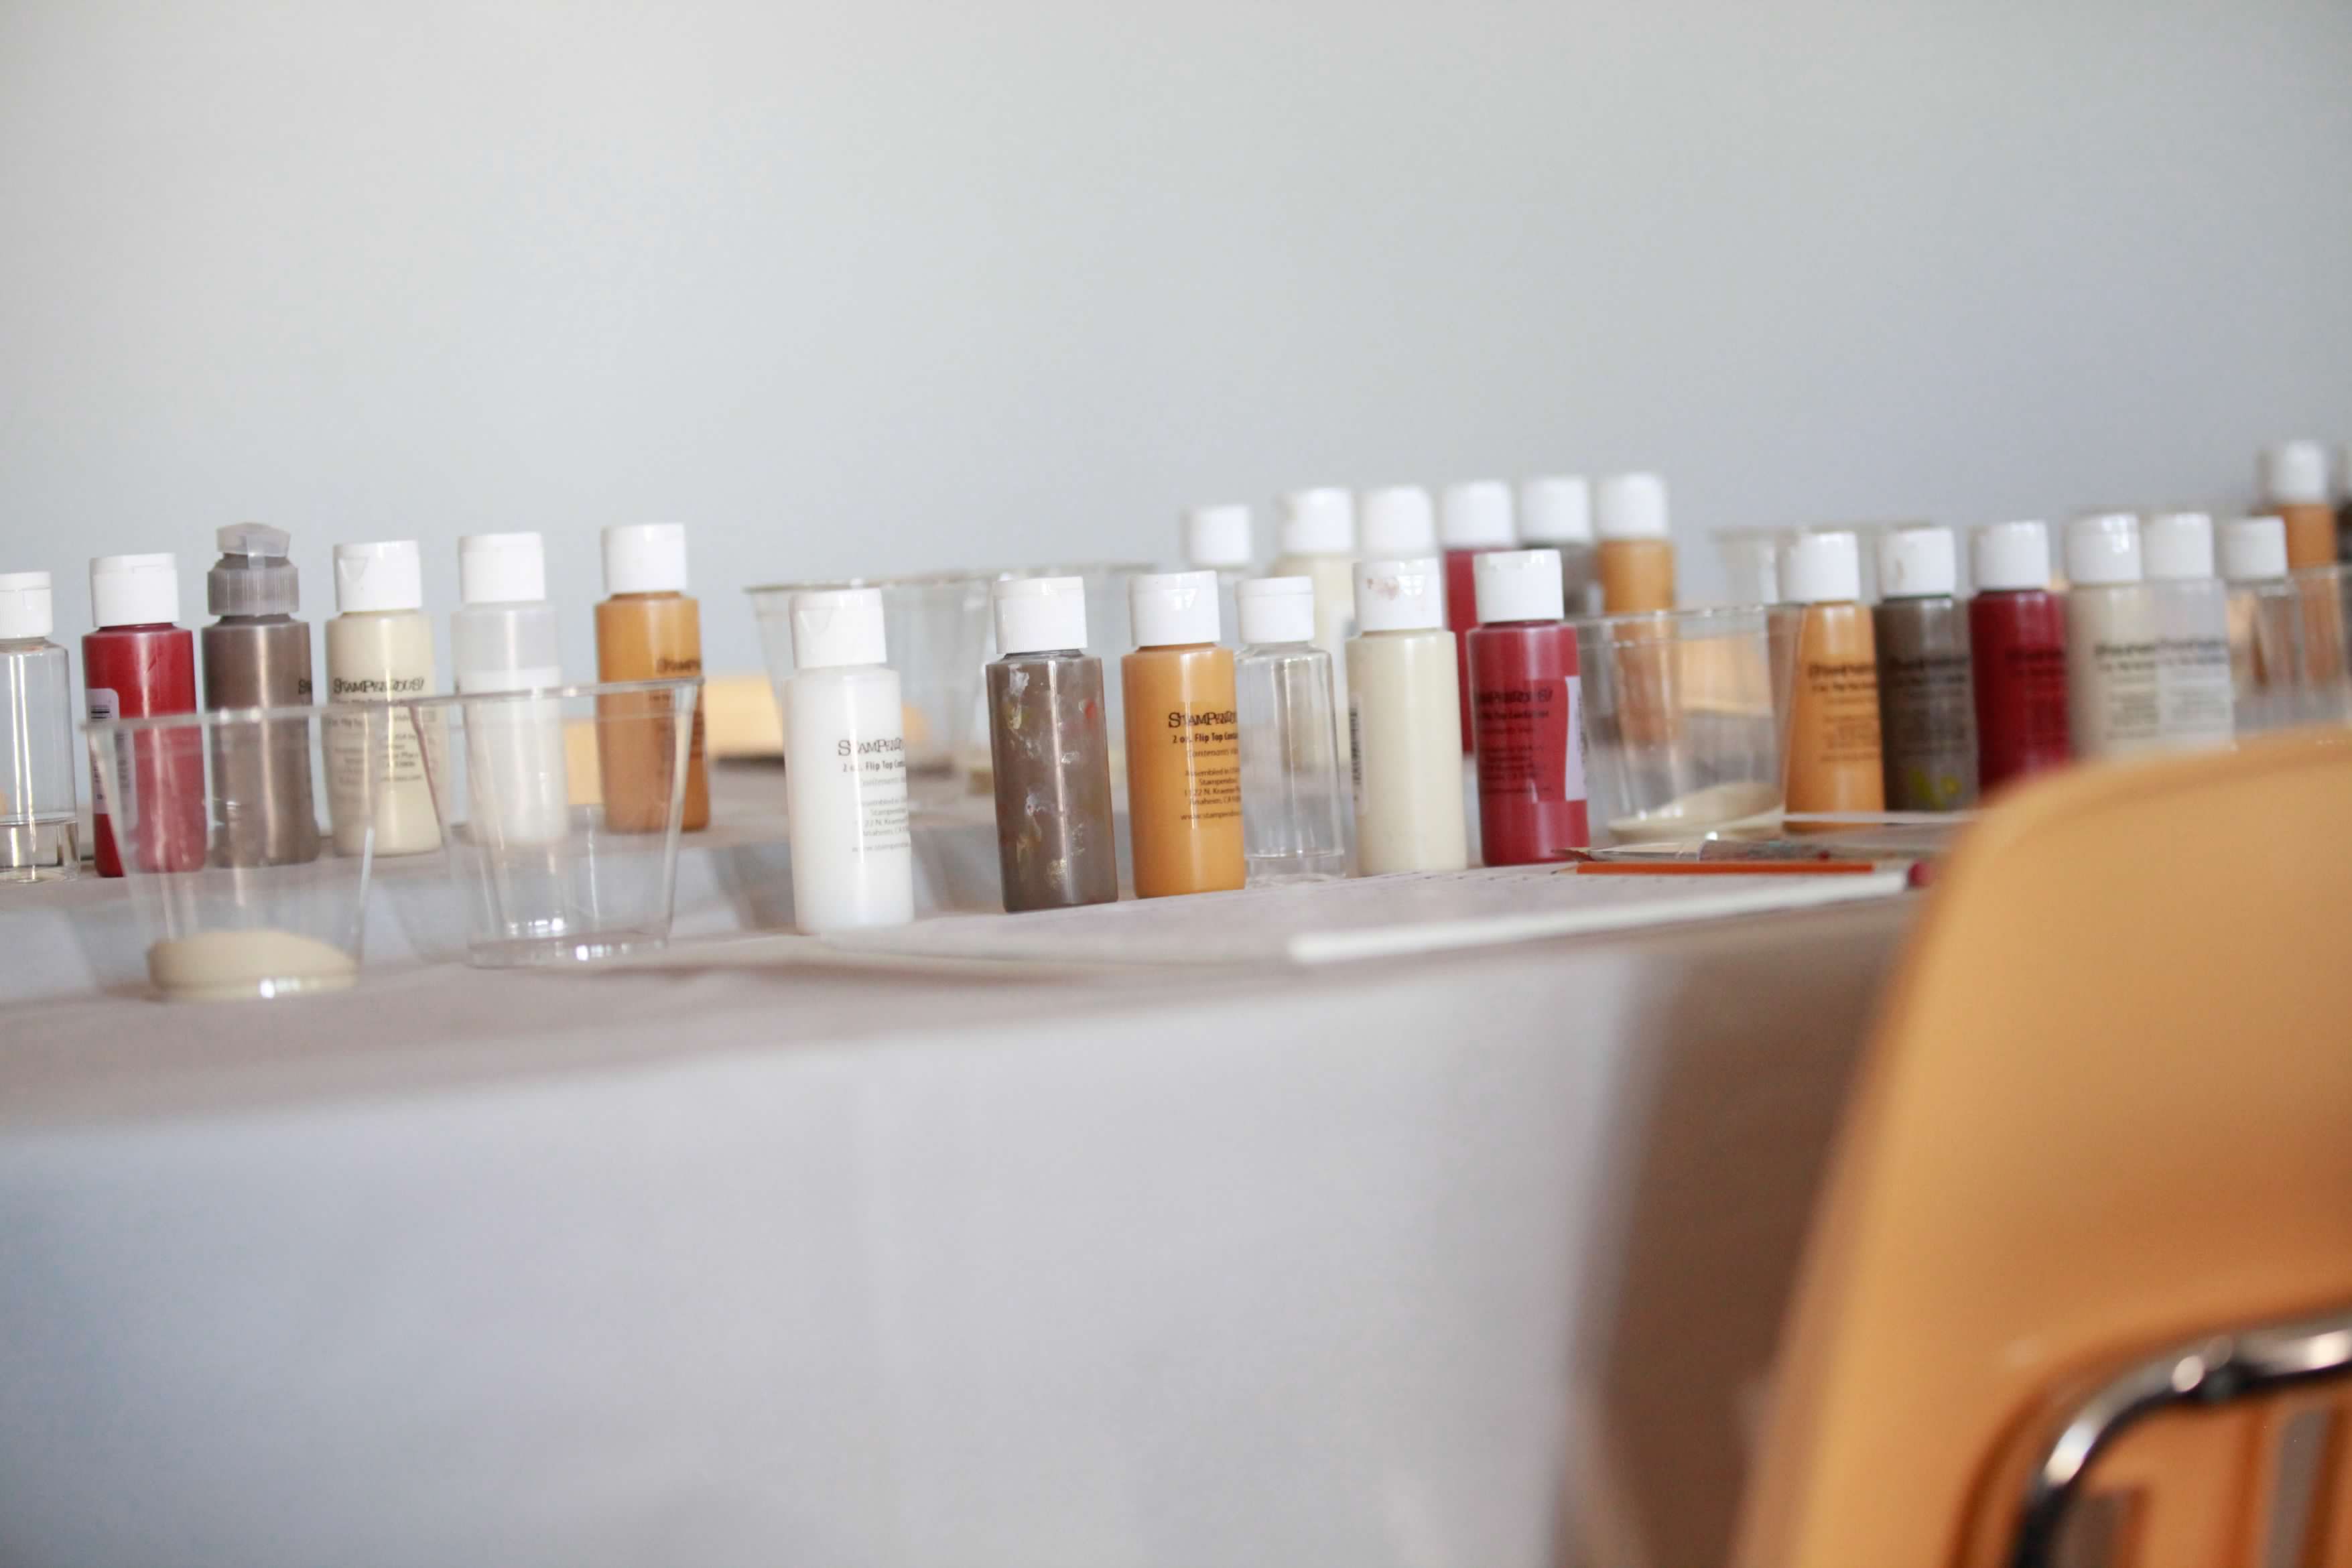
MATERIALS
- Color photo of student’s hand printed using a basic printer on standard lightweight paper and cut of each student
- Color print of Michelangelo’s hand of God
- 8″ x 8″ panel canvas
- Vallejo Fluid Acrylic paint: Unbleached Titanium, Mars Red, Raw Umber, Mars Yellow
- Extra 1/2 oz Unbleached Titanium
- Wide paint brush
- 1 oz pouring medium
- 1/4 oz silicone
- squeeze bottles to divide paint
- Wipes
- wax paper or parchment paper
- Big cups for paint pouring
- Art dryer
- Drop cloth for projects to dry on
- 1/2 oz matte medium
- Sponge brush

STEP No.1
- Prior to day of class:
- Photograph student’s hand in the pose of Adam of from Michelangelo’s painting
- Enhance photos to give a sepia hue using a filter or in Photoshop using this formula:
- Image
- Adjustments
- Black and white
- Click tint
- Hue 35
- Saturation 20
- Print using a basic printer on standard lightweight paper
- Pre-cut of each student
- Sepia in photoshop:
- Using a basic printer on standard lightweight paper, print student’s hand and Michelangelo’s hand of God
- Pre-cut hand photos


STEP NO.2
- In class students pre-paint canvas completely with Unbleached Titanium


STEP NO.3
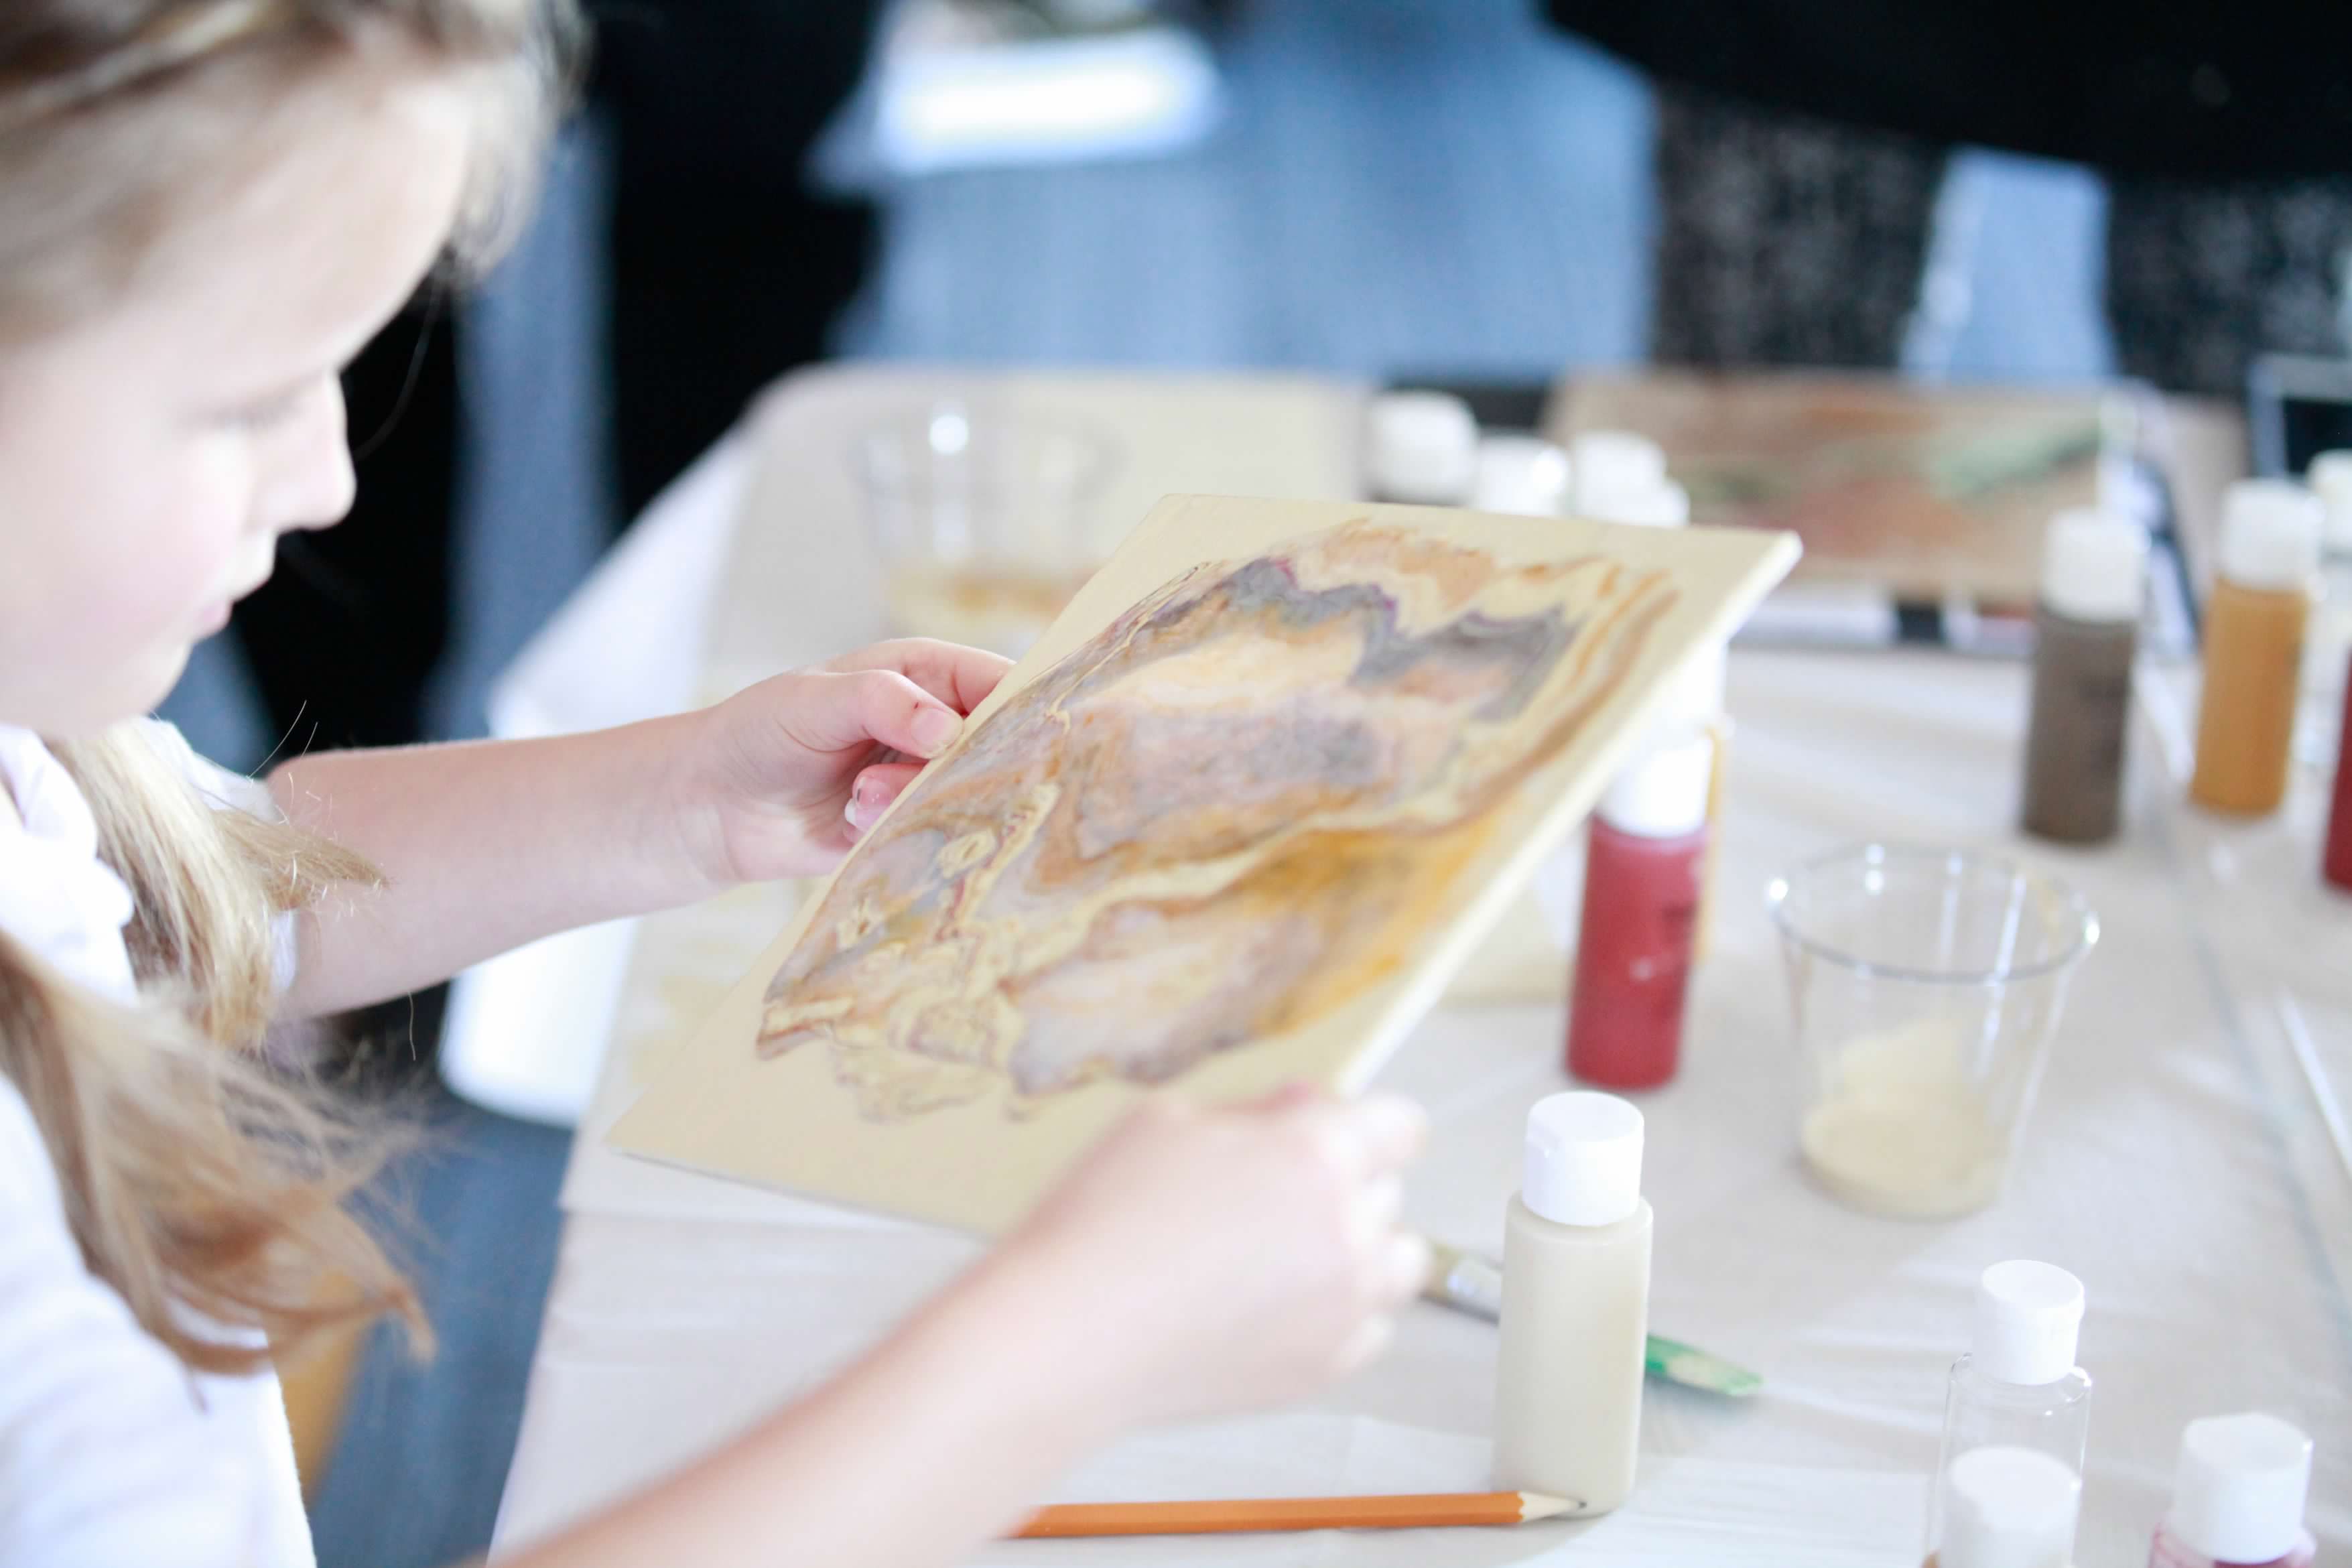
- Paint pouring fun! [You may want to look for paint pouring demos to watch on you tube]
- Follow this formula:
- Use one cup for all the paint
- 3 drops of silicone to Unbleached Titanium
- 7 drops of medium to 3 drops of paint [Unbleached Titanium, Raw Umber, Mars Yellow], Except Mars Red is only 1 drop
- Layer colors and pouring medium all in one cup
- Pour on top of canvas
- Move canvas around. Don’t over work or it’ll look like cheese. You Can do another layer on top if it gets messed up.


STEP NO.4
- Dry in the sun or with an art dryer
- Projects may not fully dry before the end of the classes

STEP NO.5
- Teacher may need to take art projects home an adhere hands for students or students will need to do this another day
- The projects may have a “greasy” coat on top due to the nature of the silicone medium, but the Matte Medium will take this off
- Wrap + adhere hands with Matte Medium and a sponge brush
- put a layer of Matte Medium over the entire project
- Let dry


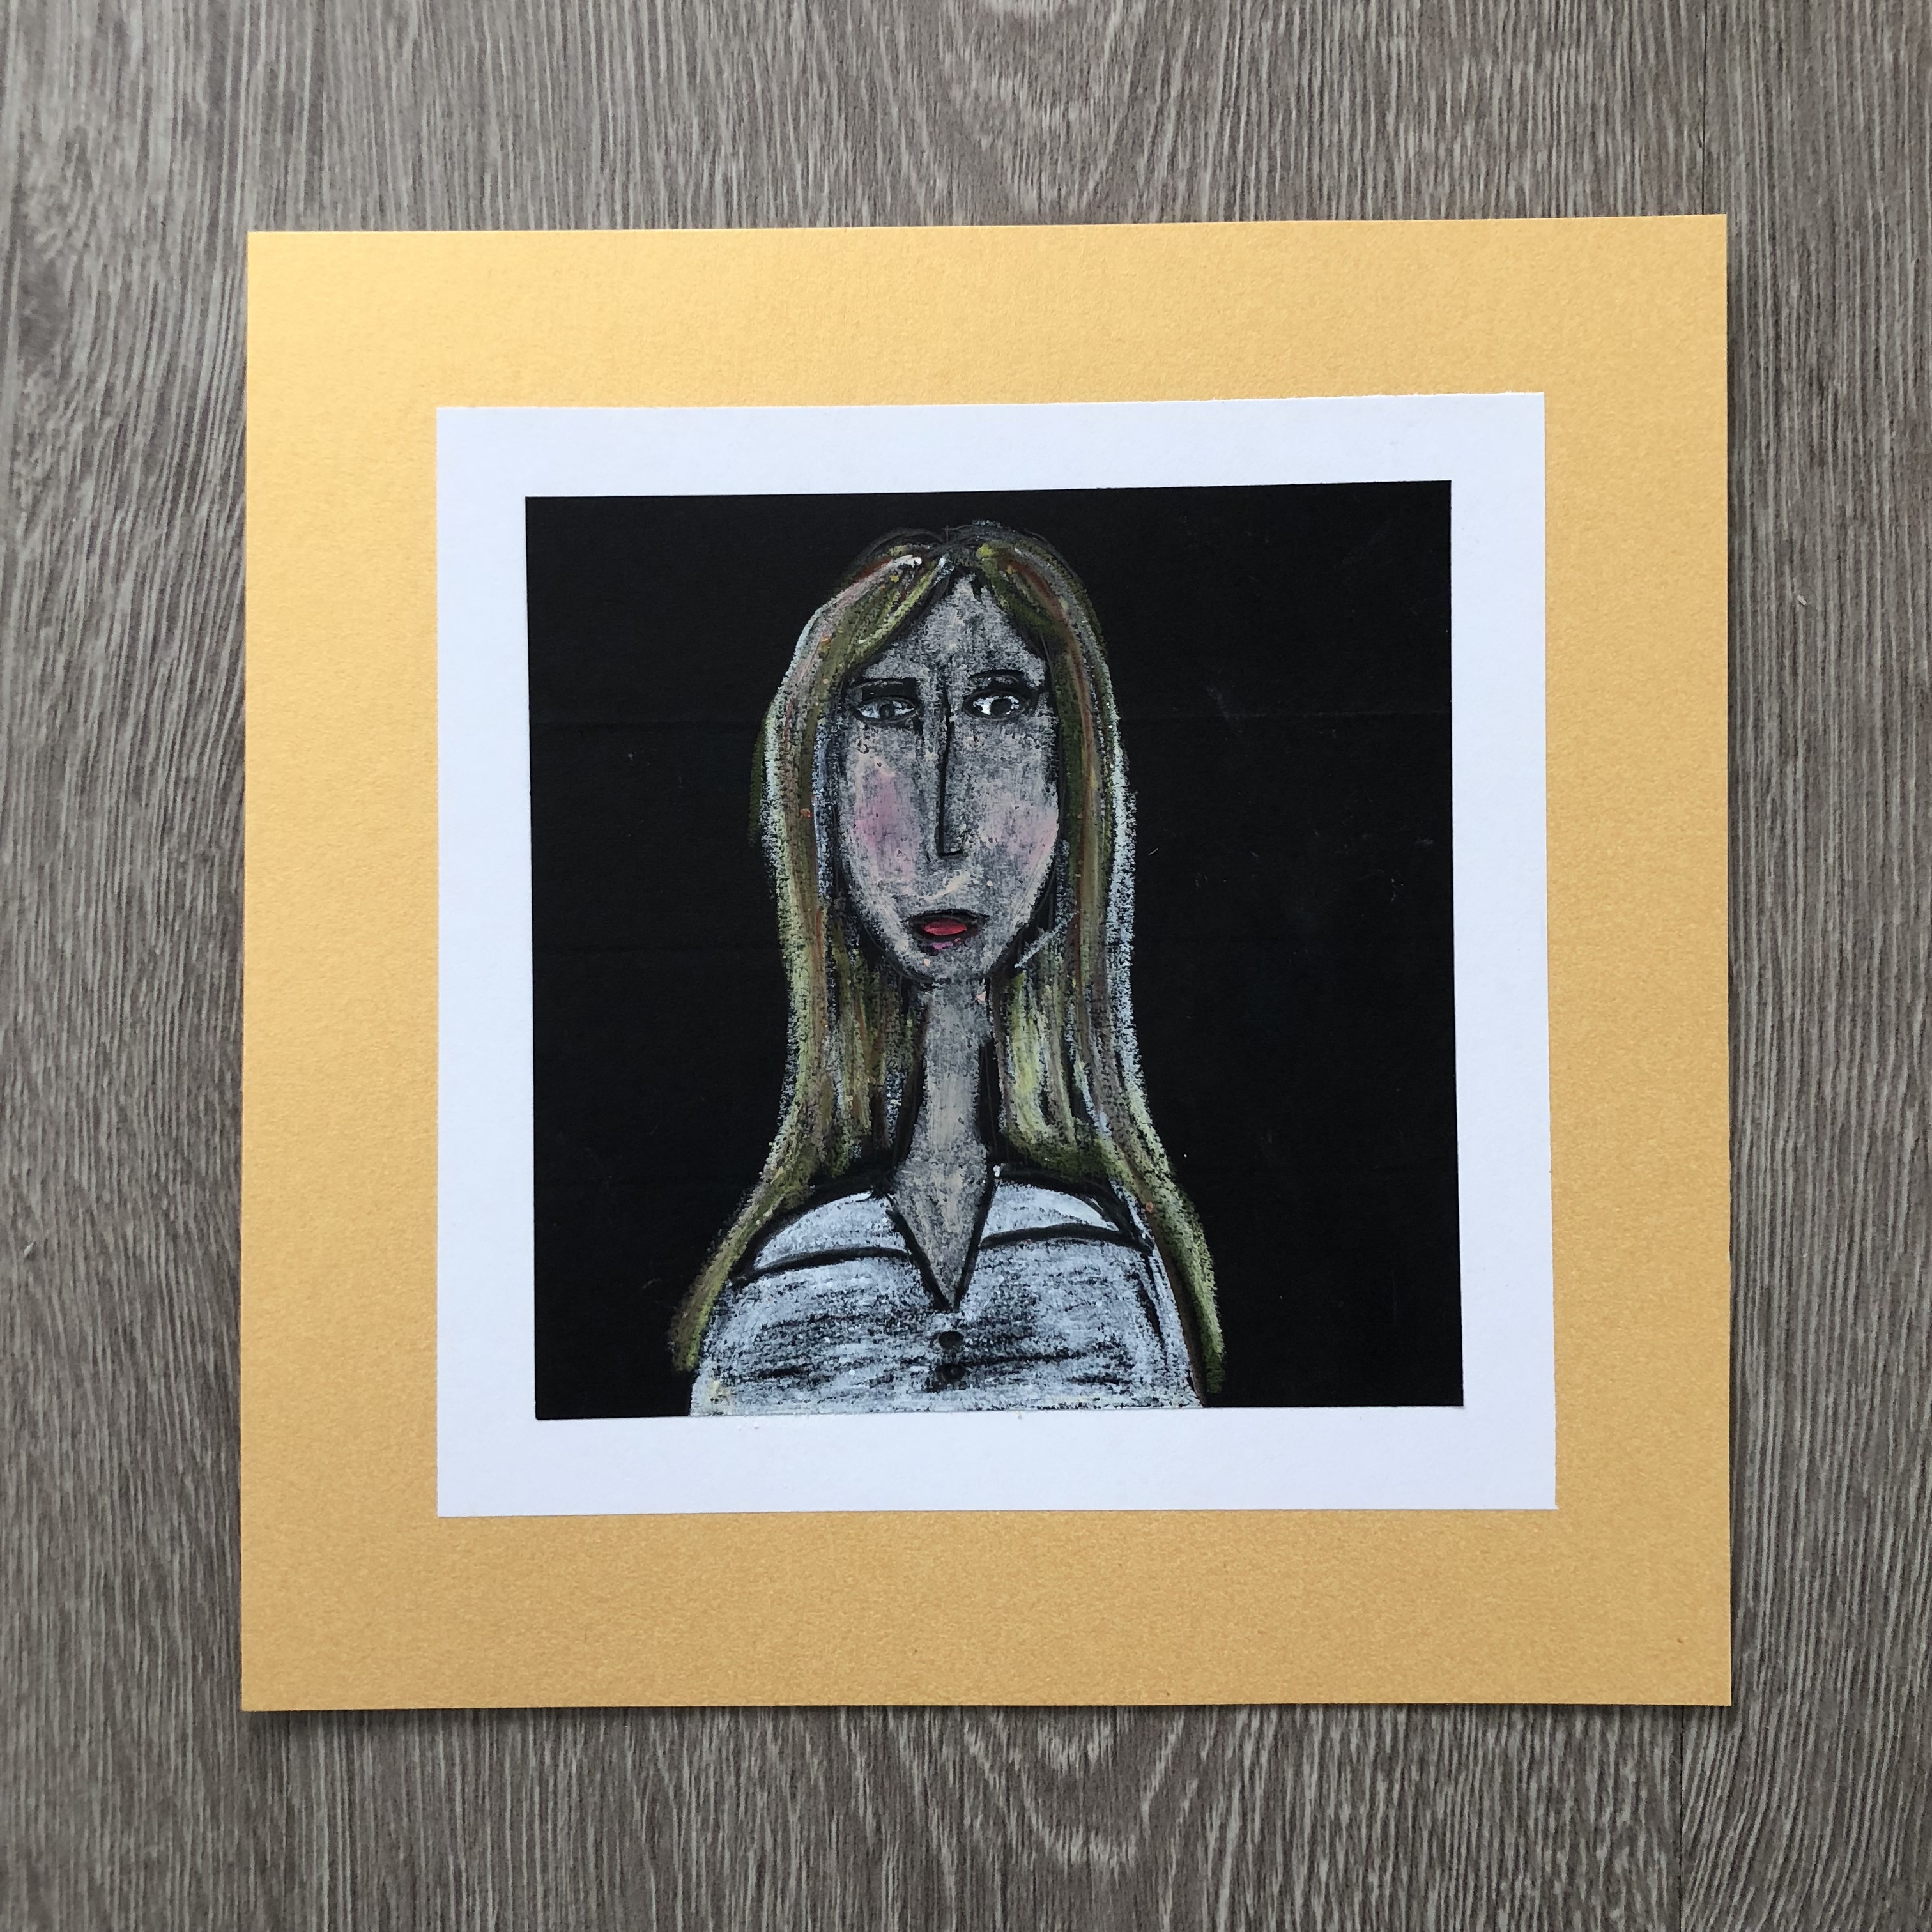
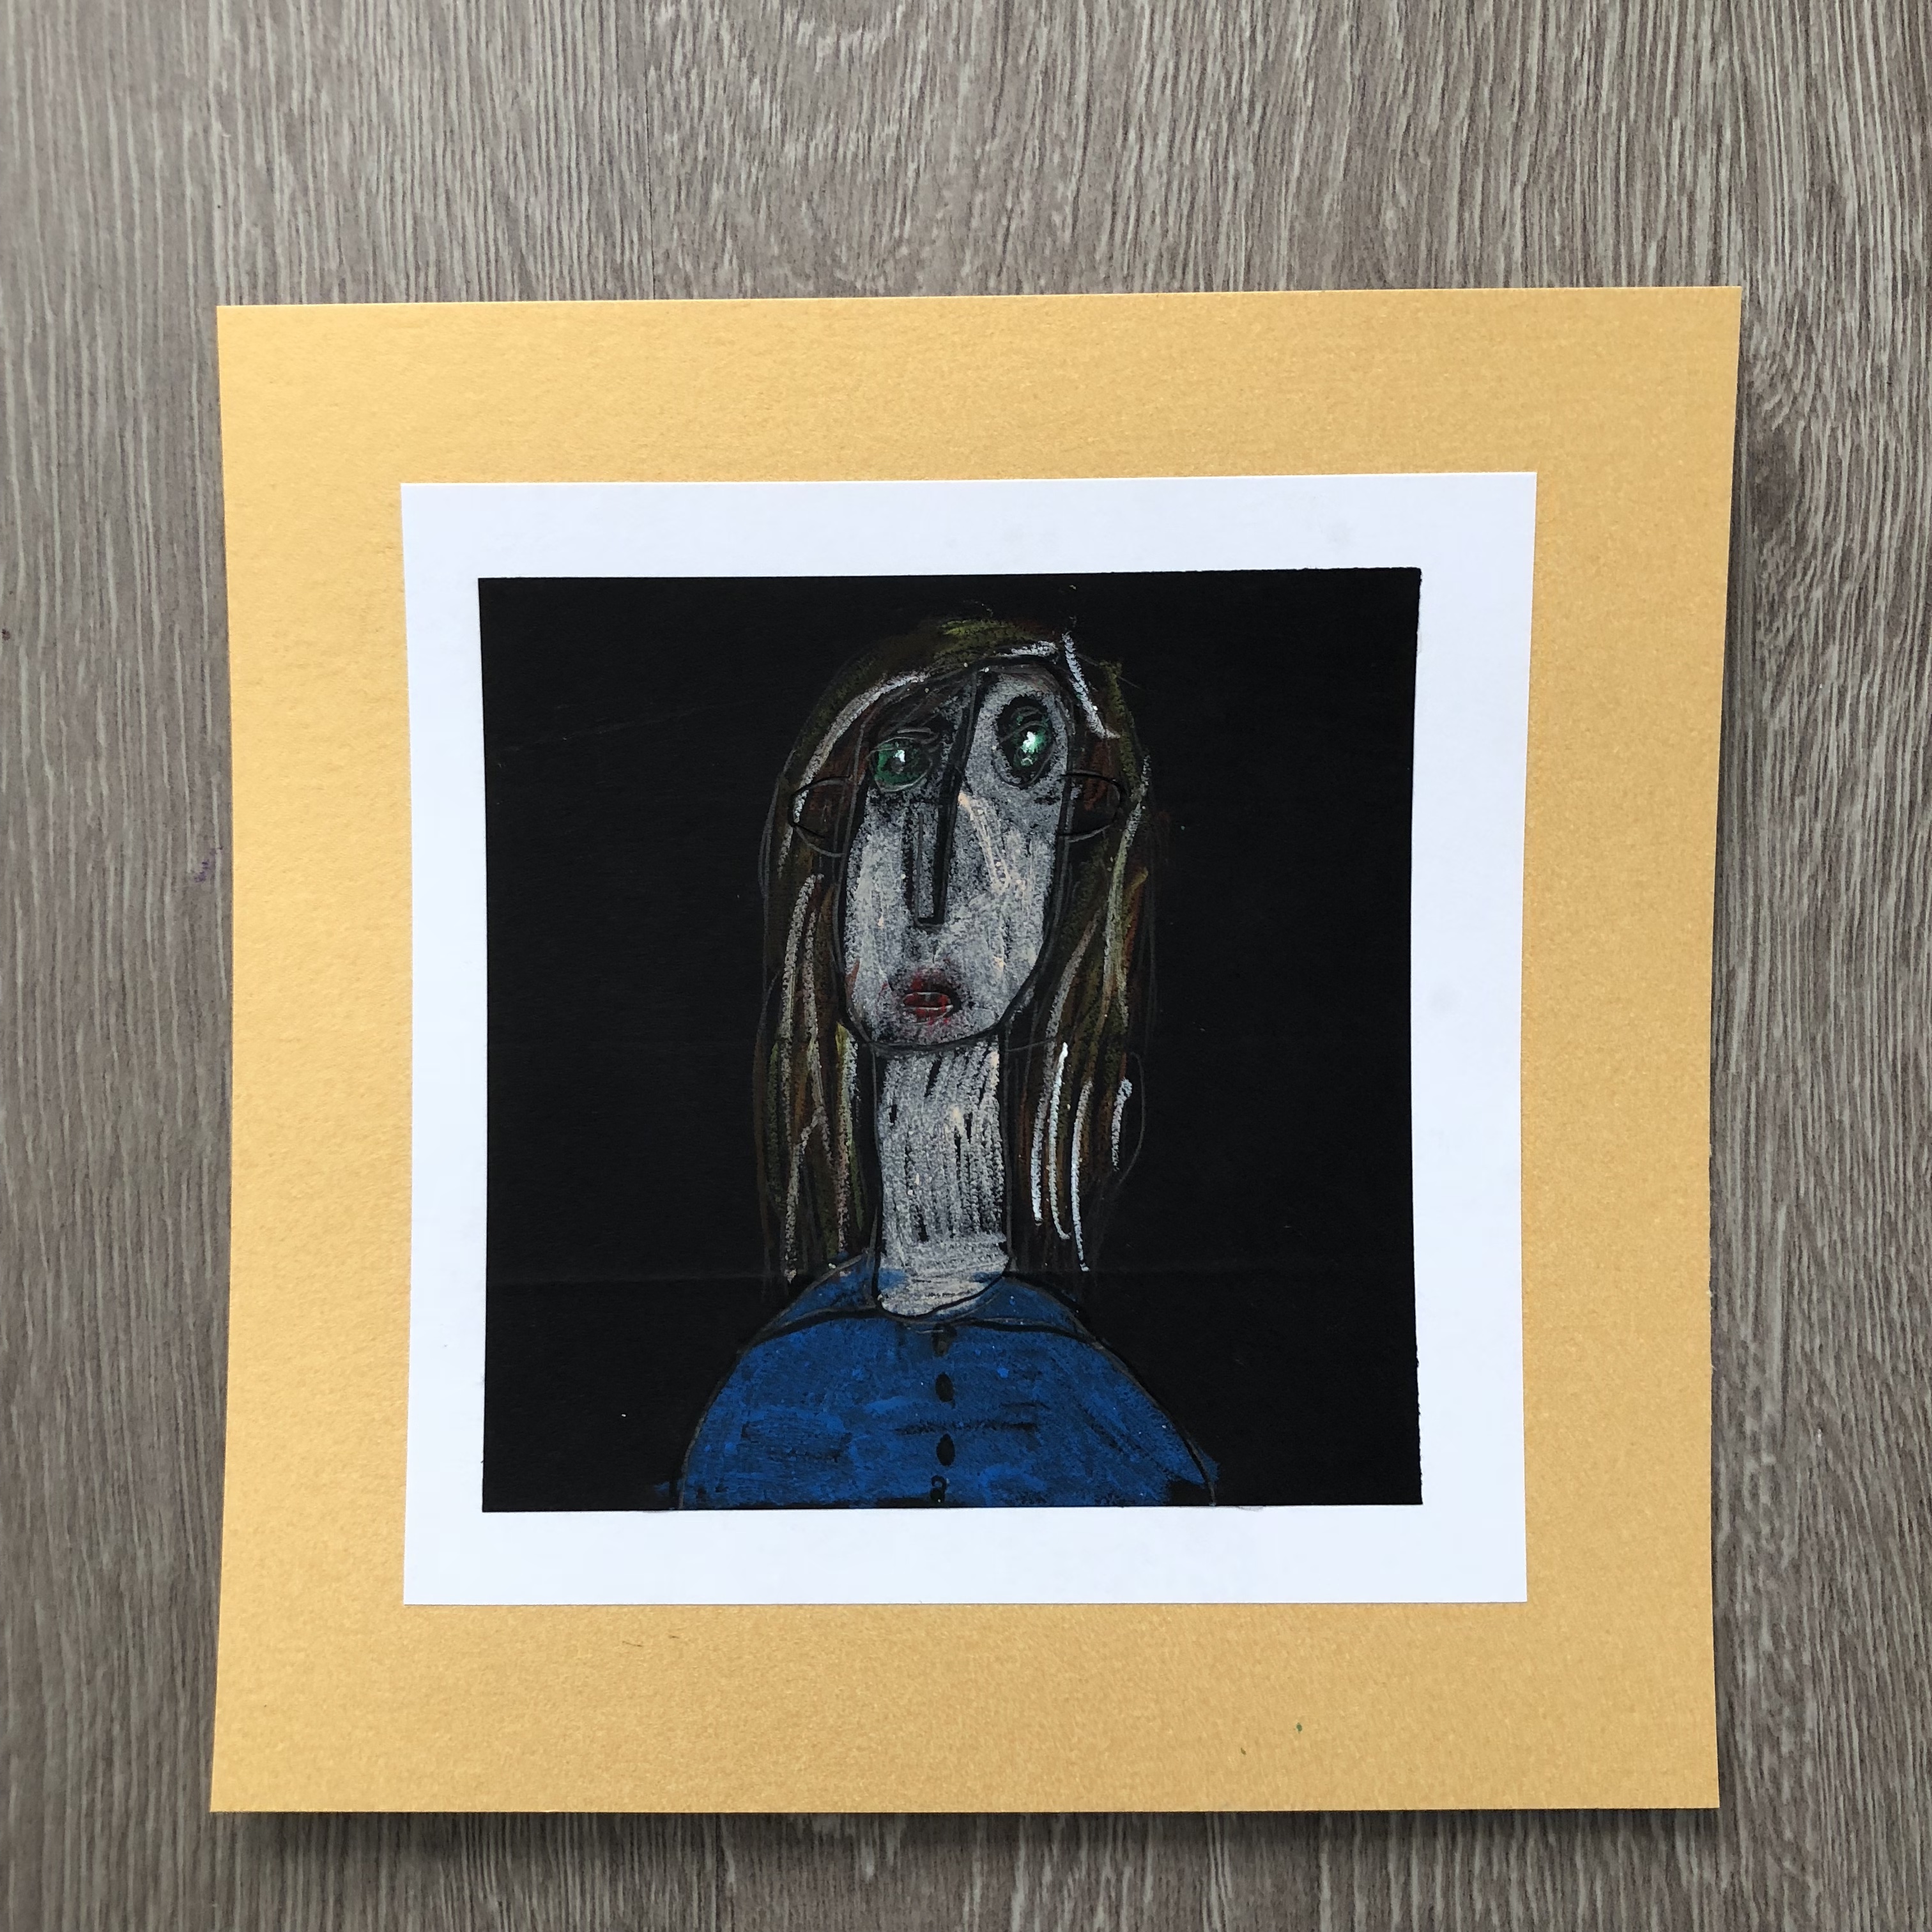
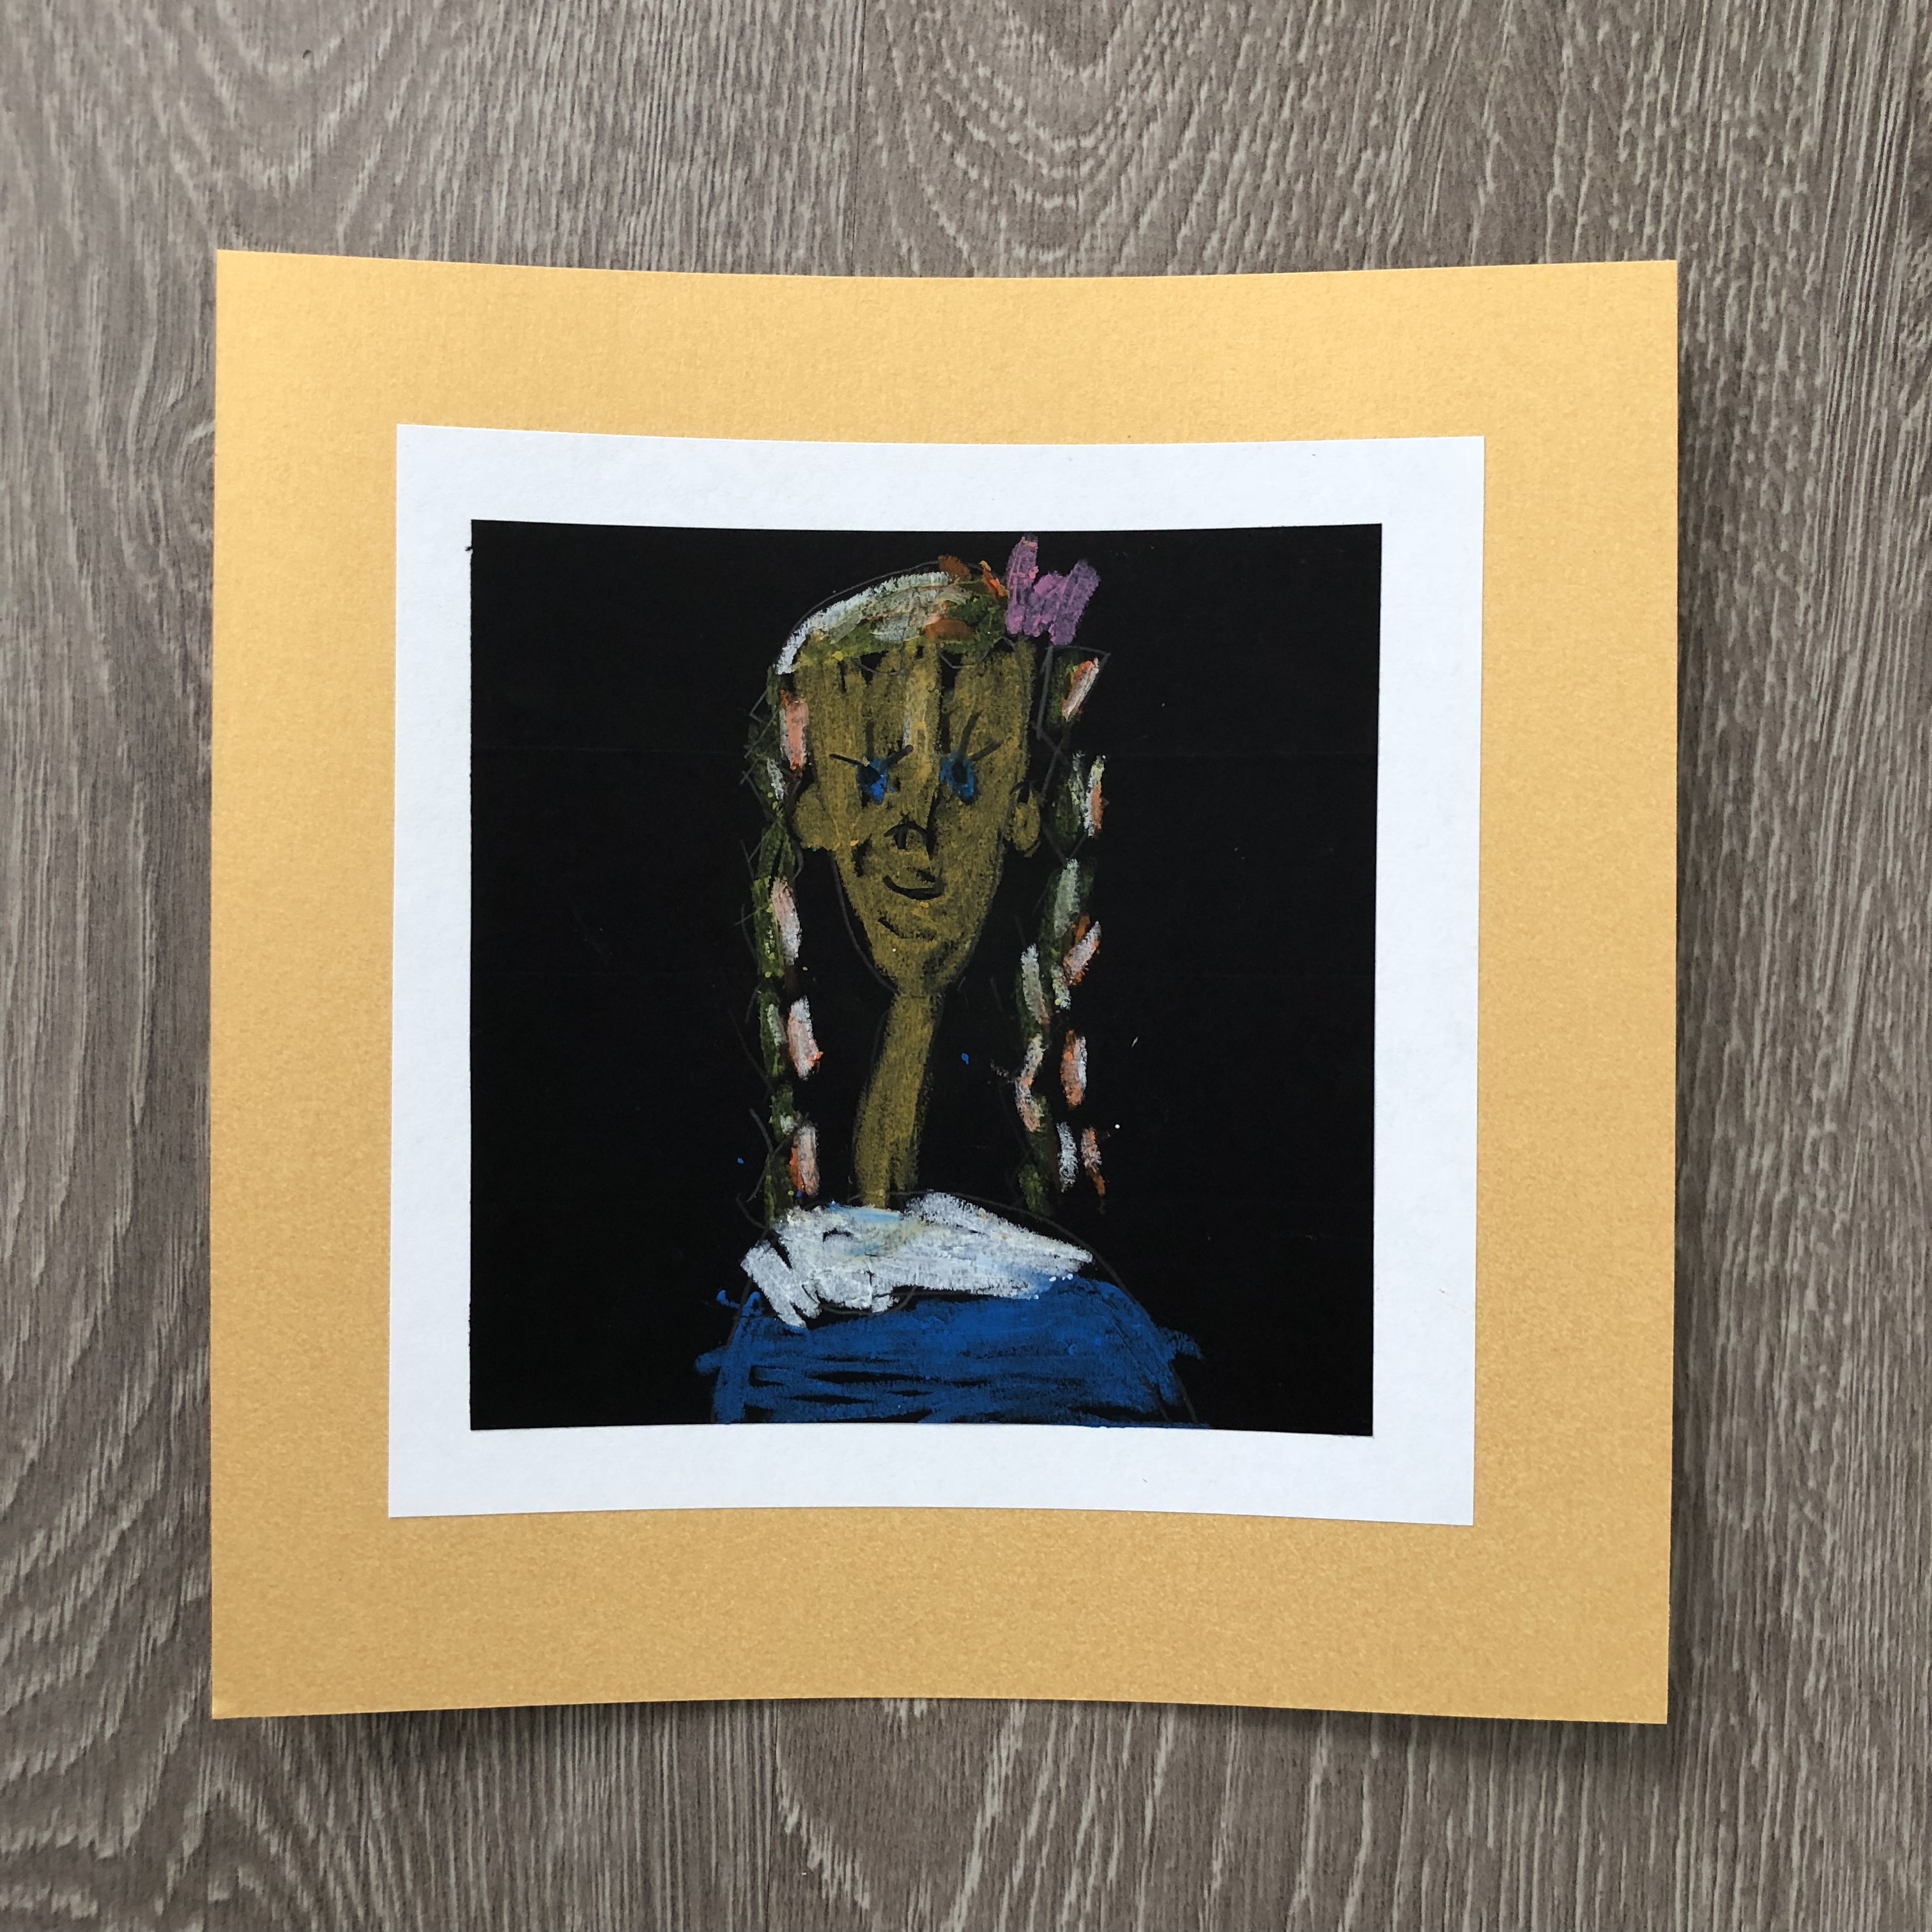
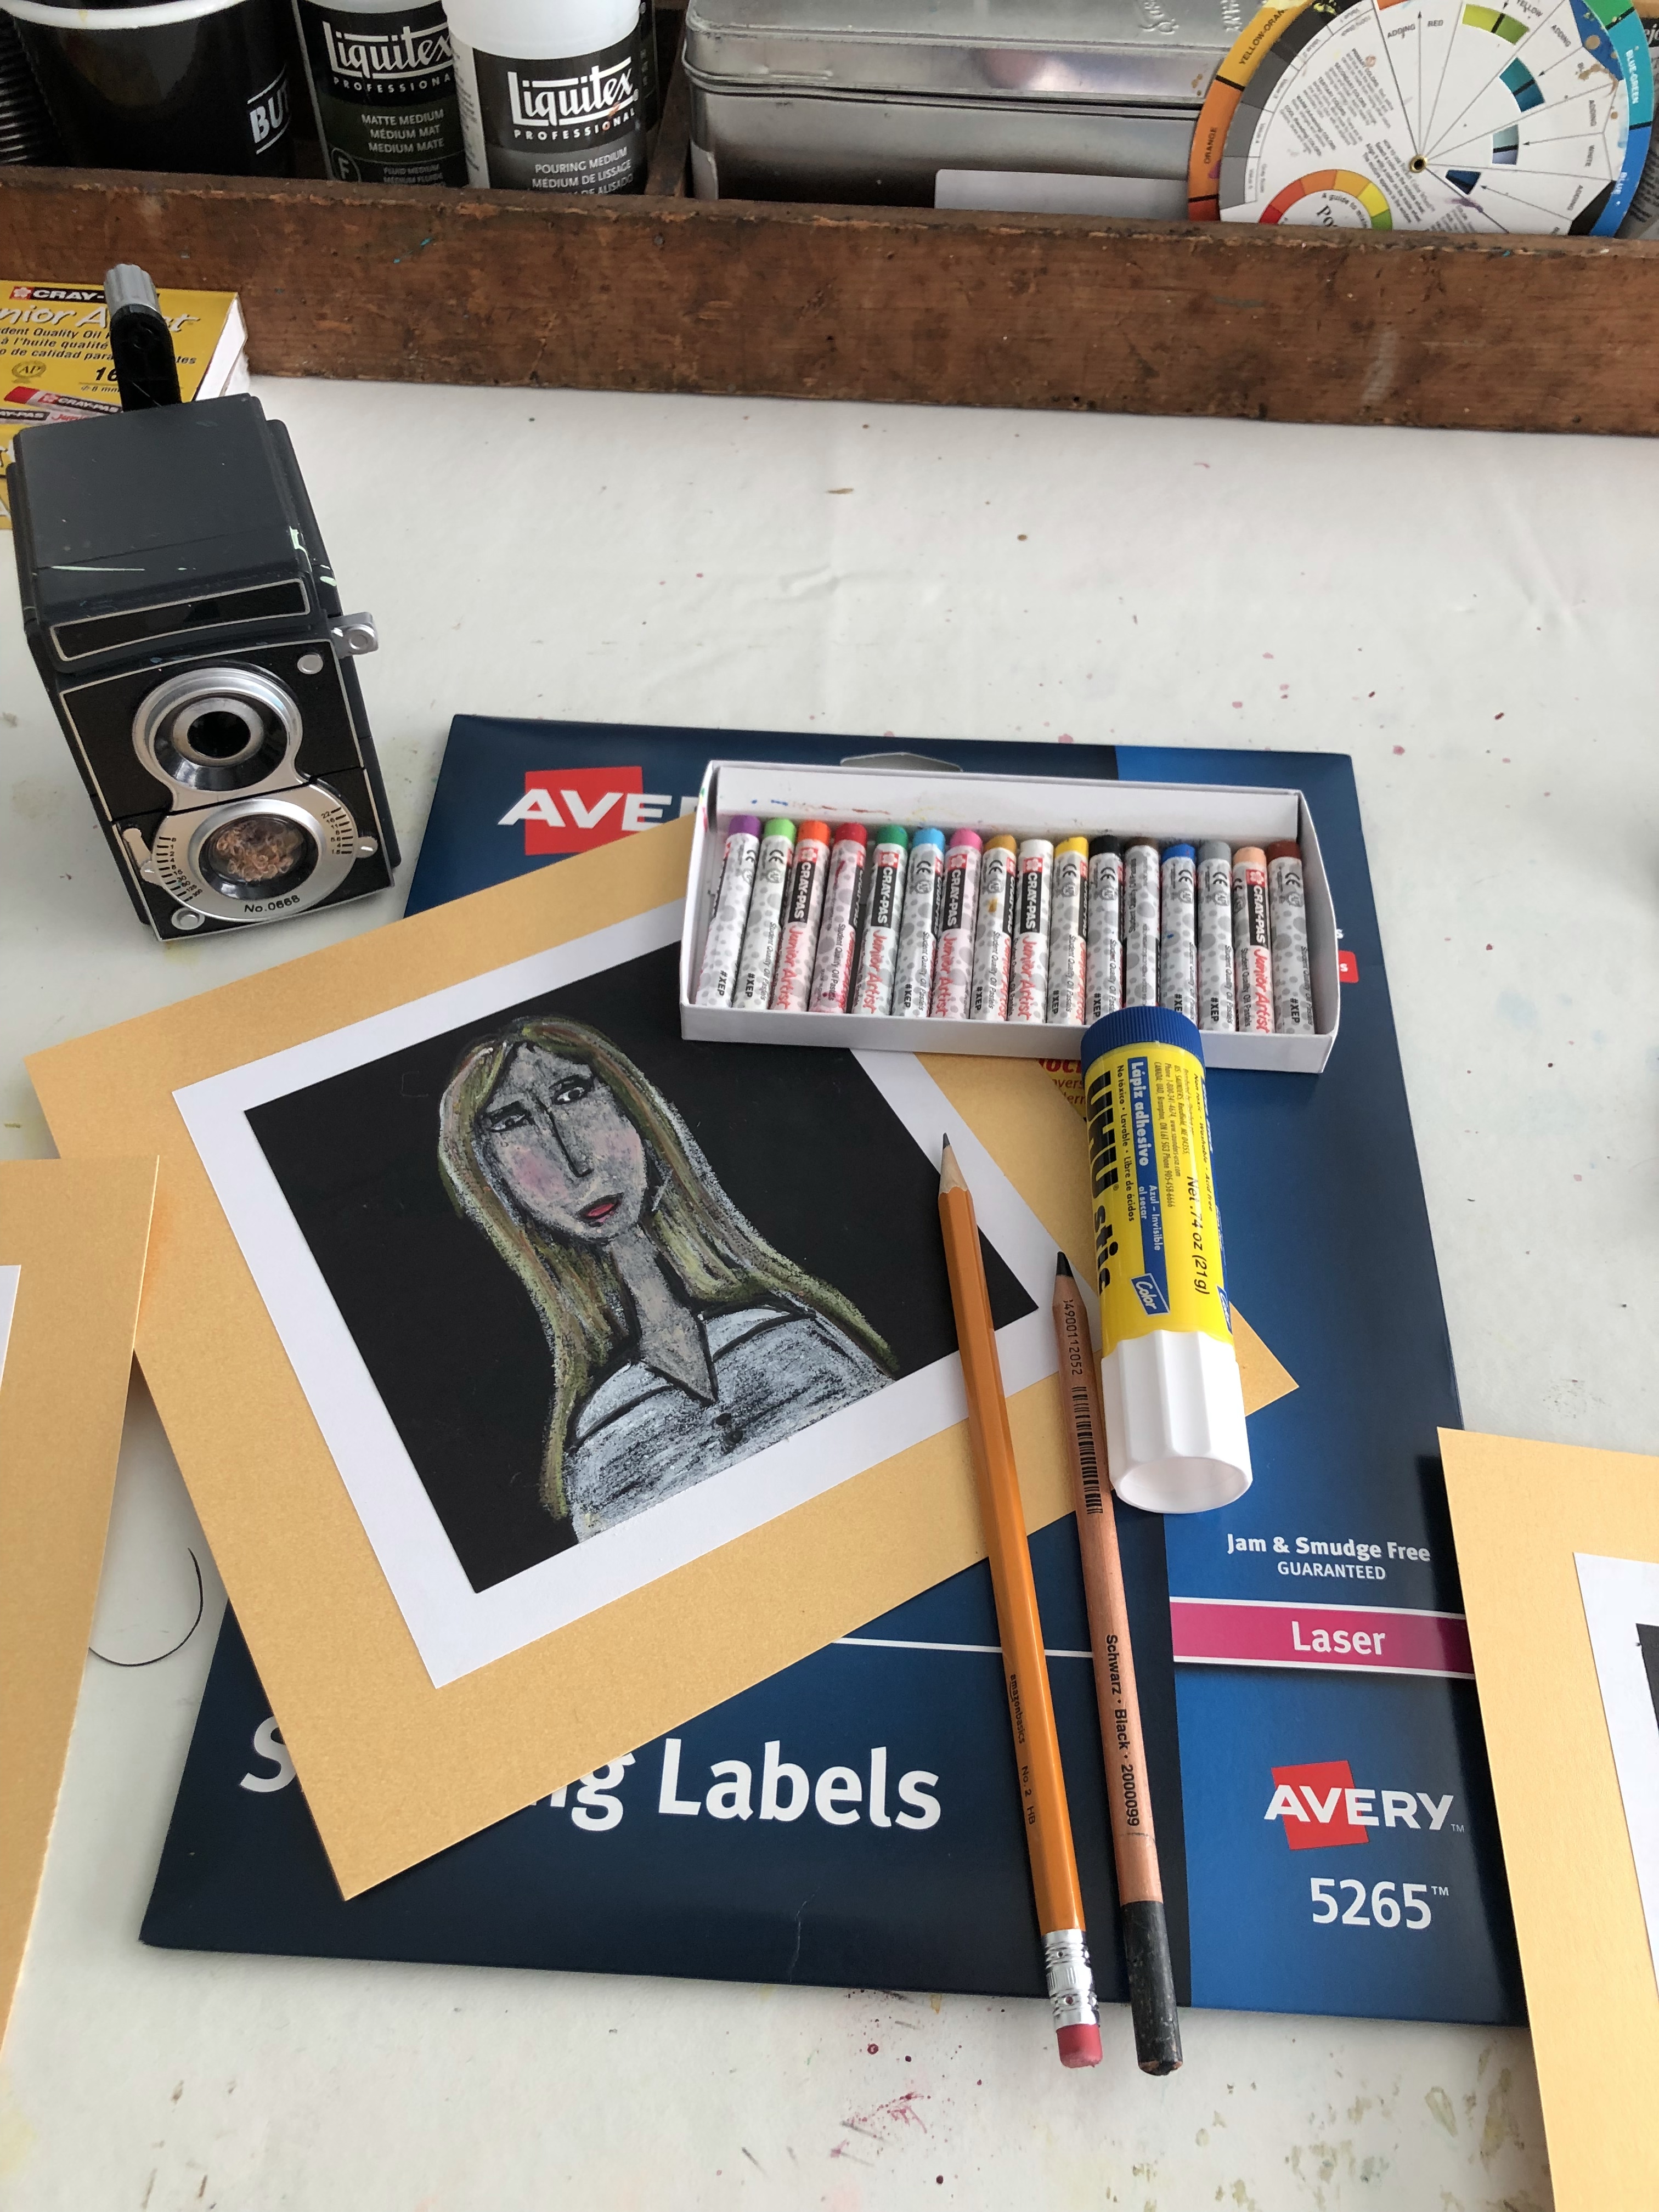
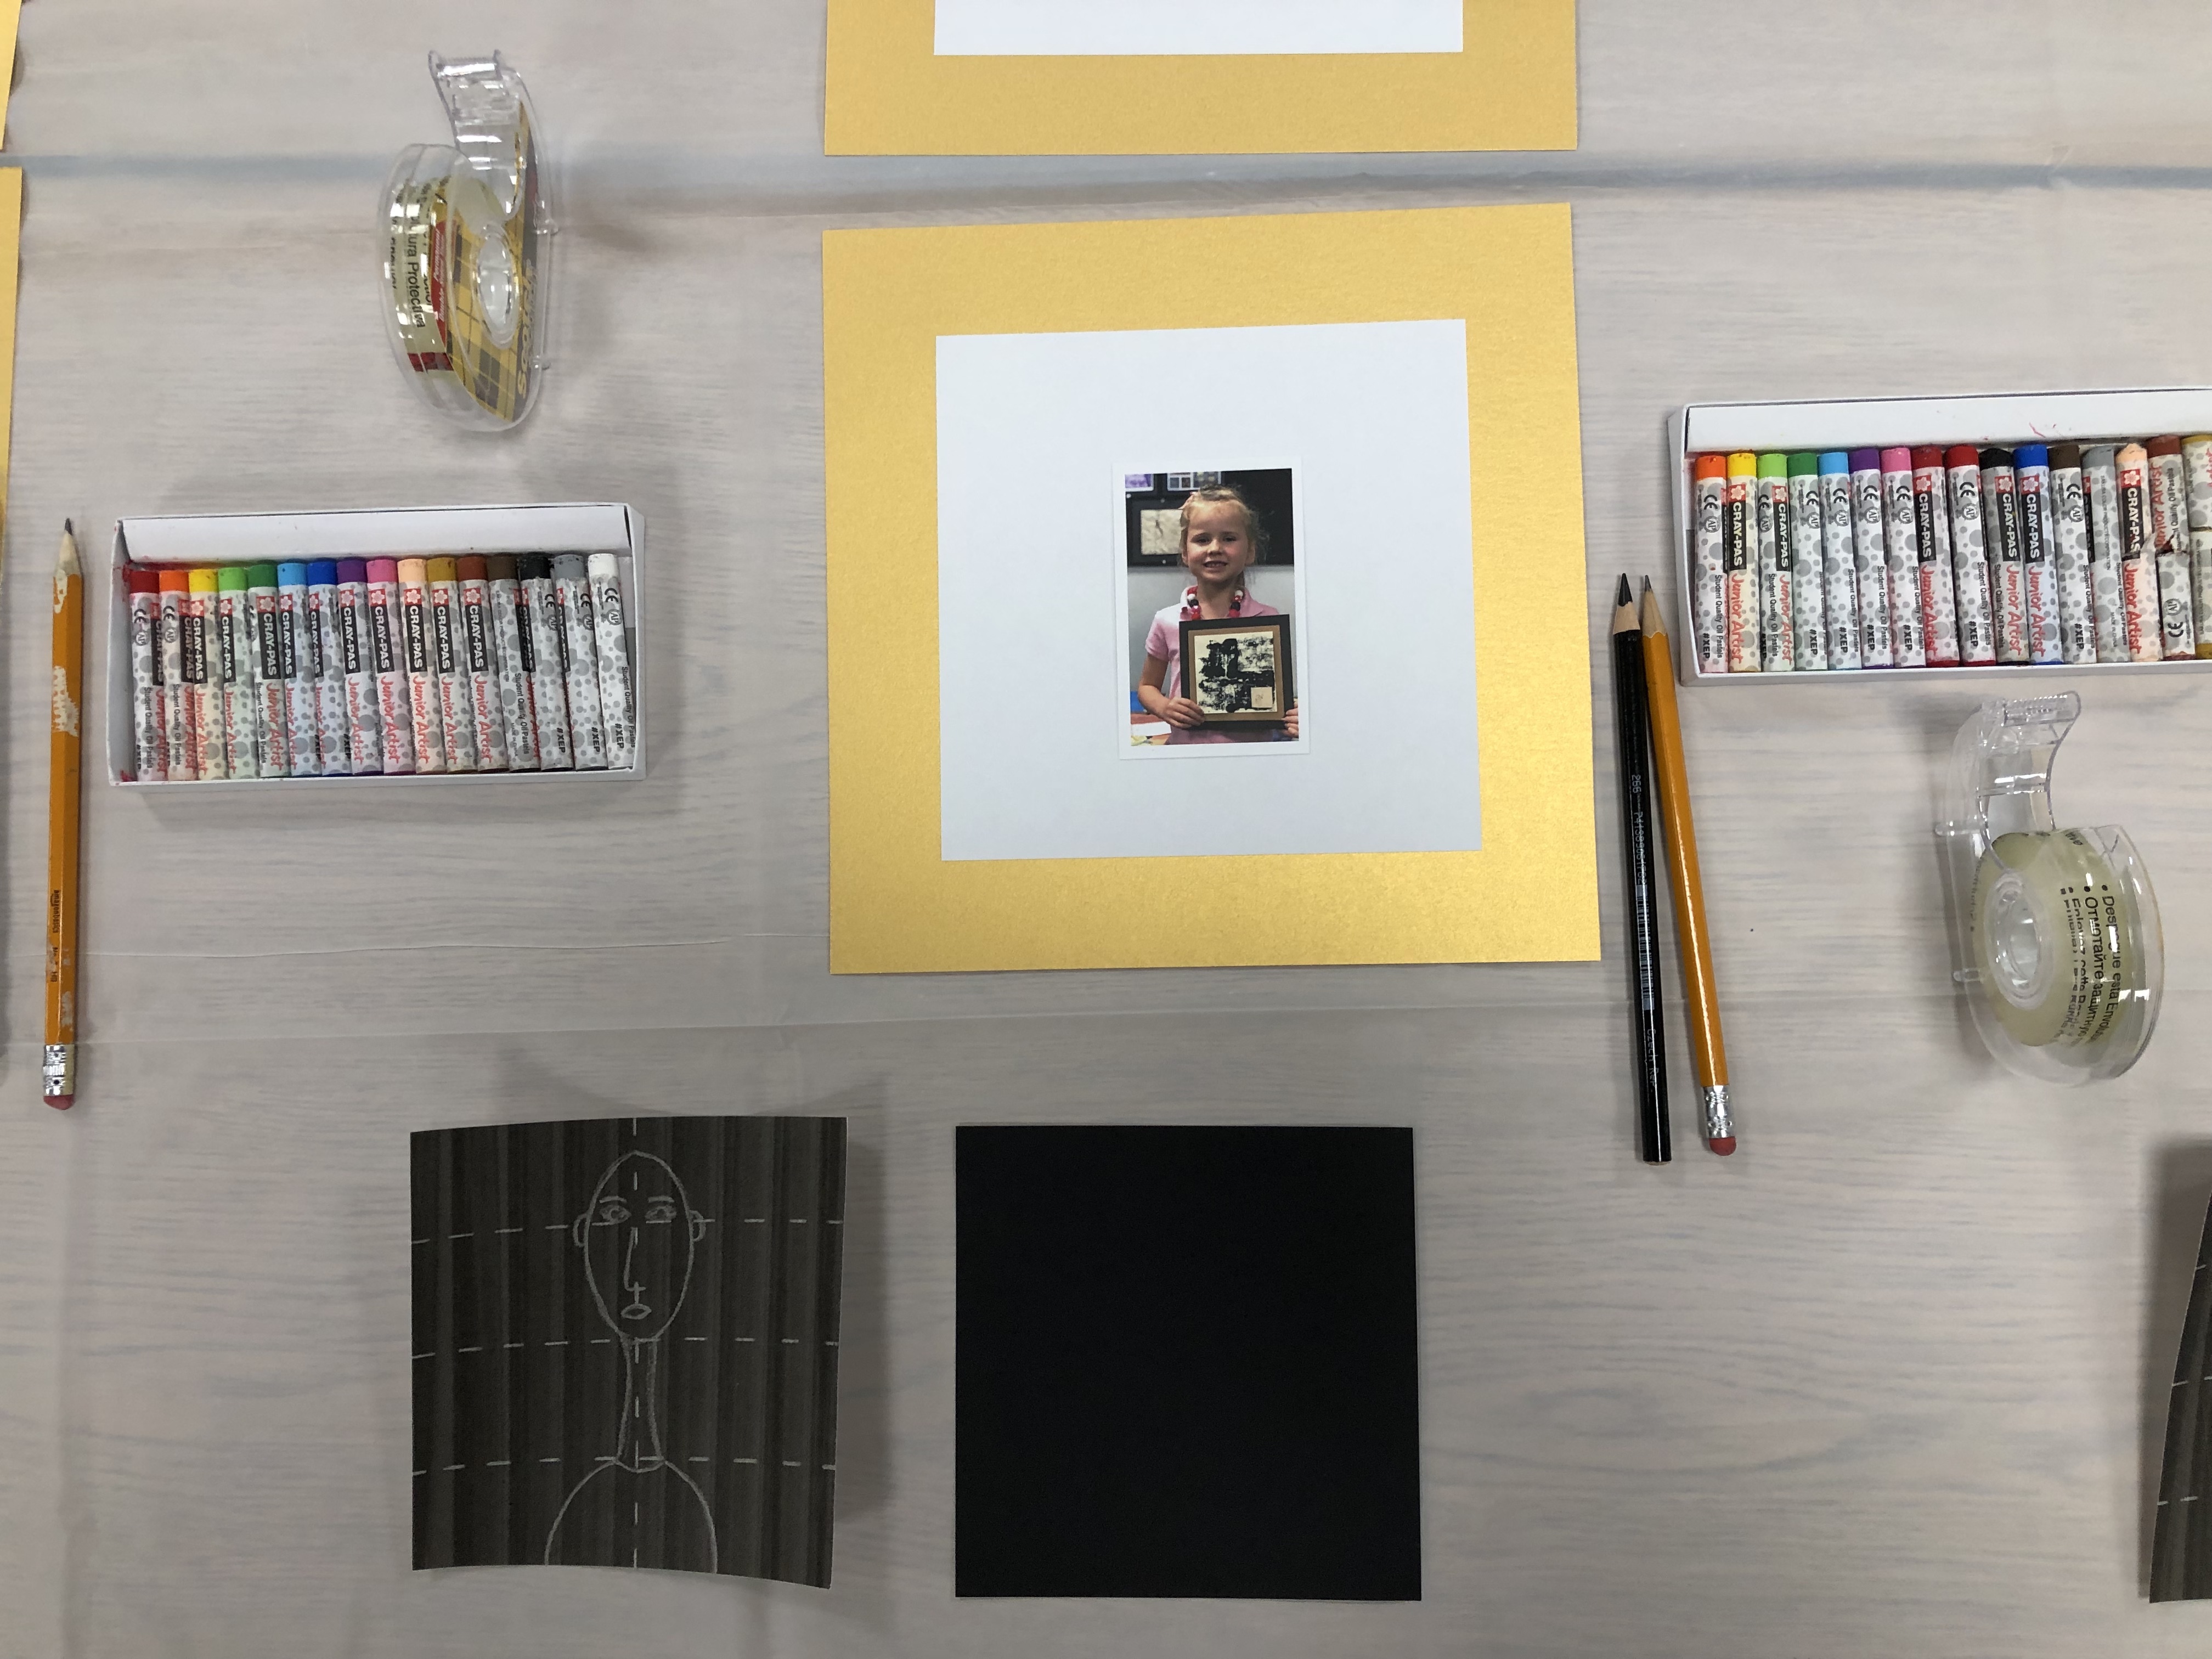
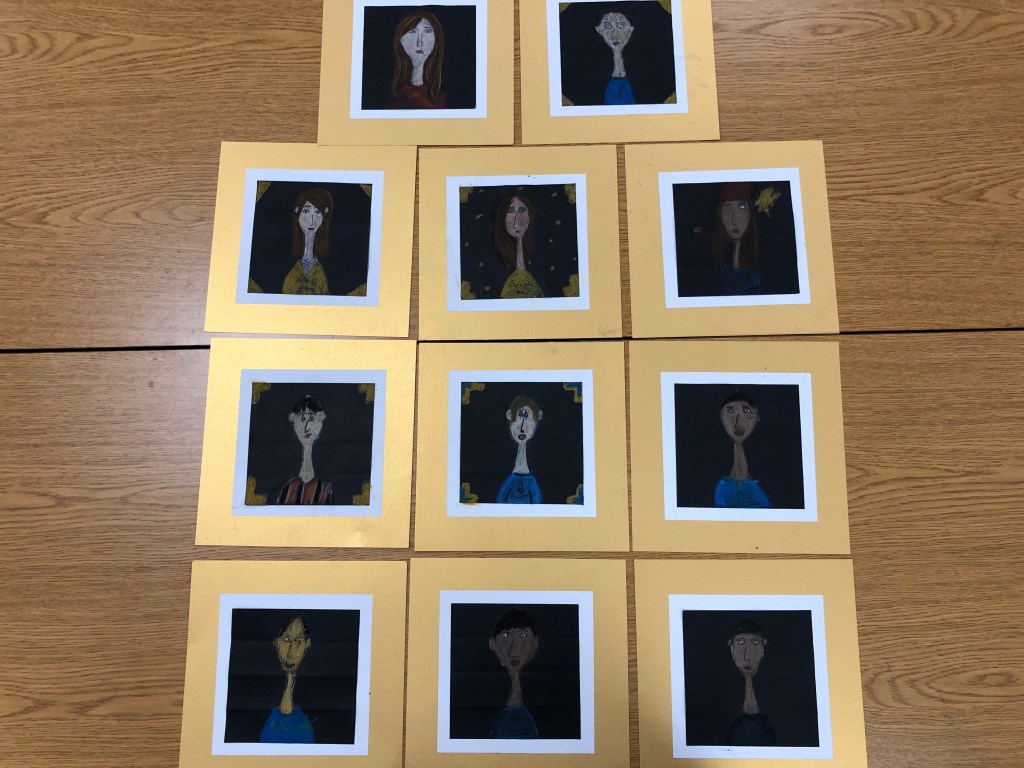
NO.5 El Greco 1541-1614


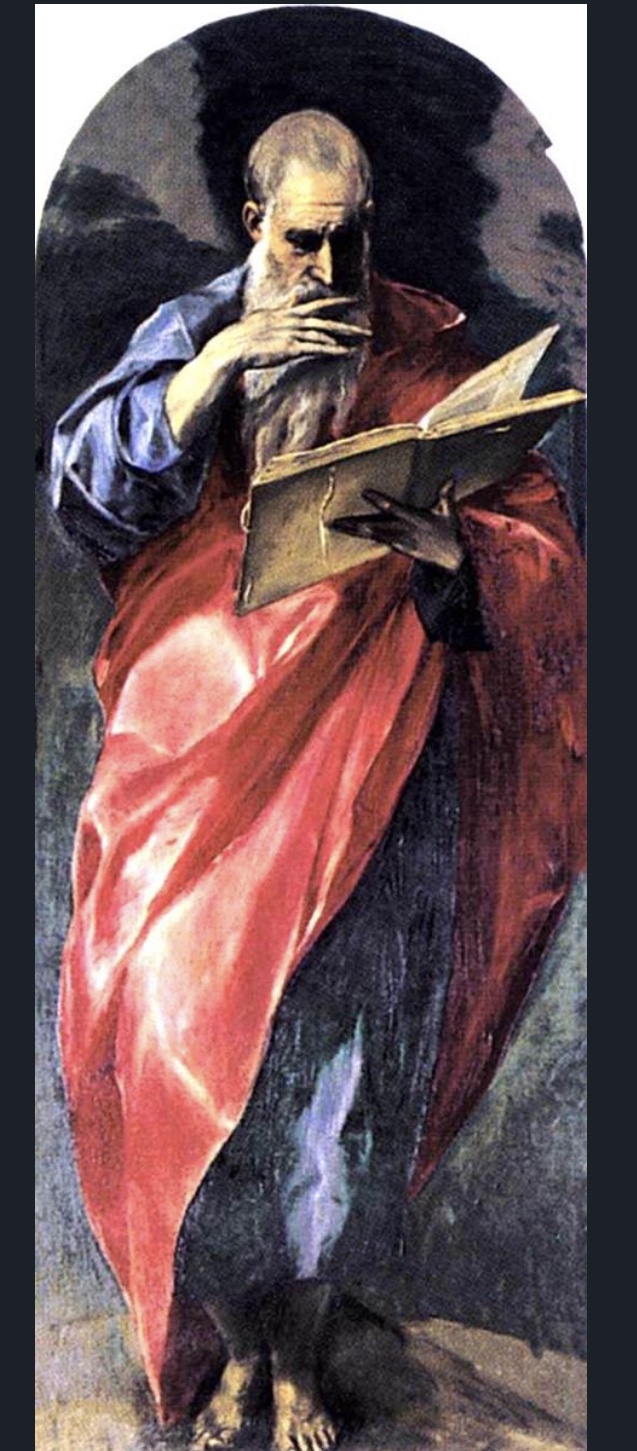
THE PROJECT + THE ARTIST
- Draw a light hearted + humorous stylized self portrait inspired by El Greco’s elongated and vibrant Mannerist portraits
- It was said at his funeral that El Greco was “Too odd for his time”
MATERIALS
- 5″ x 5″ black paper
- 6″ x 6″ white paper
- 8″ x 8″ gold cardstock
- photo of students for self portrait drawing
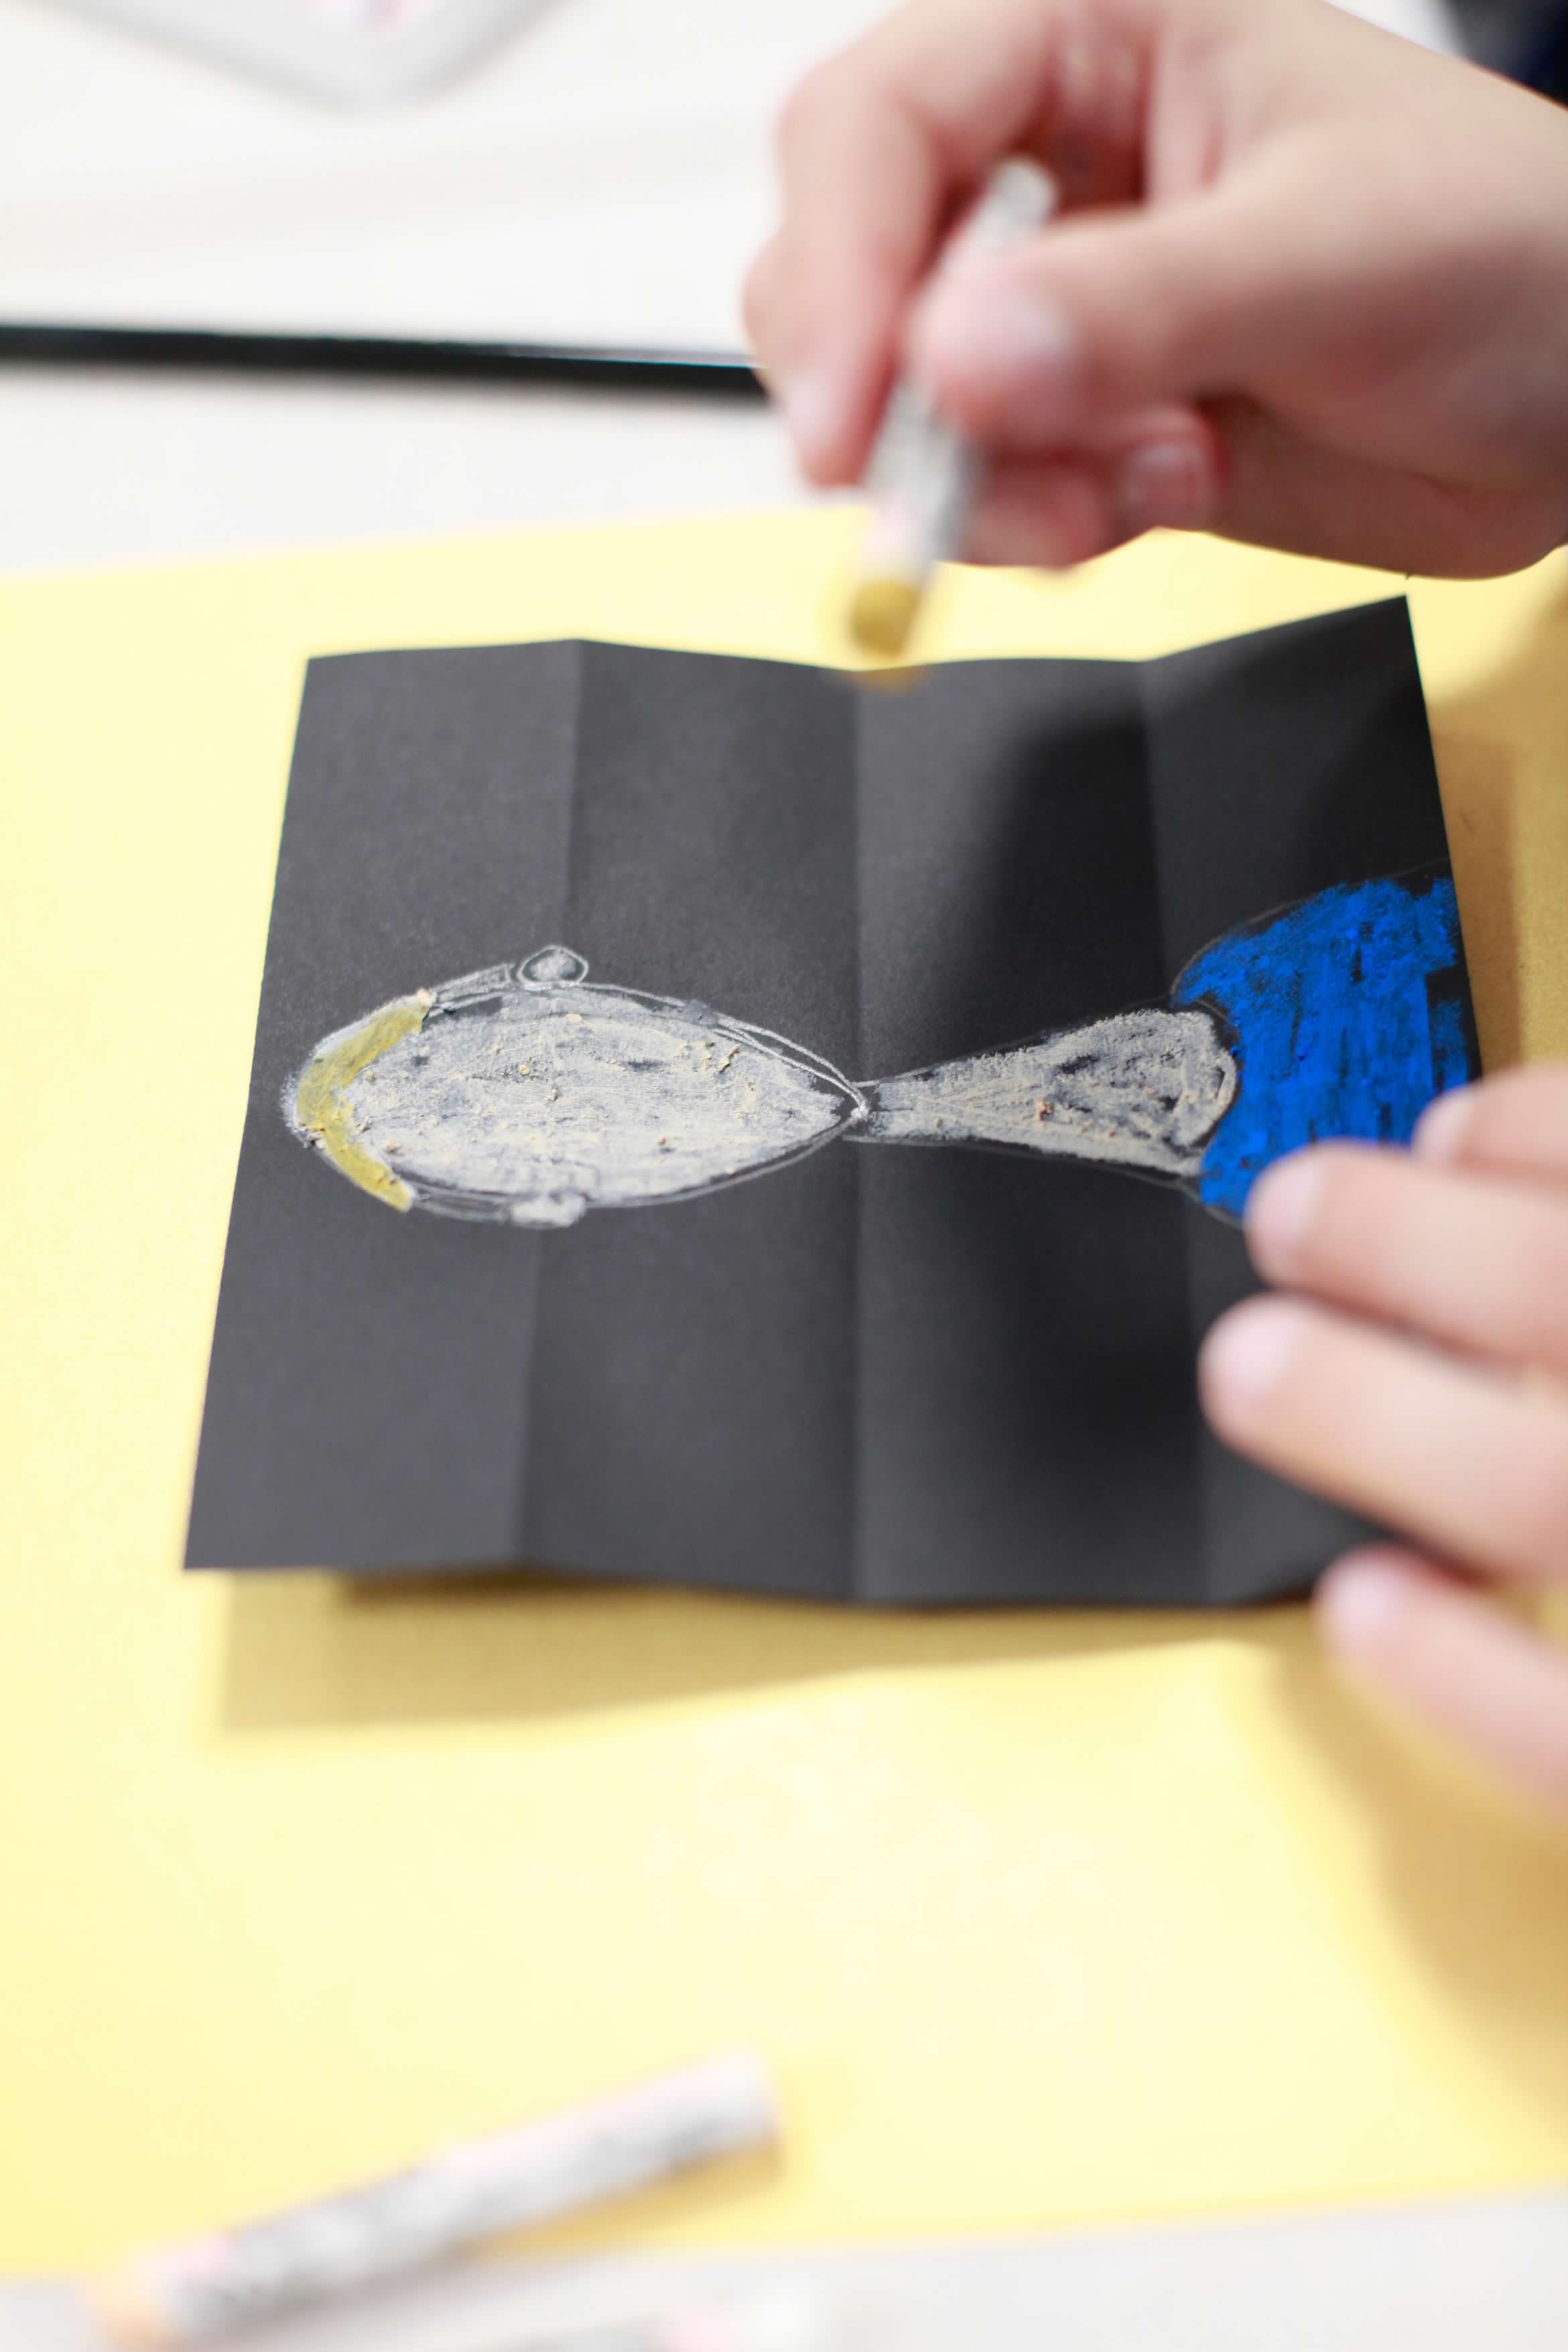
- oil pastels [can be broken in half or thirds]
- black and white color pencils
- double face tape or glue stick
- hair spray to seal oil pastels (optional)

STEP NO.1
- Print photos of students for viewing during the self portrait drawing
- See video for drawing an elongated portrait [note: this video was made for a different project, but the steps are the same]
- This is the only drawing project of all six. By this time, the students should be feeling more confident and comfortable with their art skills. However some students become fearful when it comes to drawing especially a self portrait …. Take the edge off by encouraging your students to have fun with this light hearted and humorous stylized self portrait.
STEP NO.2
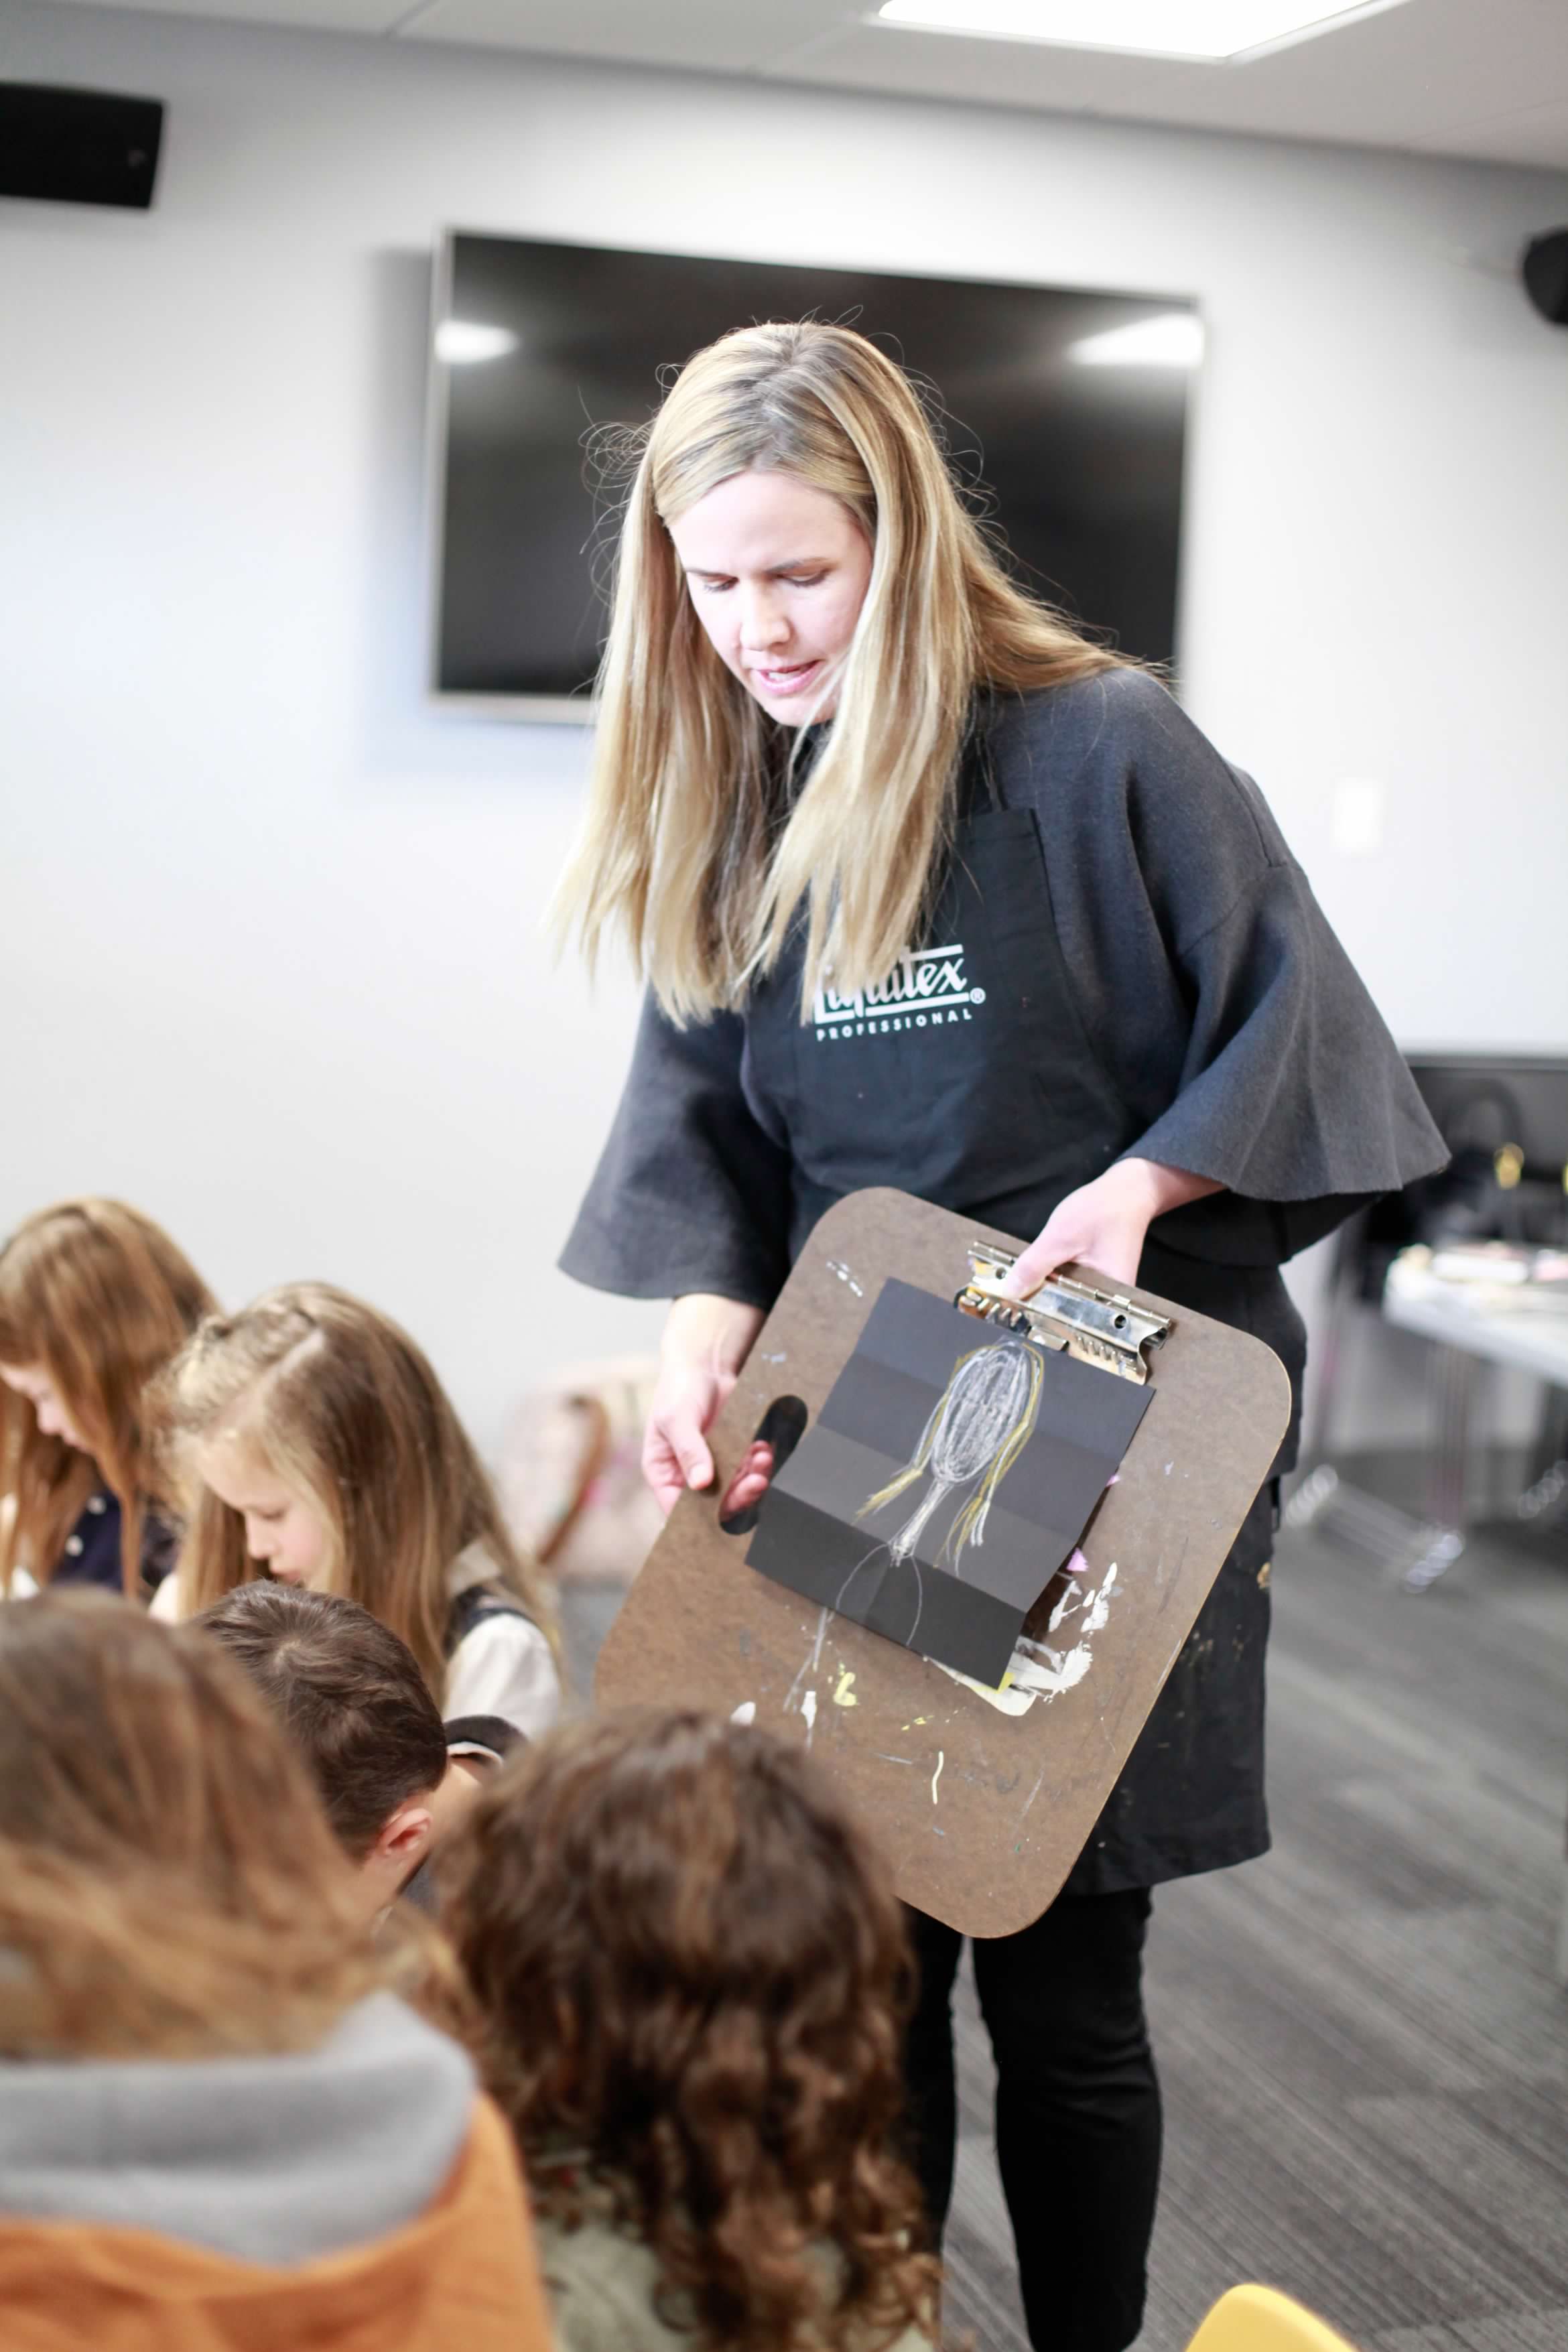

- See video for applying color with oil pastel to elongated portrait [note: this video was made for a different project, but the steps are the same]

STEP NO. 3
- With glue stick or double face tape adhere portrait to white paper and gold cardstock “frame”
- Hair spray will help seal the the oil pastel

GOALS + DESIGN SKILLS TO LEARN:
- learn about + be inspired by the master artists in history and take away a quality visual to remember them by
- expose students to interesting and unique mediums (art supplies), which are forgiving and easily create successful projects
- identify that art goes beyond drawing people…. too often people think they must be able to draw a person to be creative, which is not true
- demonstrate a professional presentation of artwork
- provide an art gift for our students + their parents that they may desire to display in their home
- provide resources for students to use the tools learned in class at home [feel free to give parents the link to our blog so they can easily find supplies, tutorials, demos, and instructions to replicate the projects at home]
TIPS FOR INSTRUCTING AN ART ADVENTURE + SET UP:
- you will need a full 30 minutes to complete these projects
- consider using your morning assembly time to present the artist in detail and then briefly review how the project relates to the artist during art time
- set up only one art location for all classes to rotate through …. by doing this you only need to purchase 8 or so of most items
- invite at least two helpers who will familiarize themselves with the projects + help with all the classes rotating through…. one to help the class creating and one preparing supplies for the next class
- instructors should practice the project before class meets and provide a sample for students
- prepare and pre-cut as much as possible before class meets
- always start by having students write their name on the back of their project…. if they desire to write their name on the front encourage them to do it once they’ve completed their piece in tiny excellent lettering under the painting
- i highly recommend listening to the podcasts provided on ridge light ranch for the artists we will be studying …. they will help you prepare immensely
