DESIGN SKILLS TO LEARN:
- painting negative and positive space
- architectural drawing
- using stencils with paint
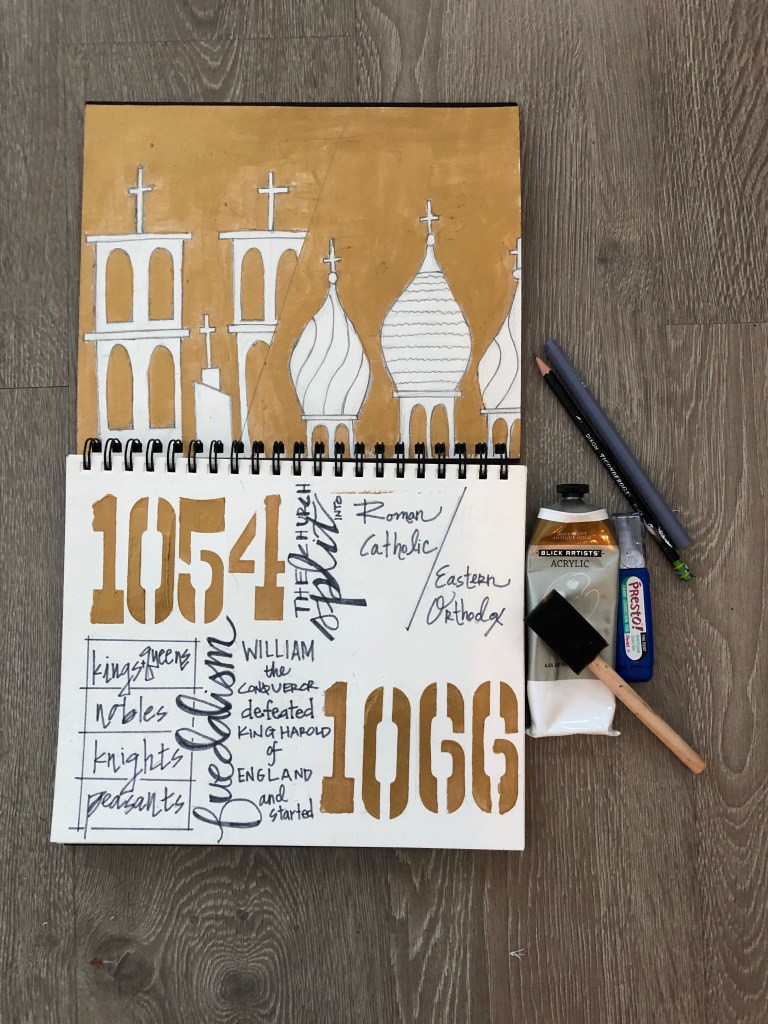
MATERIALS: (SEE ART TOOLS IN MENU FOR DETAILS + LINKS)
- watercolor sketchbook or two sheets of watercolor/heavy paper
- pencil
- ruler
- gold paint (other medium options: gold crayon, gold color pencil, any other paint color that reflects the medieval time period)
- white out correction pen
- gray felt tip marker
- number stencils with sponge brush ( other options: draw block numbers and paint or color in)
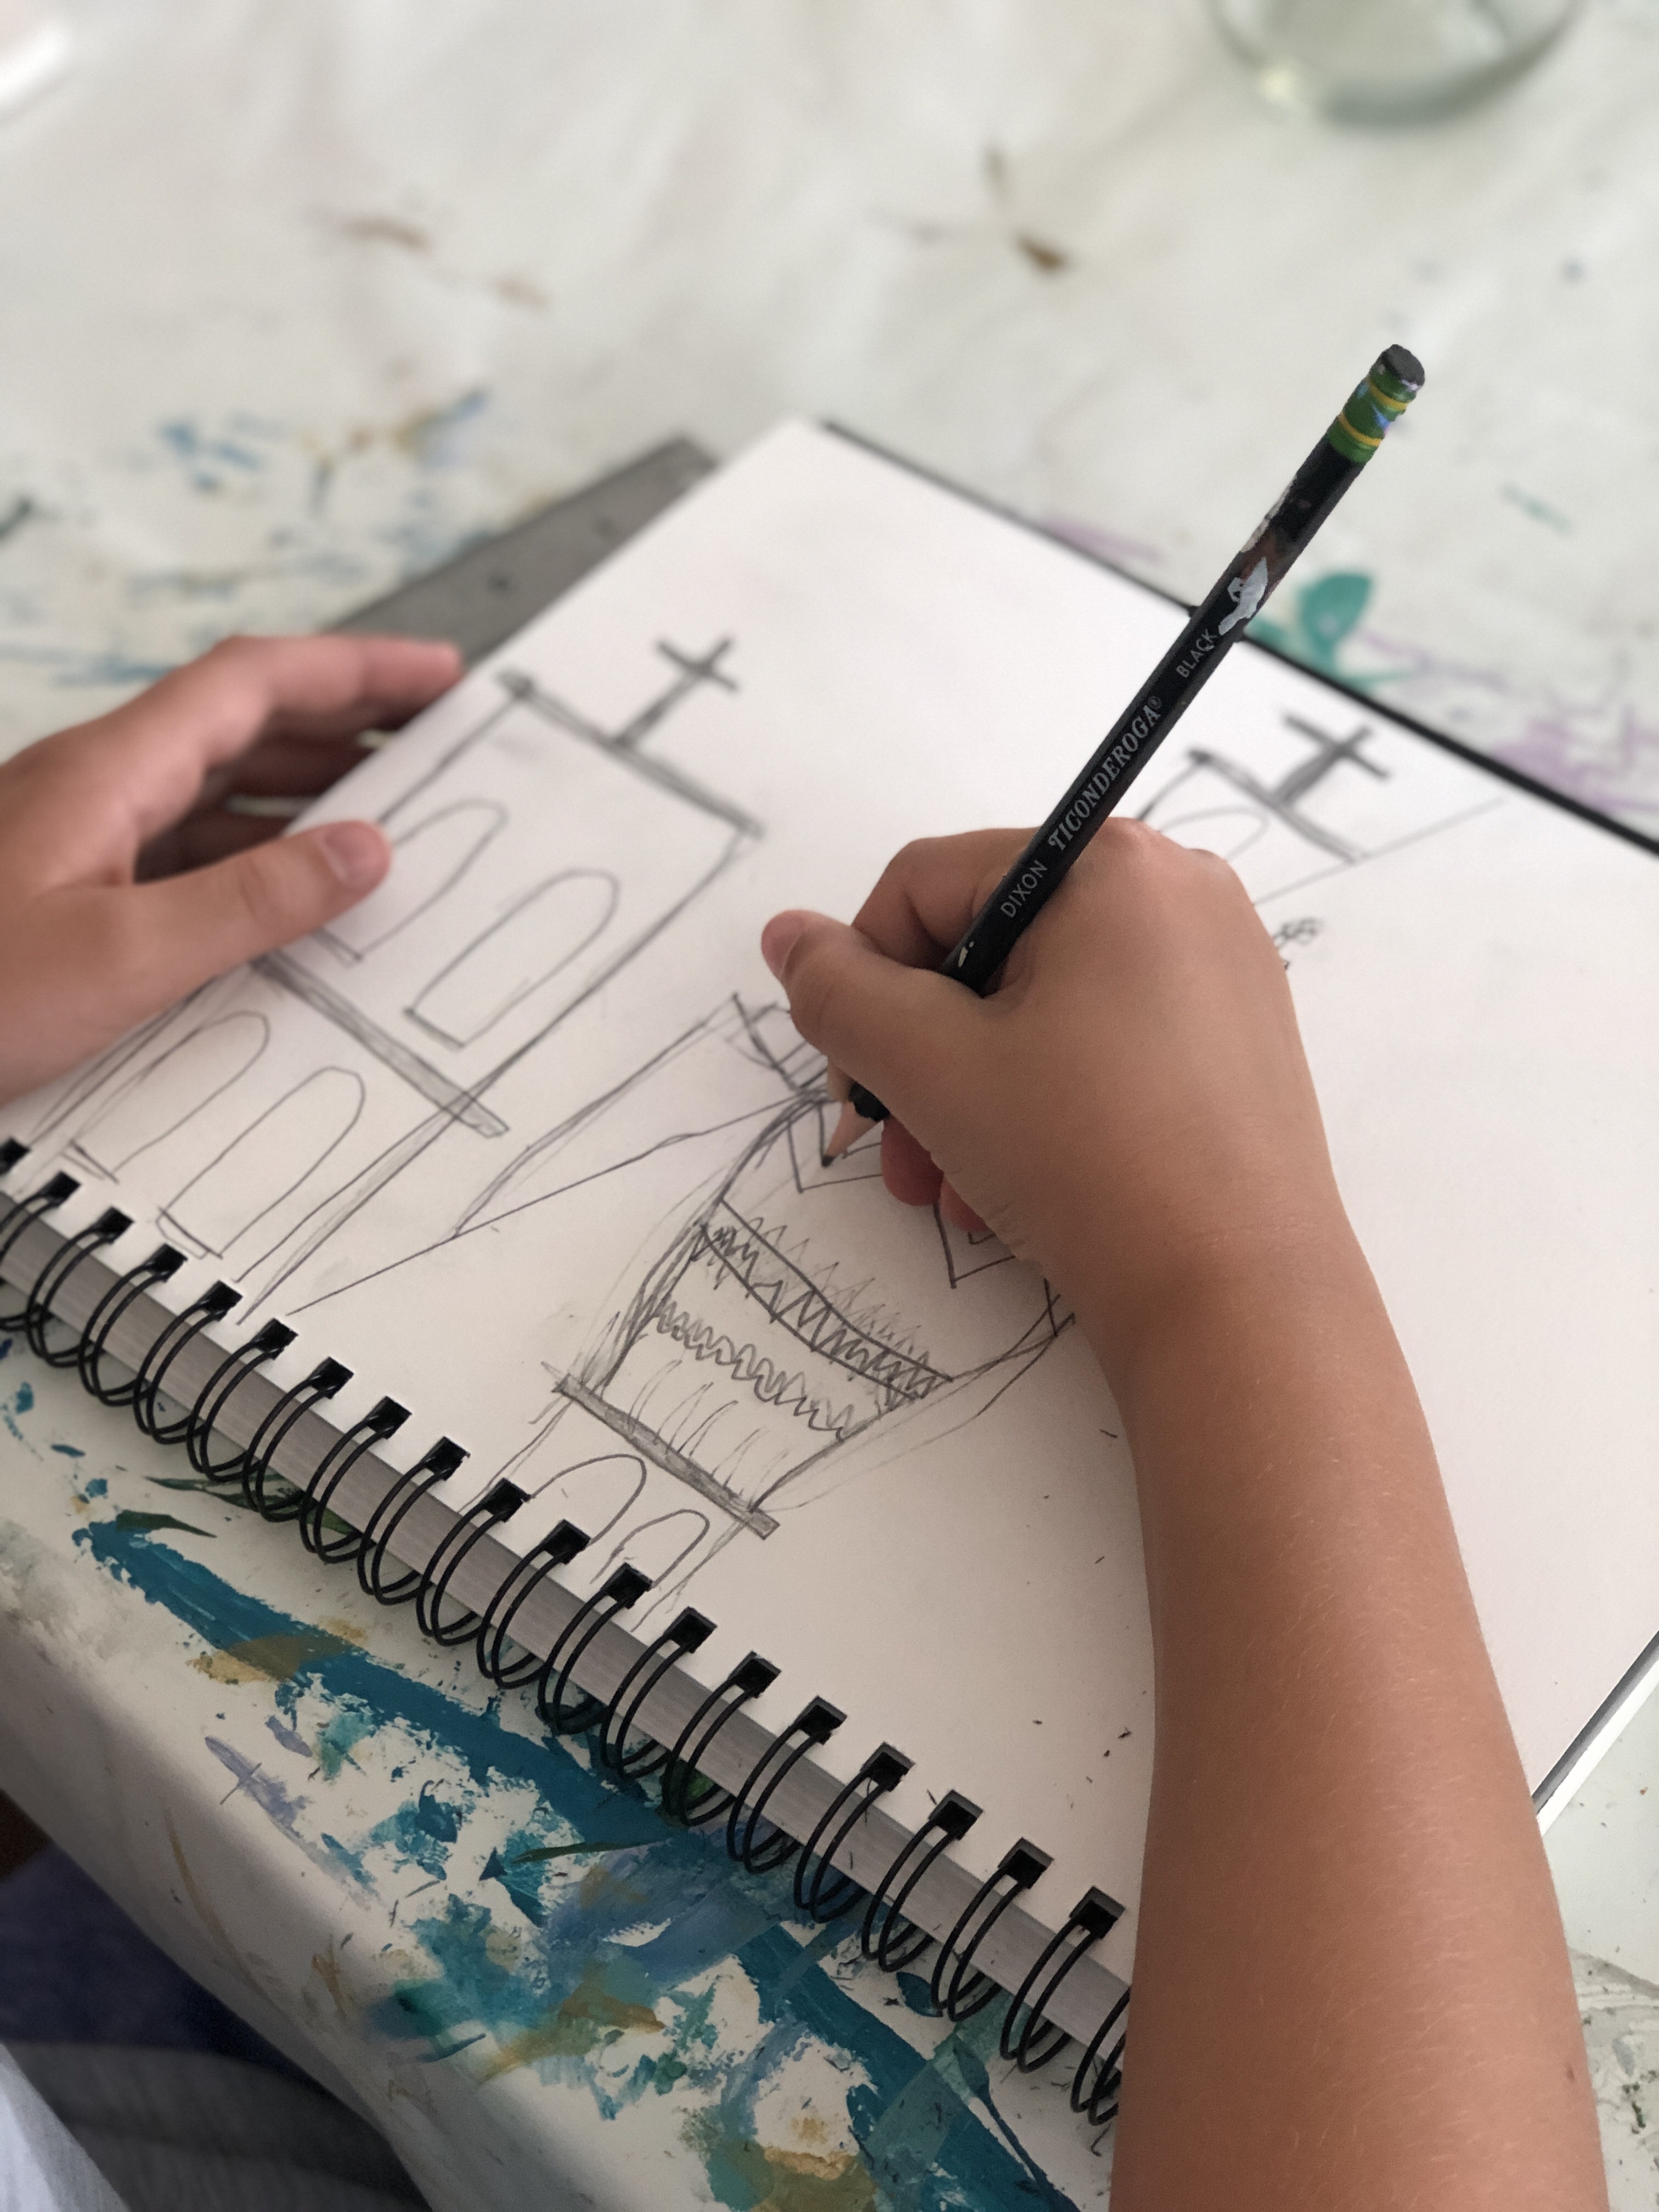
STEP NO.1
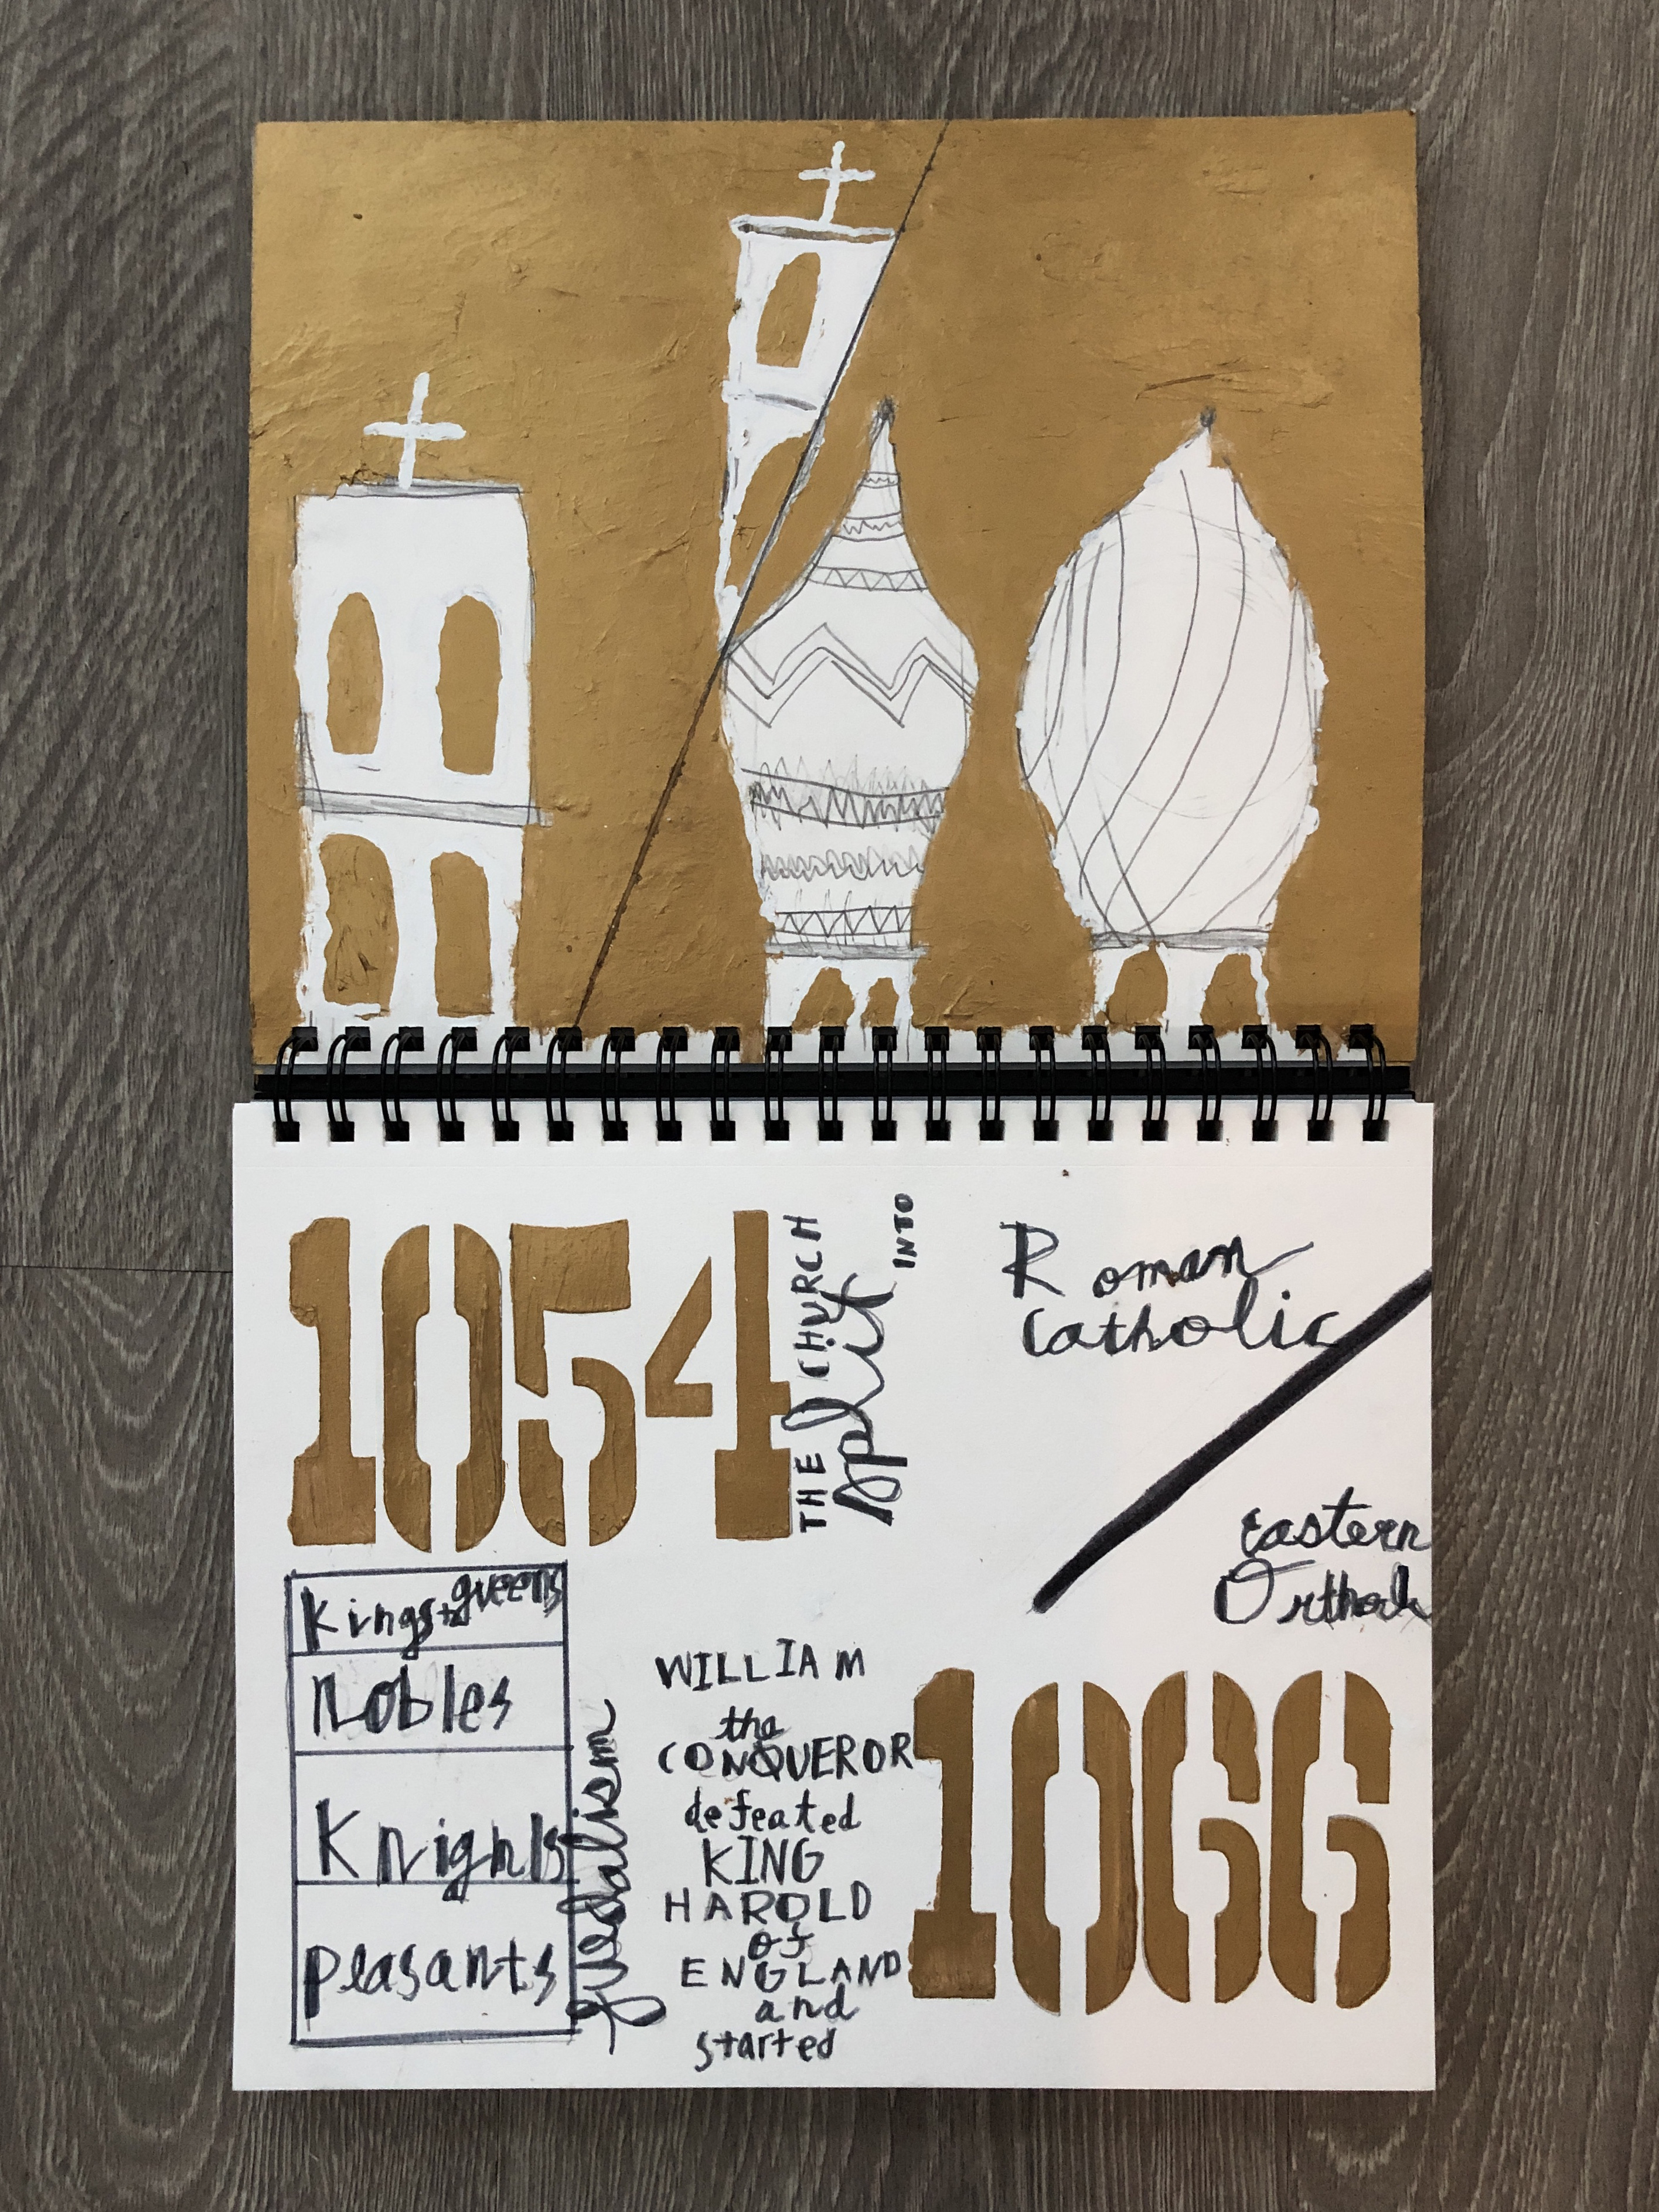
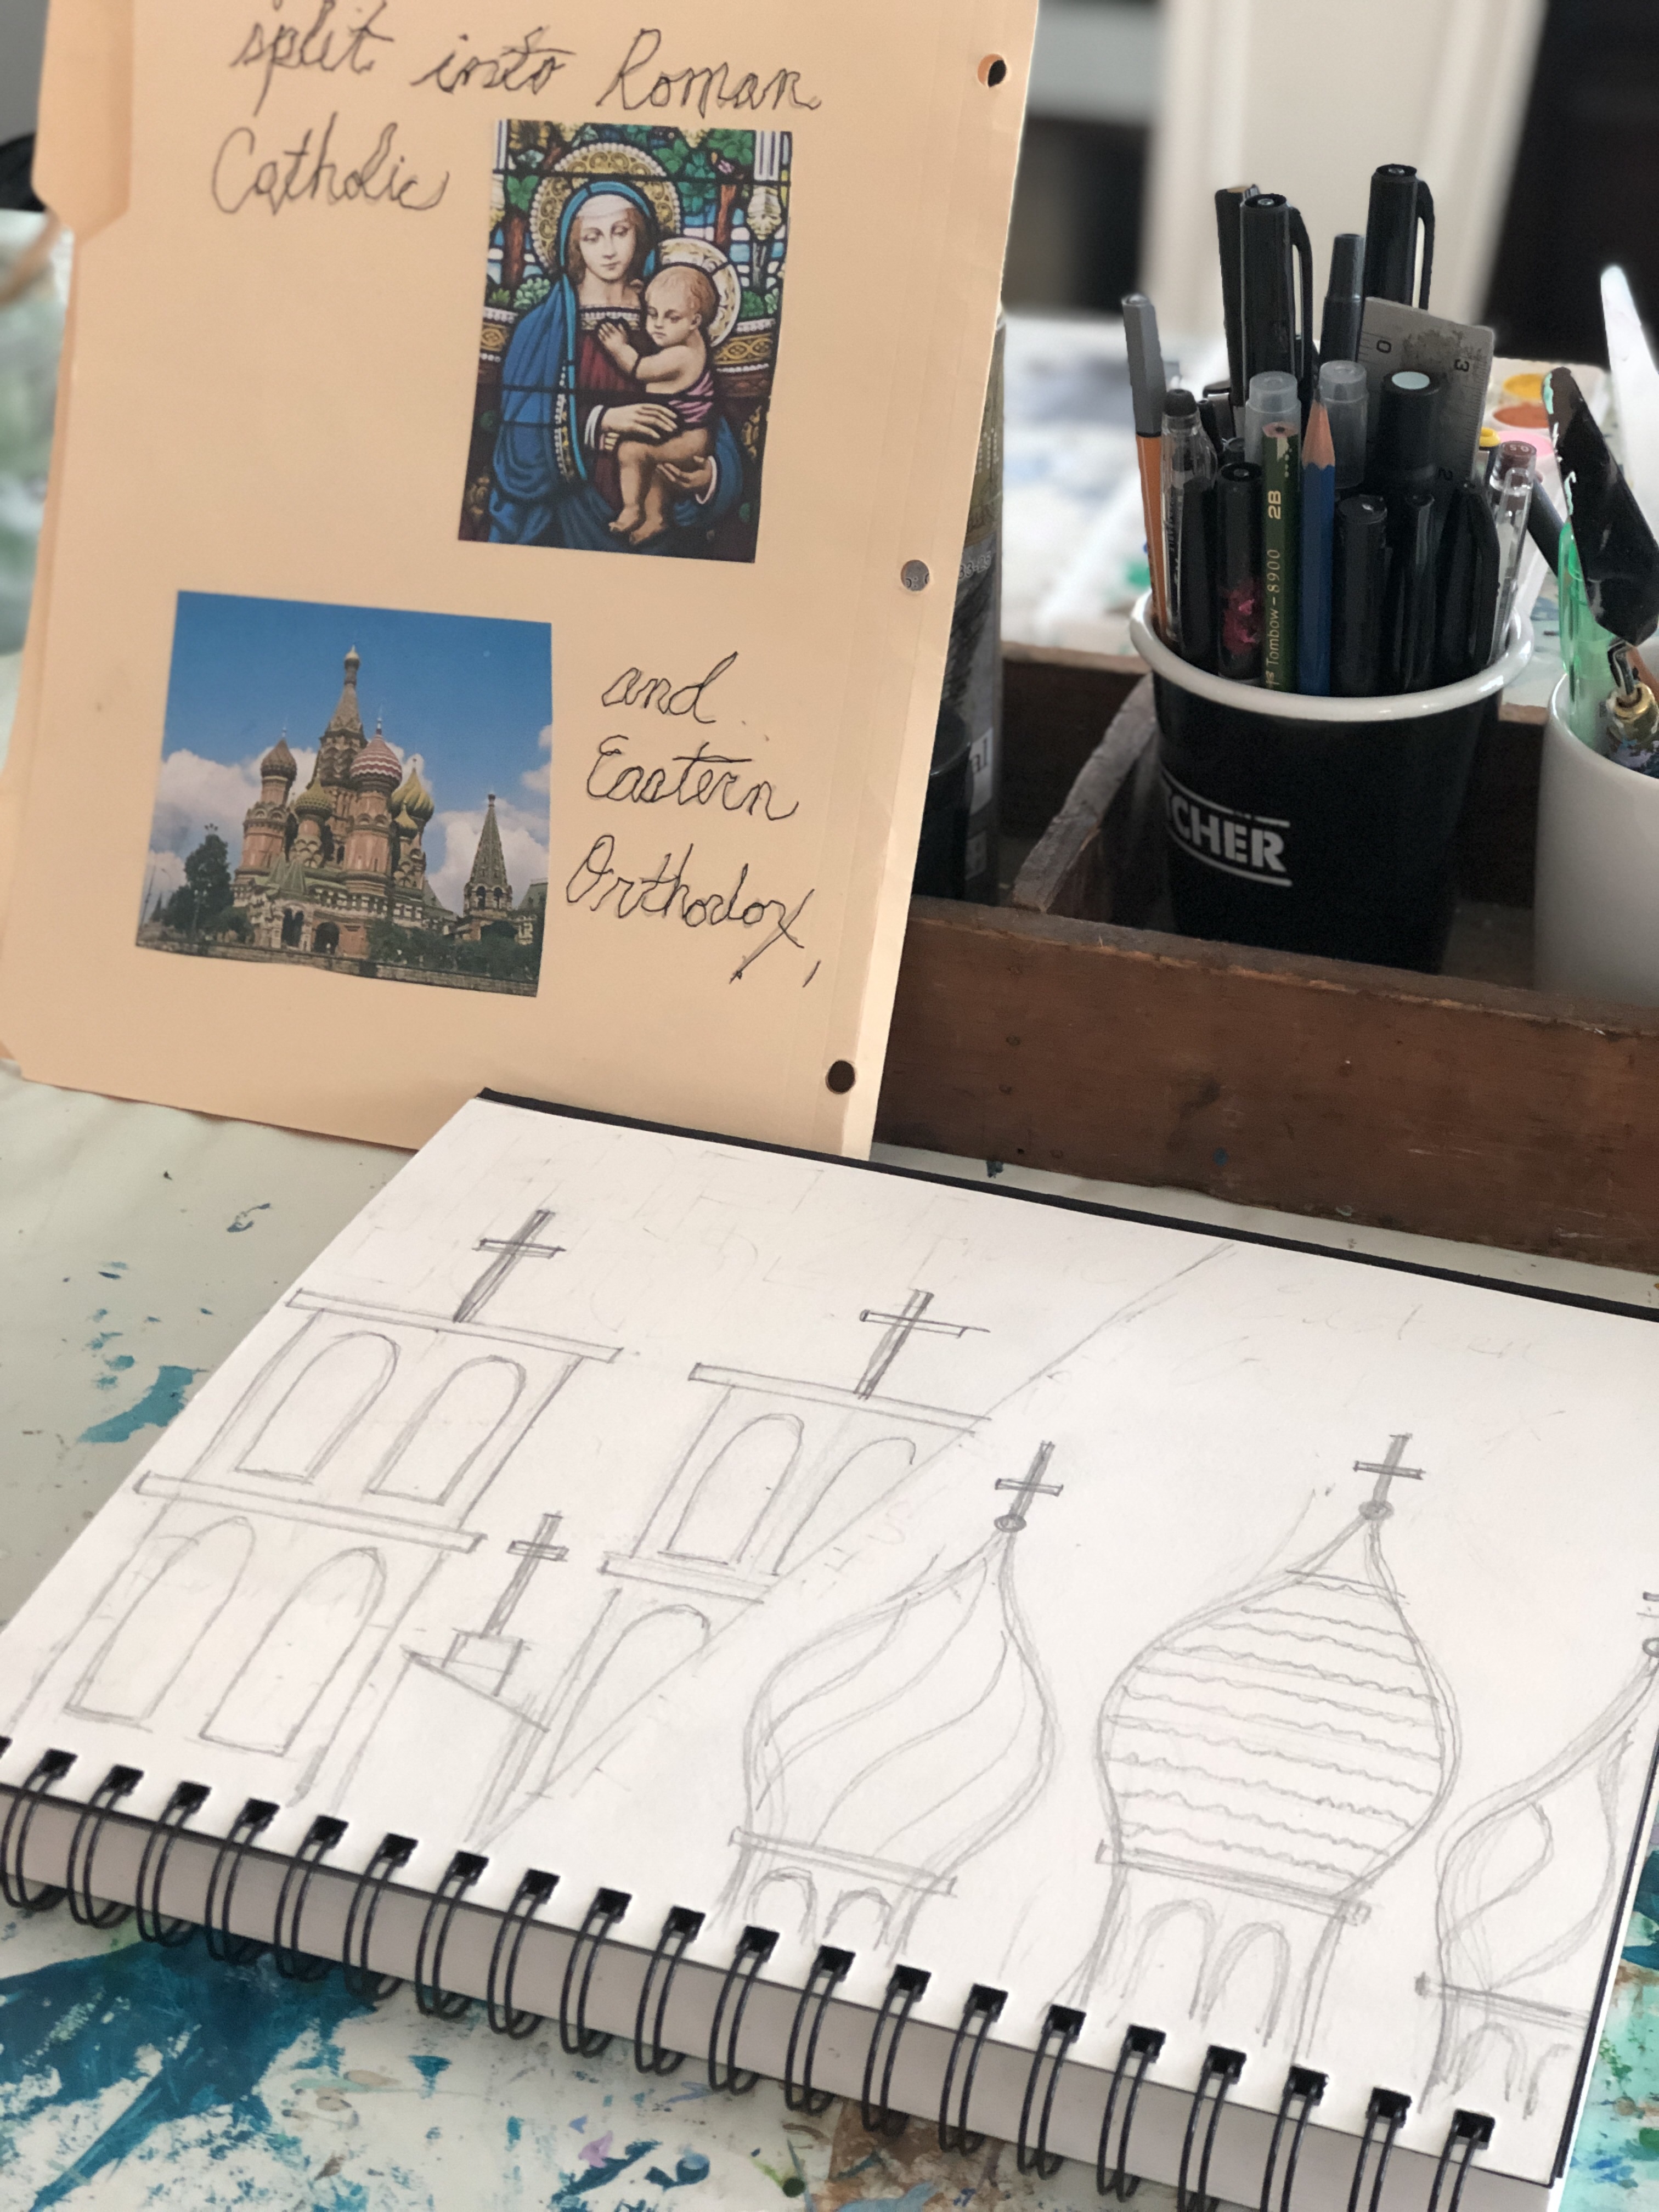
- draw “the church split” architectural drawing
- start by drawing a line on an angle using a ruler
- on one side draw the roman catholic church. I found it easier to draw the entire building lightly and then erase at the angled line.
- on the other side draw the eastern orthodox church. start with a circle for the initial dome shape, add a triangle-ish top, and rectangle bottom.
- keep it simple! the next step is much easier if the shapes are simple
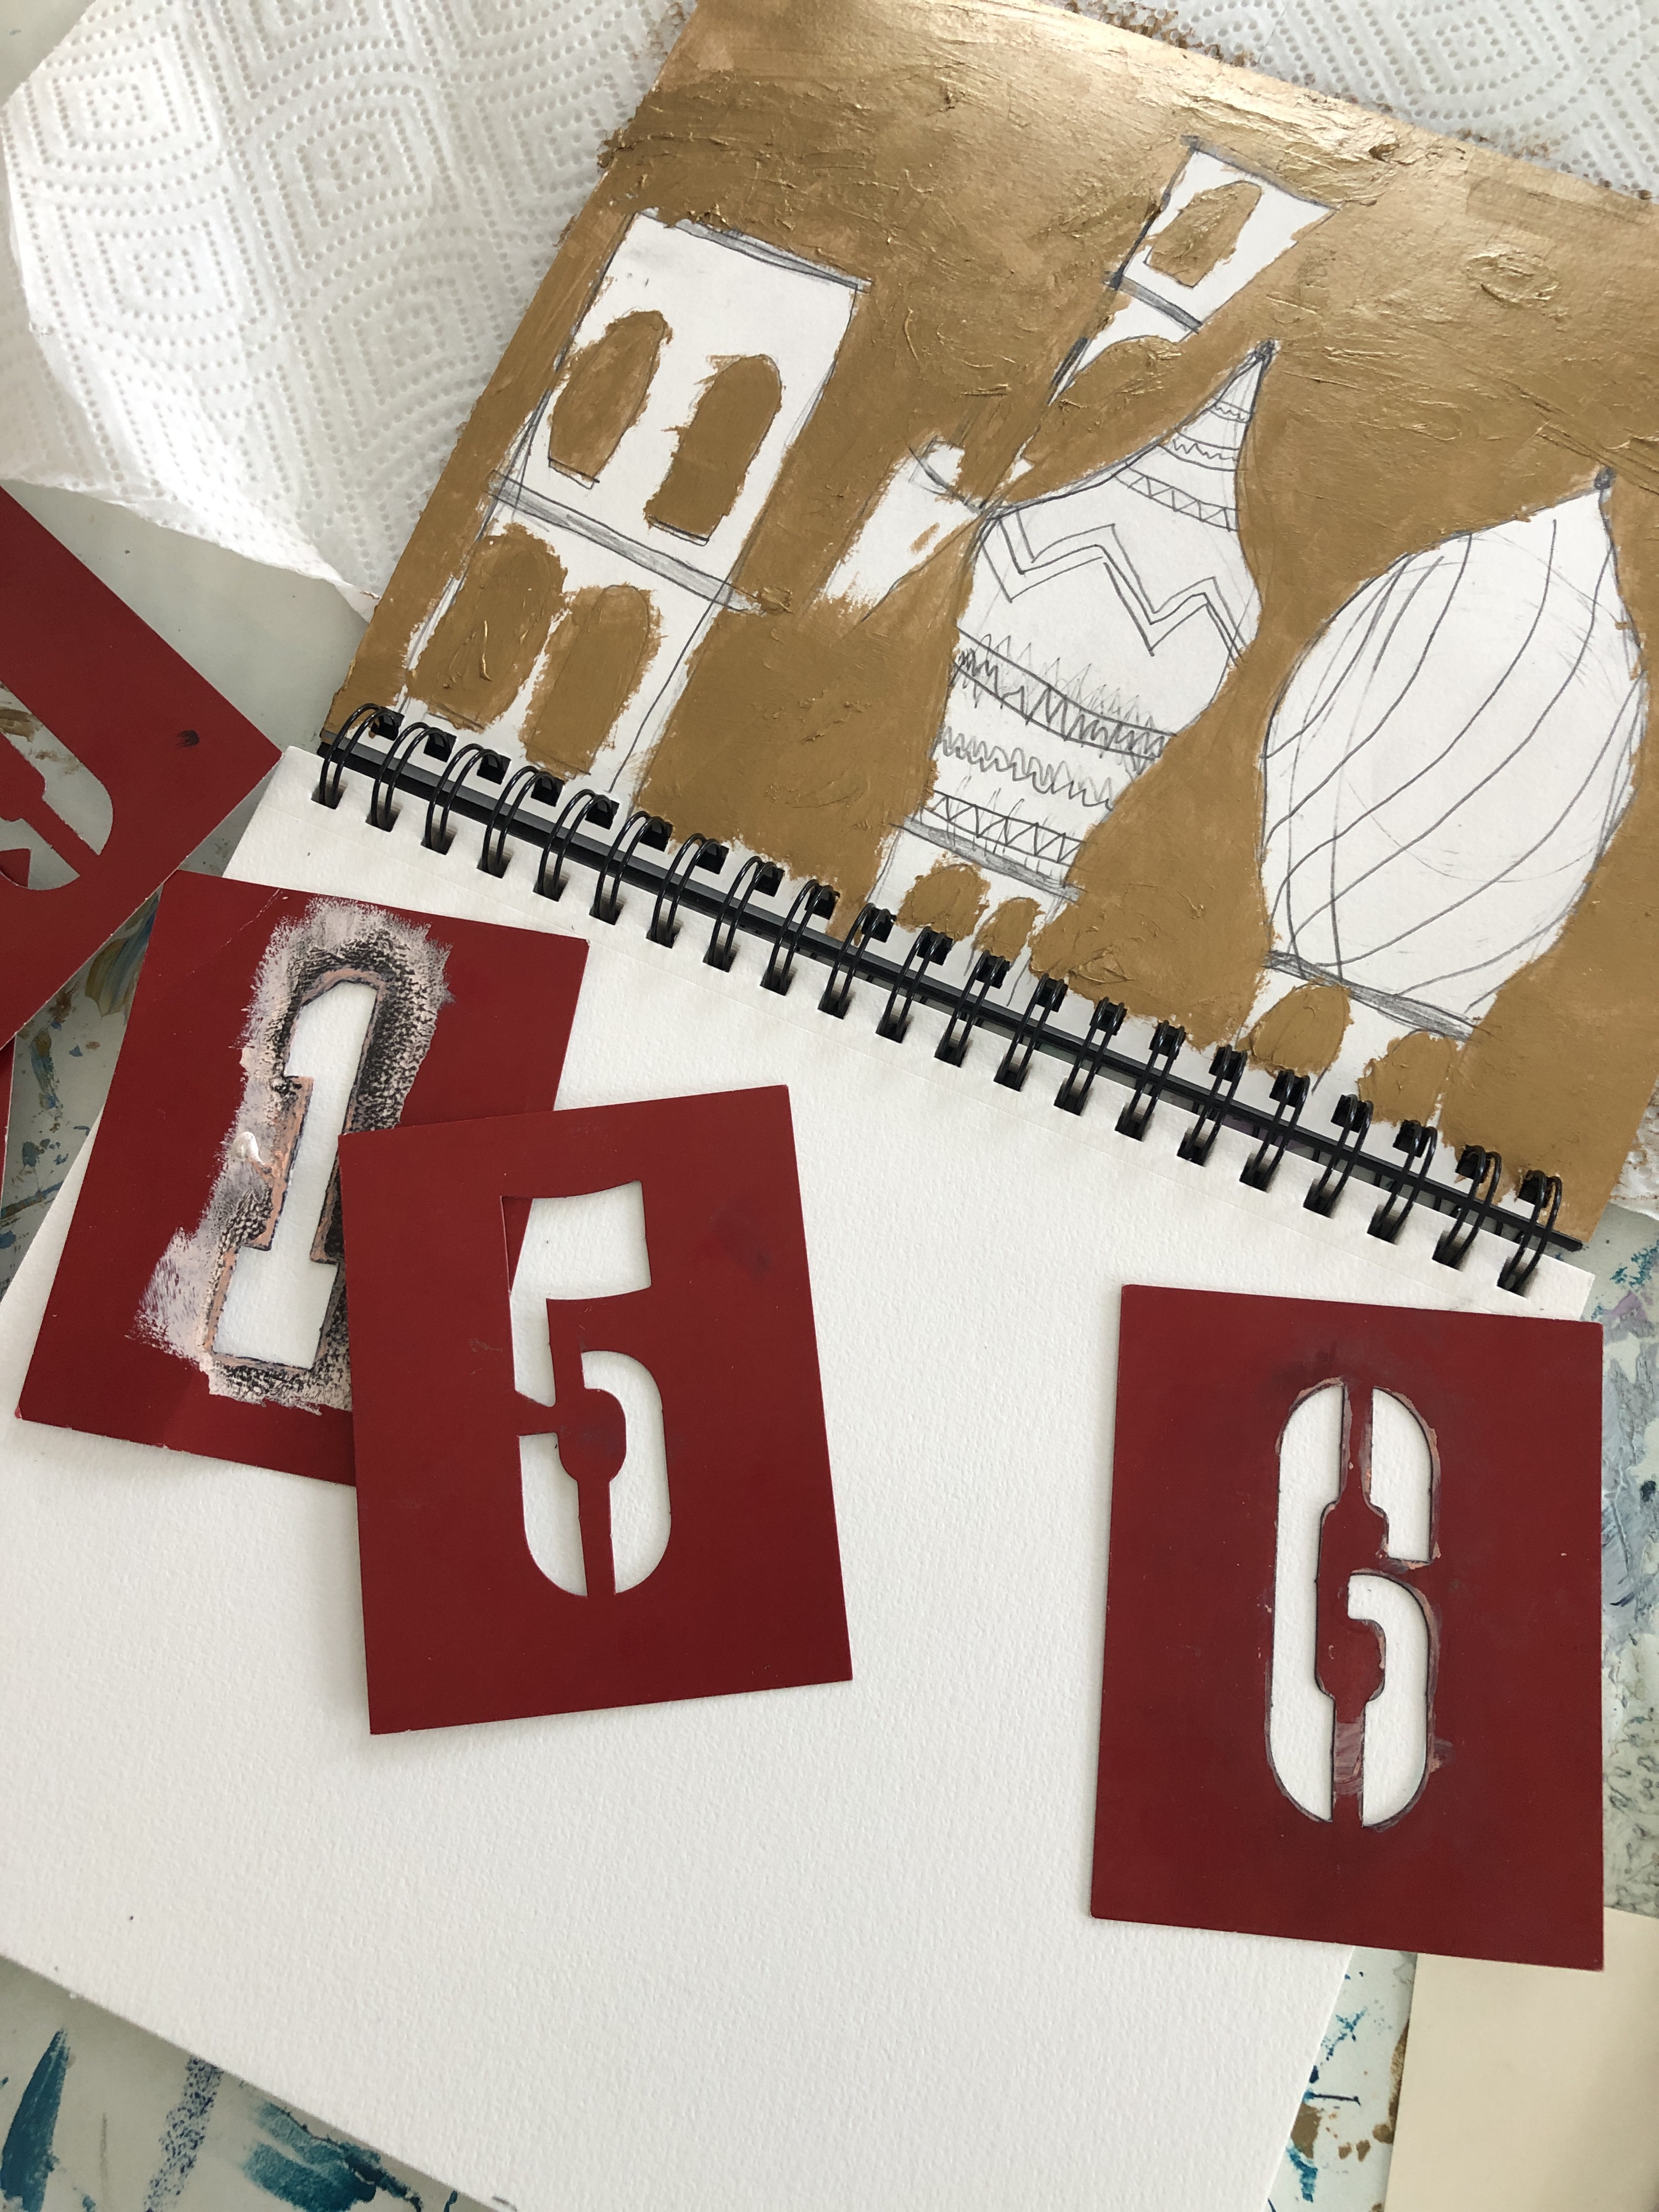
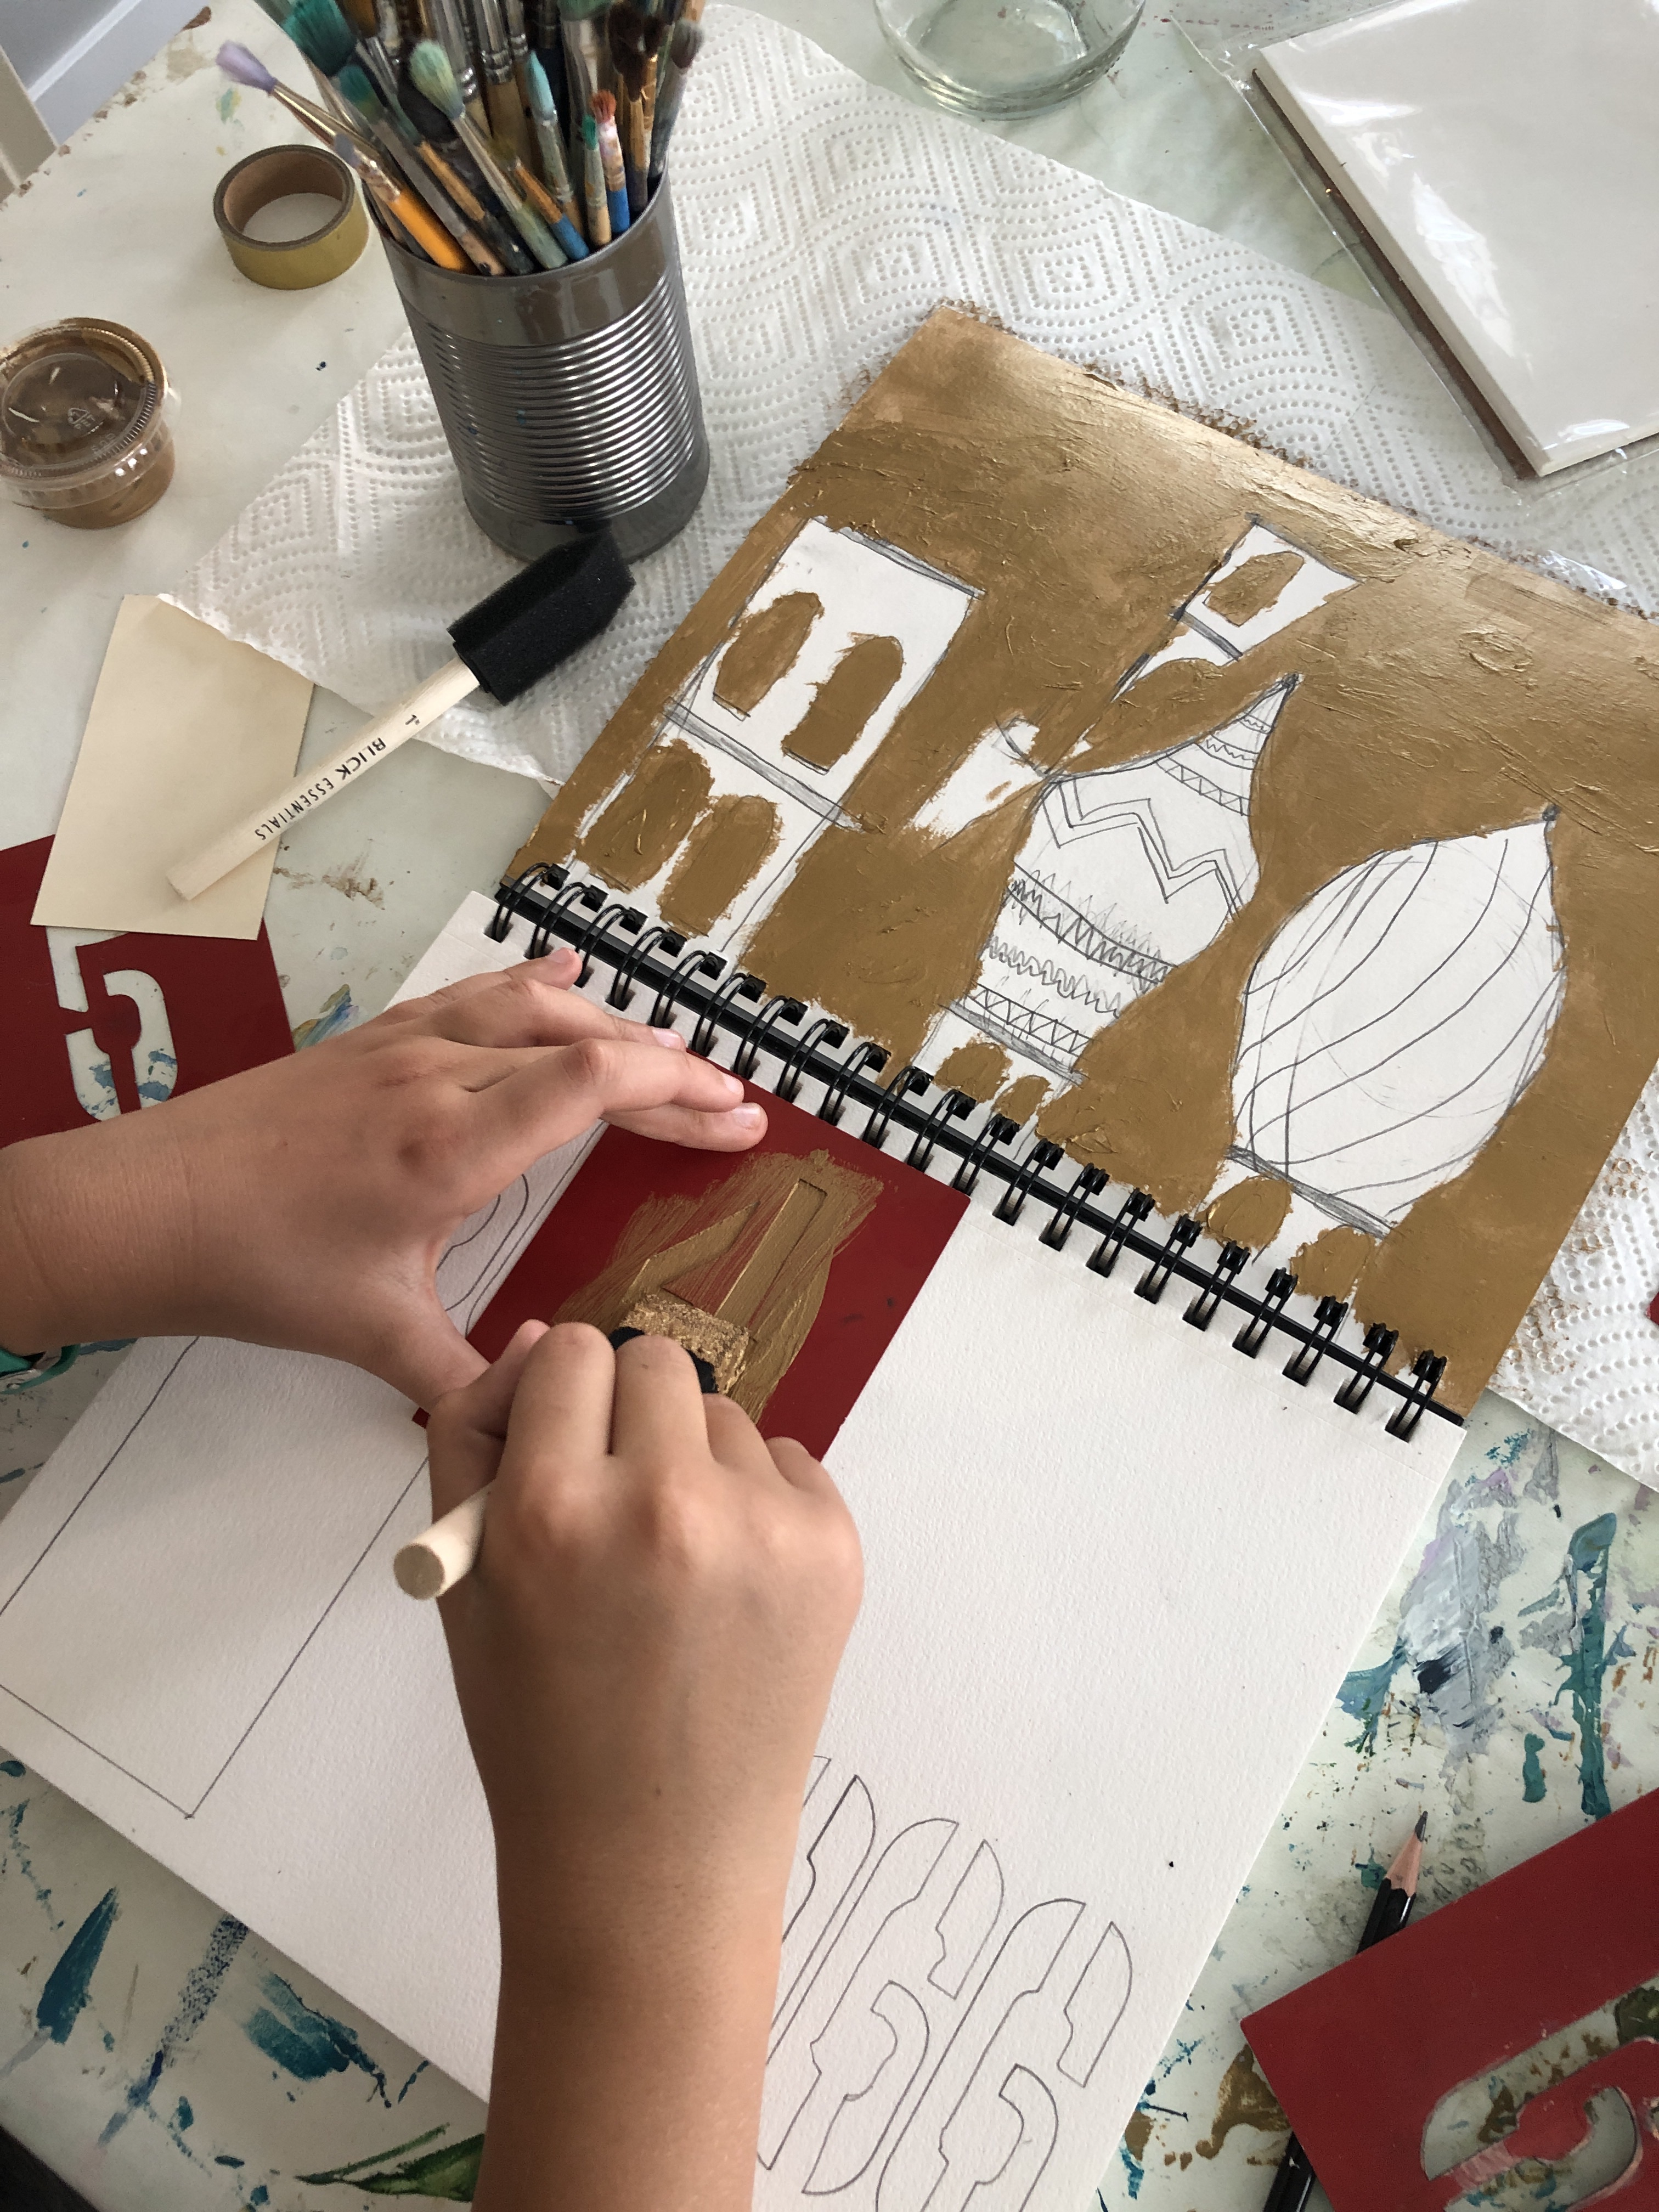
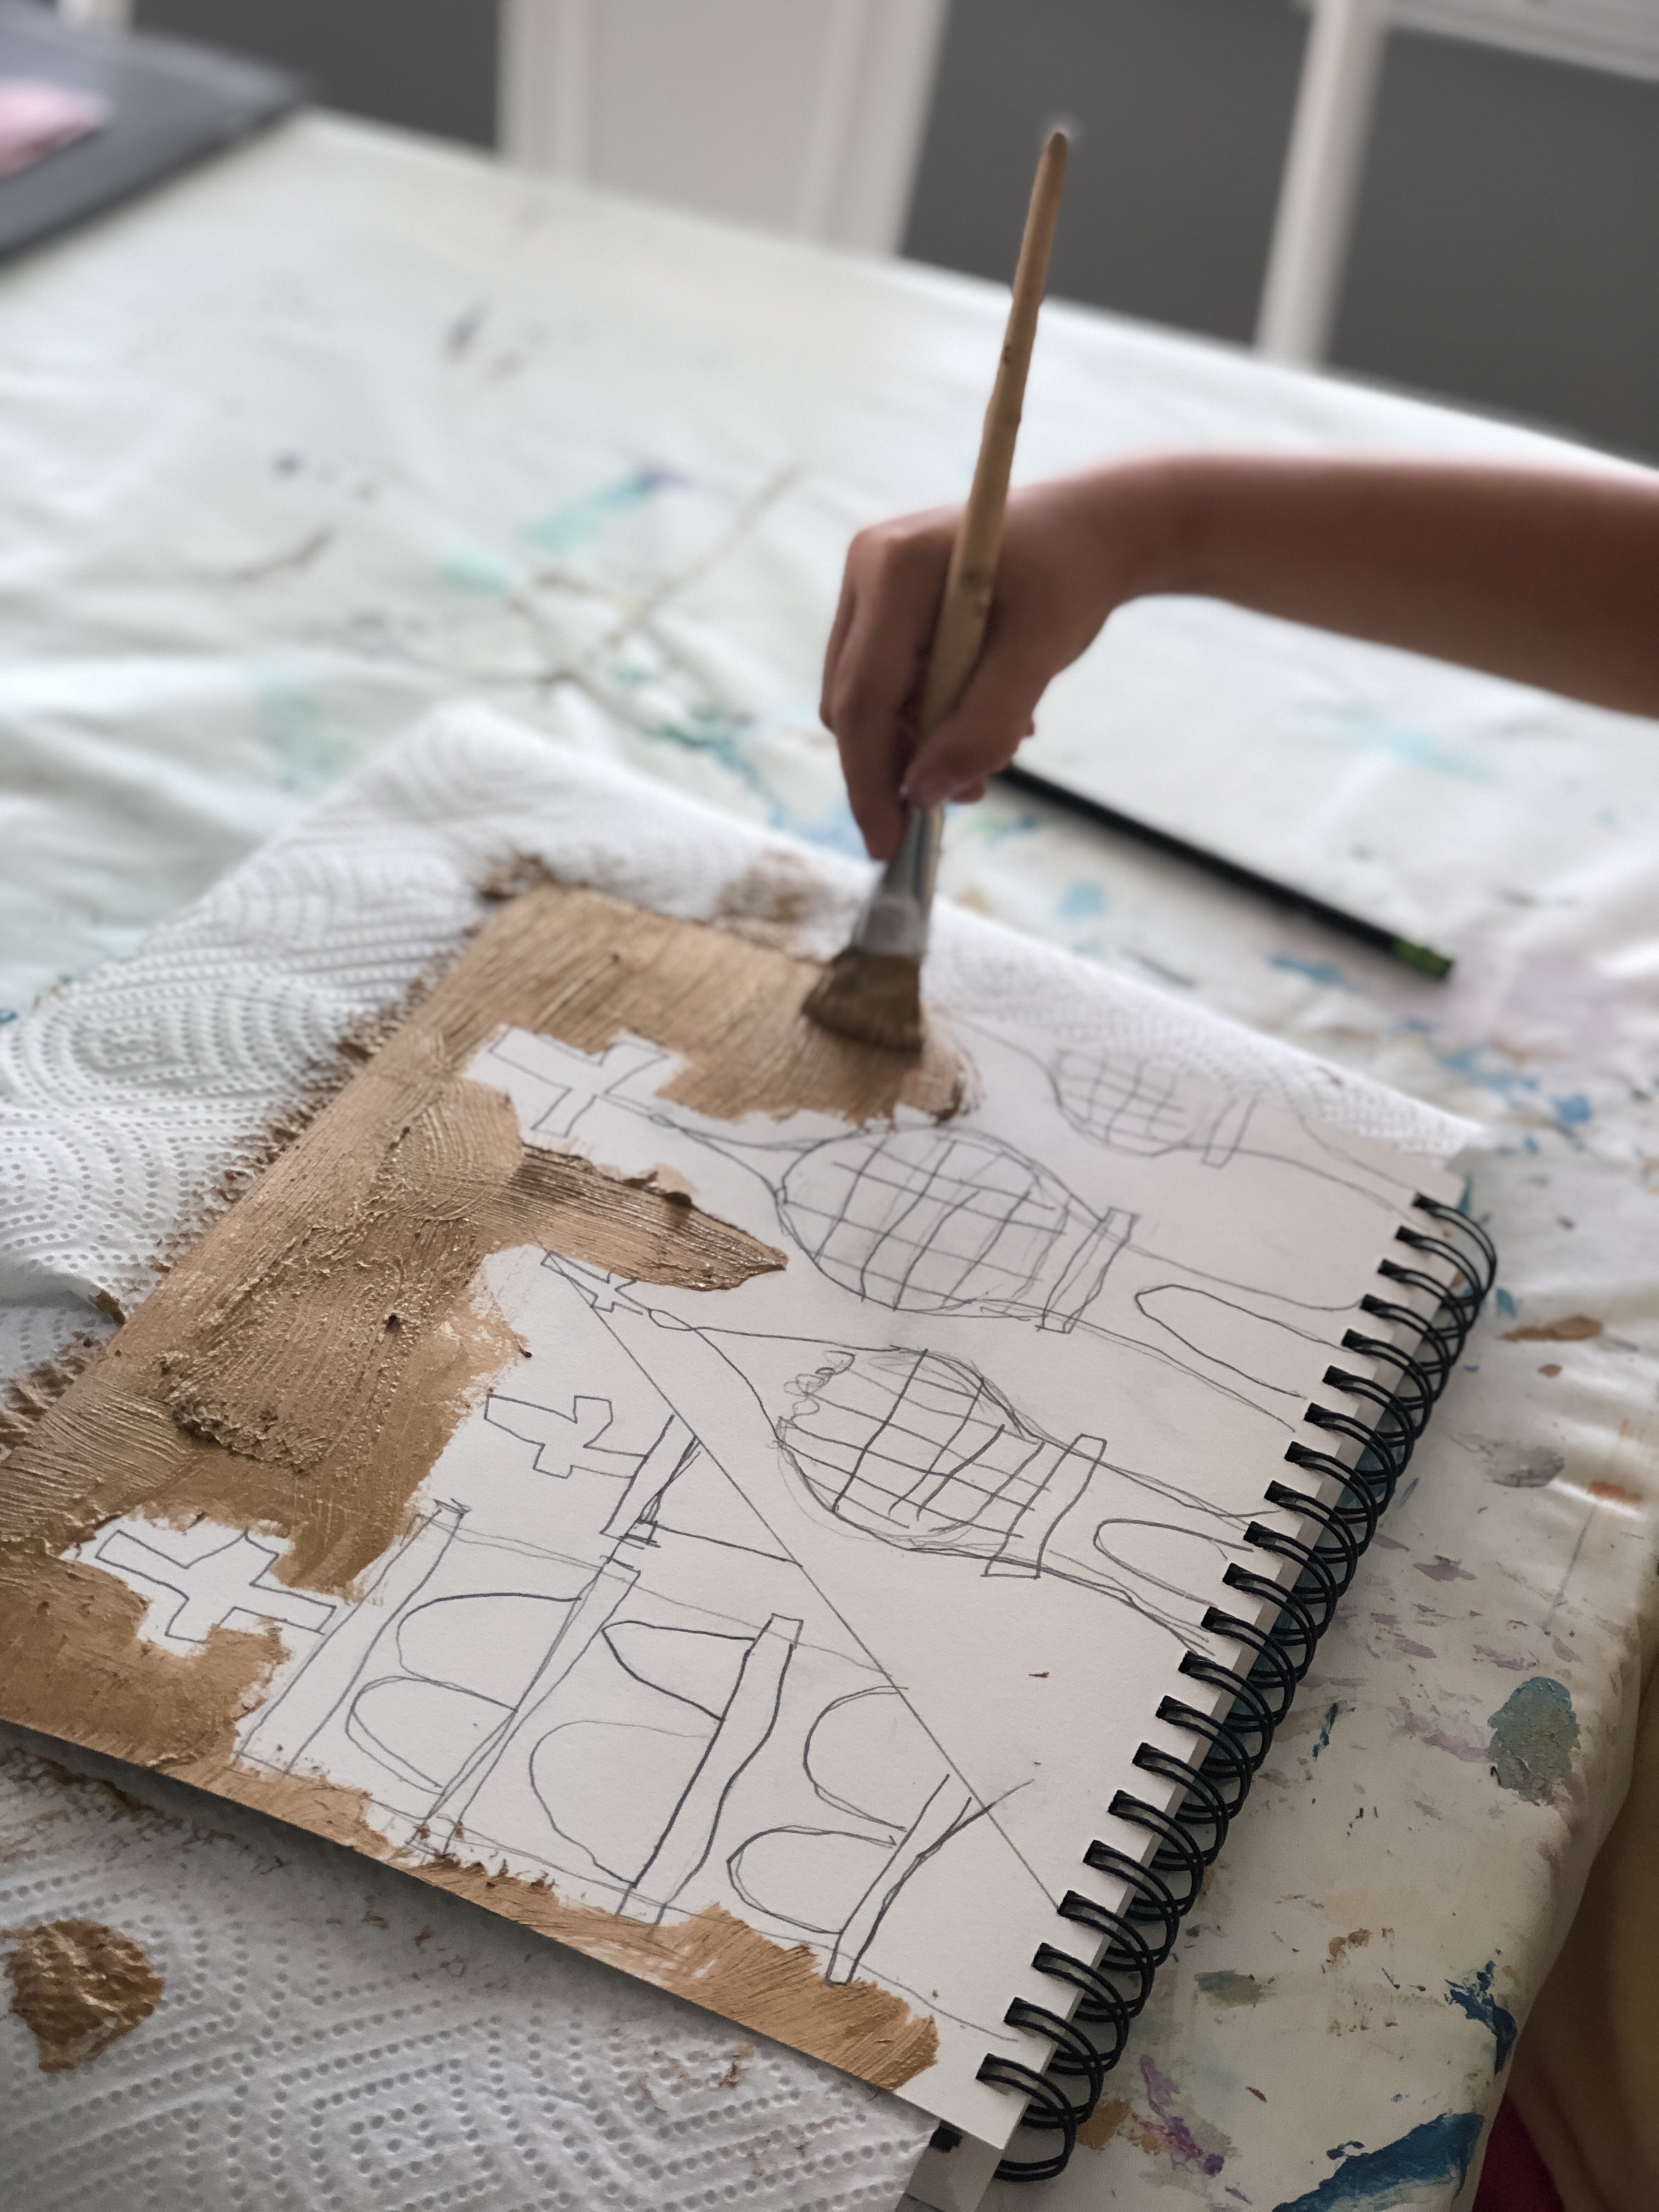
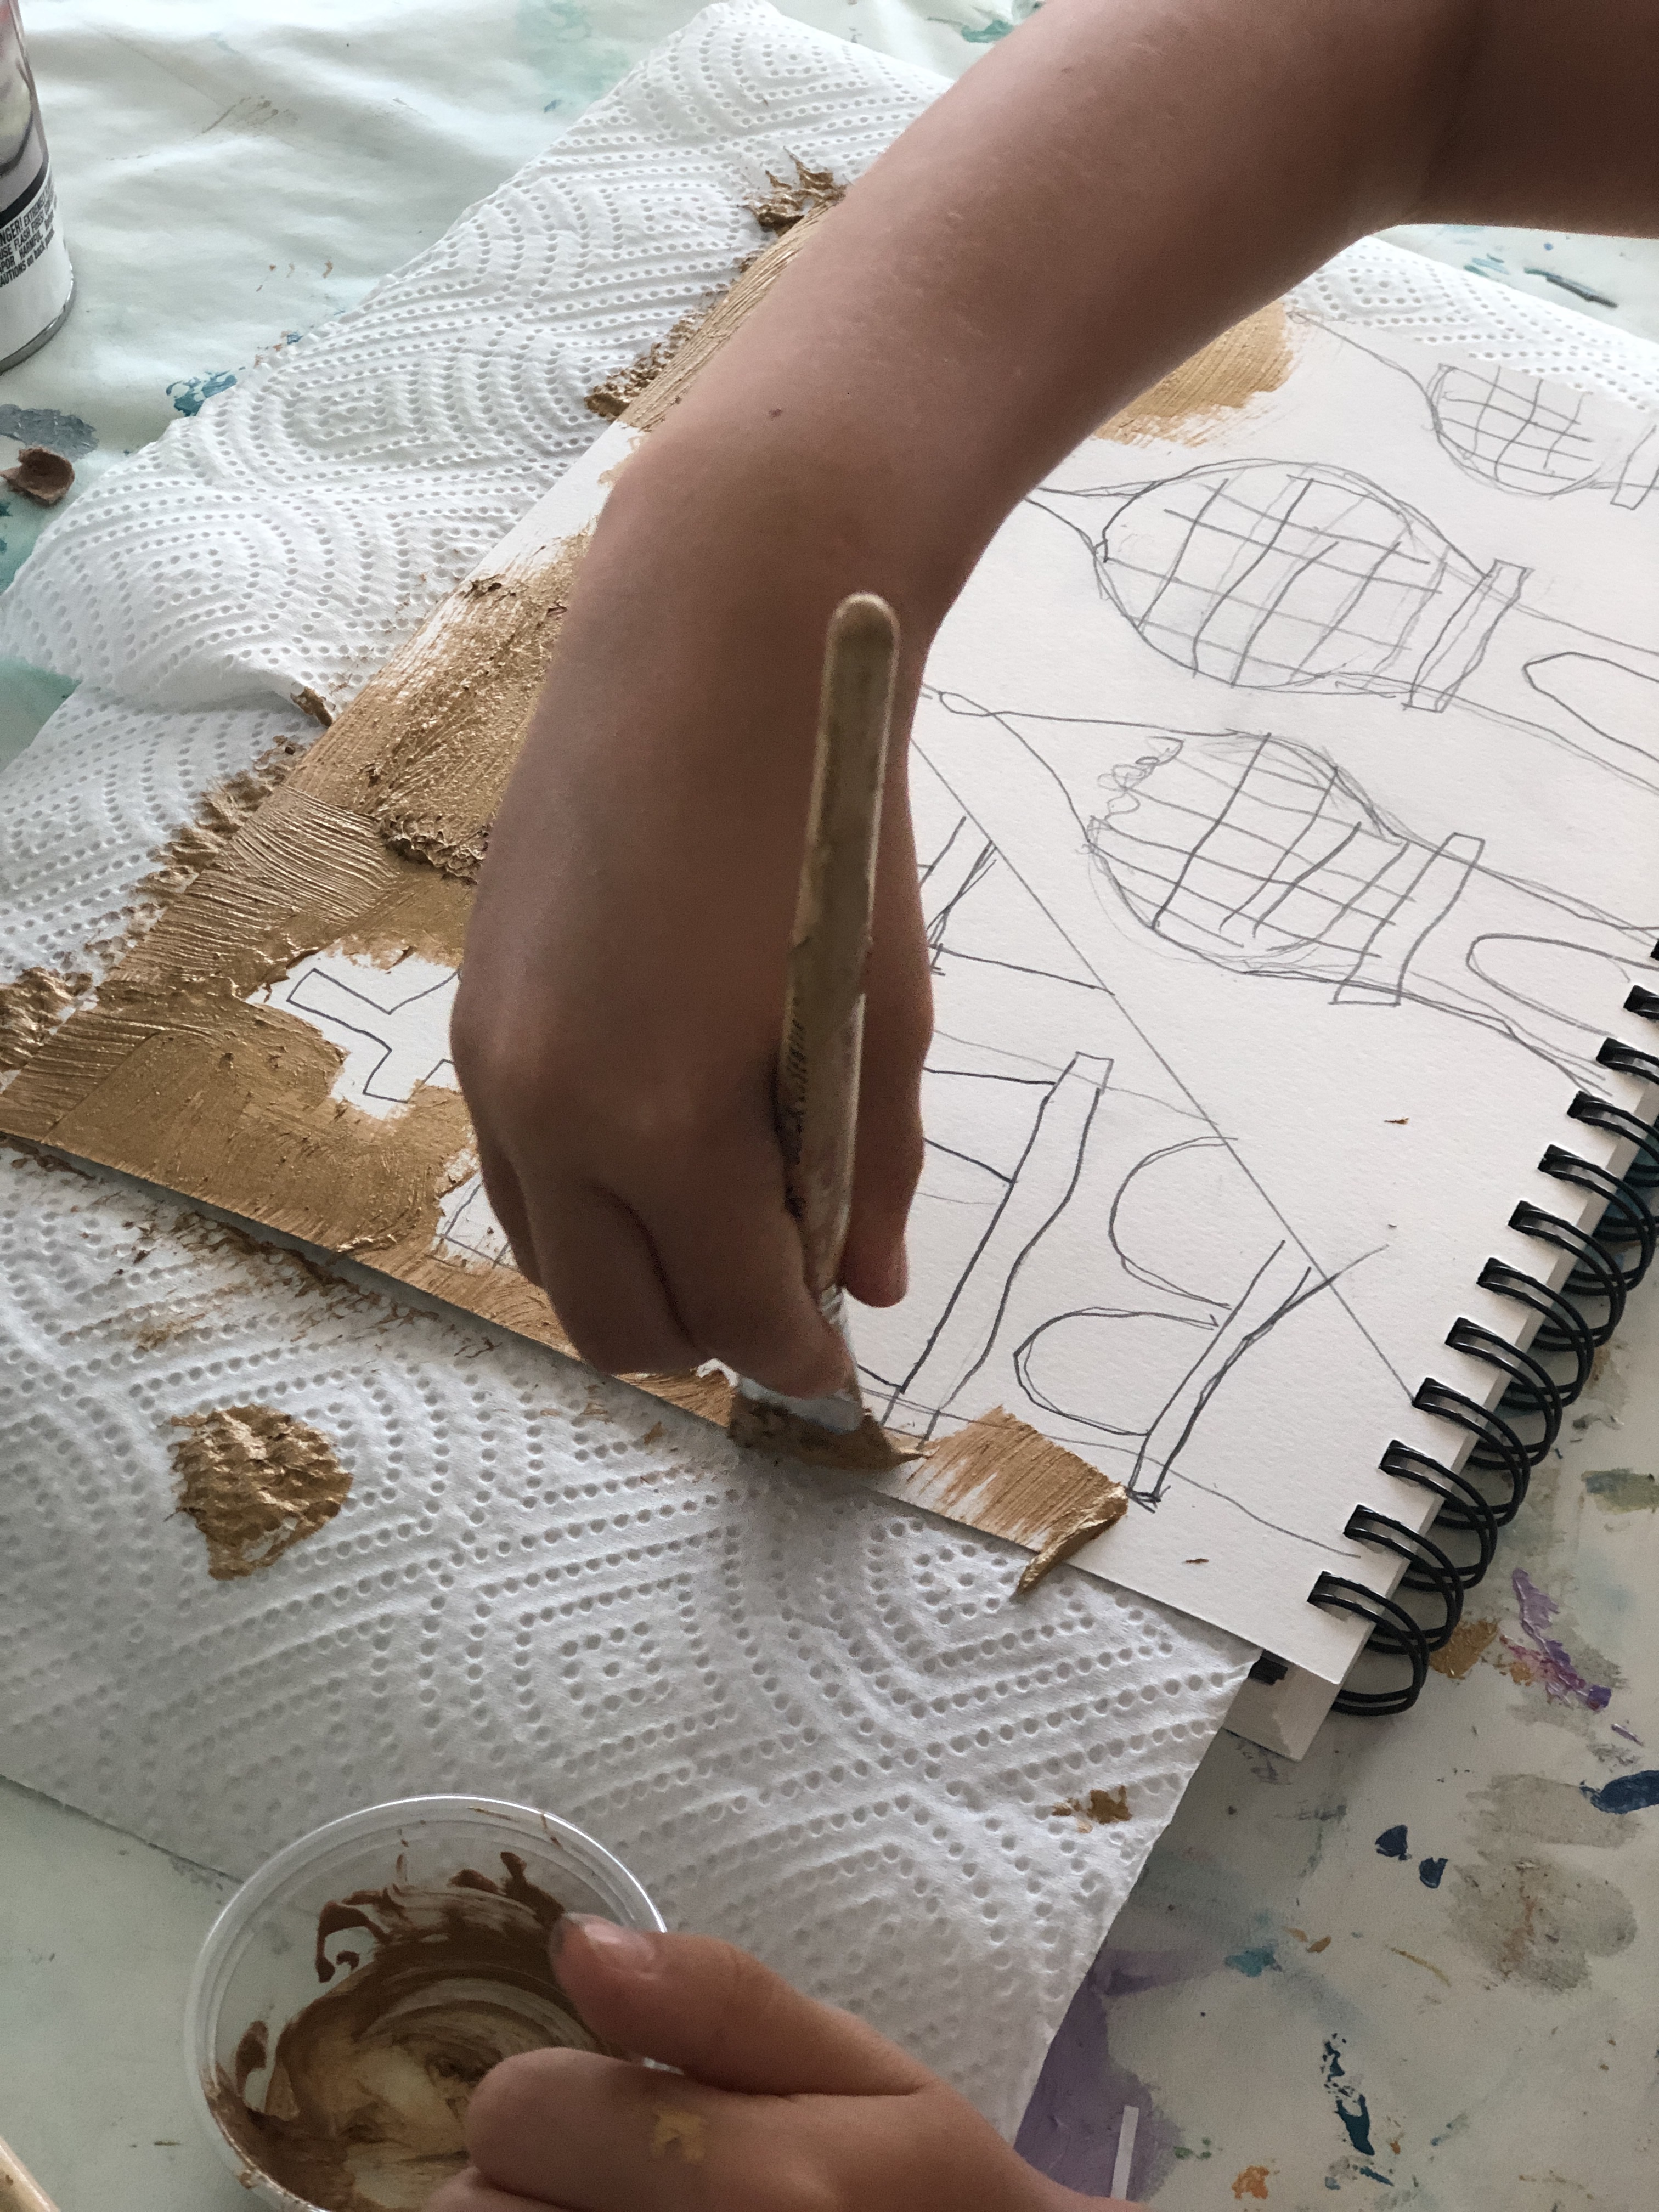
STEP NO. 2
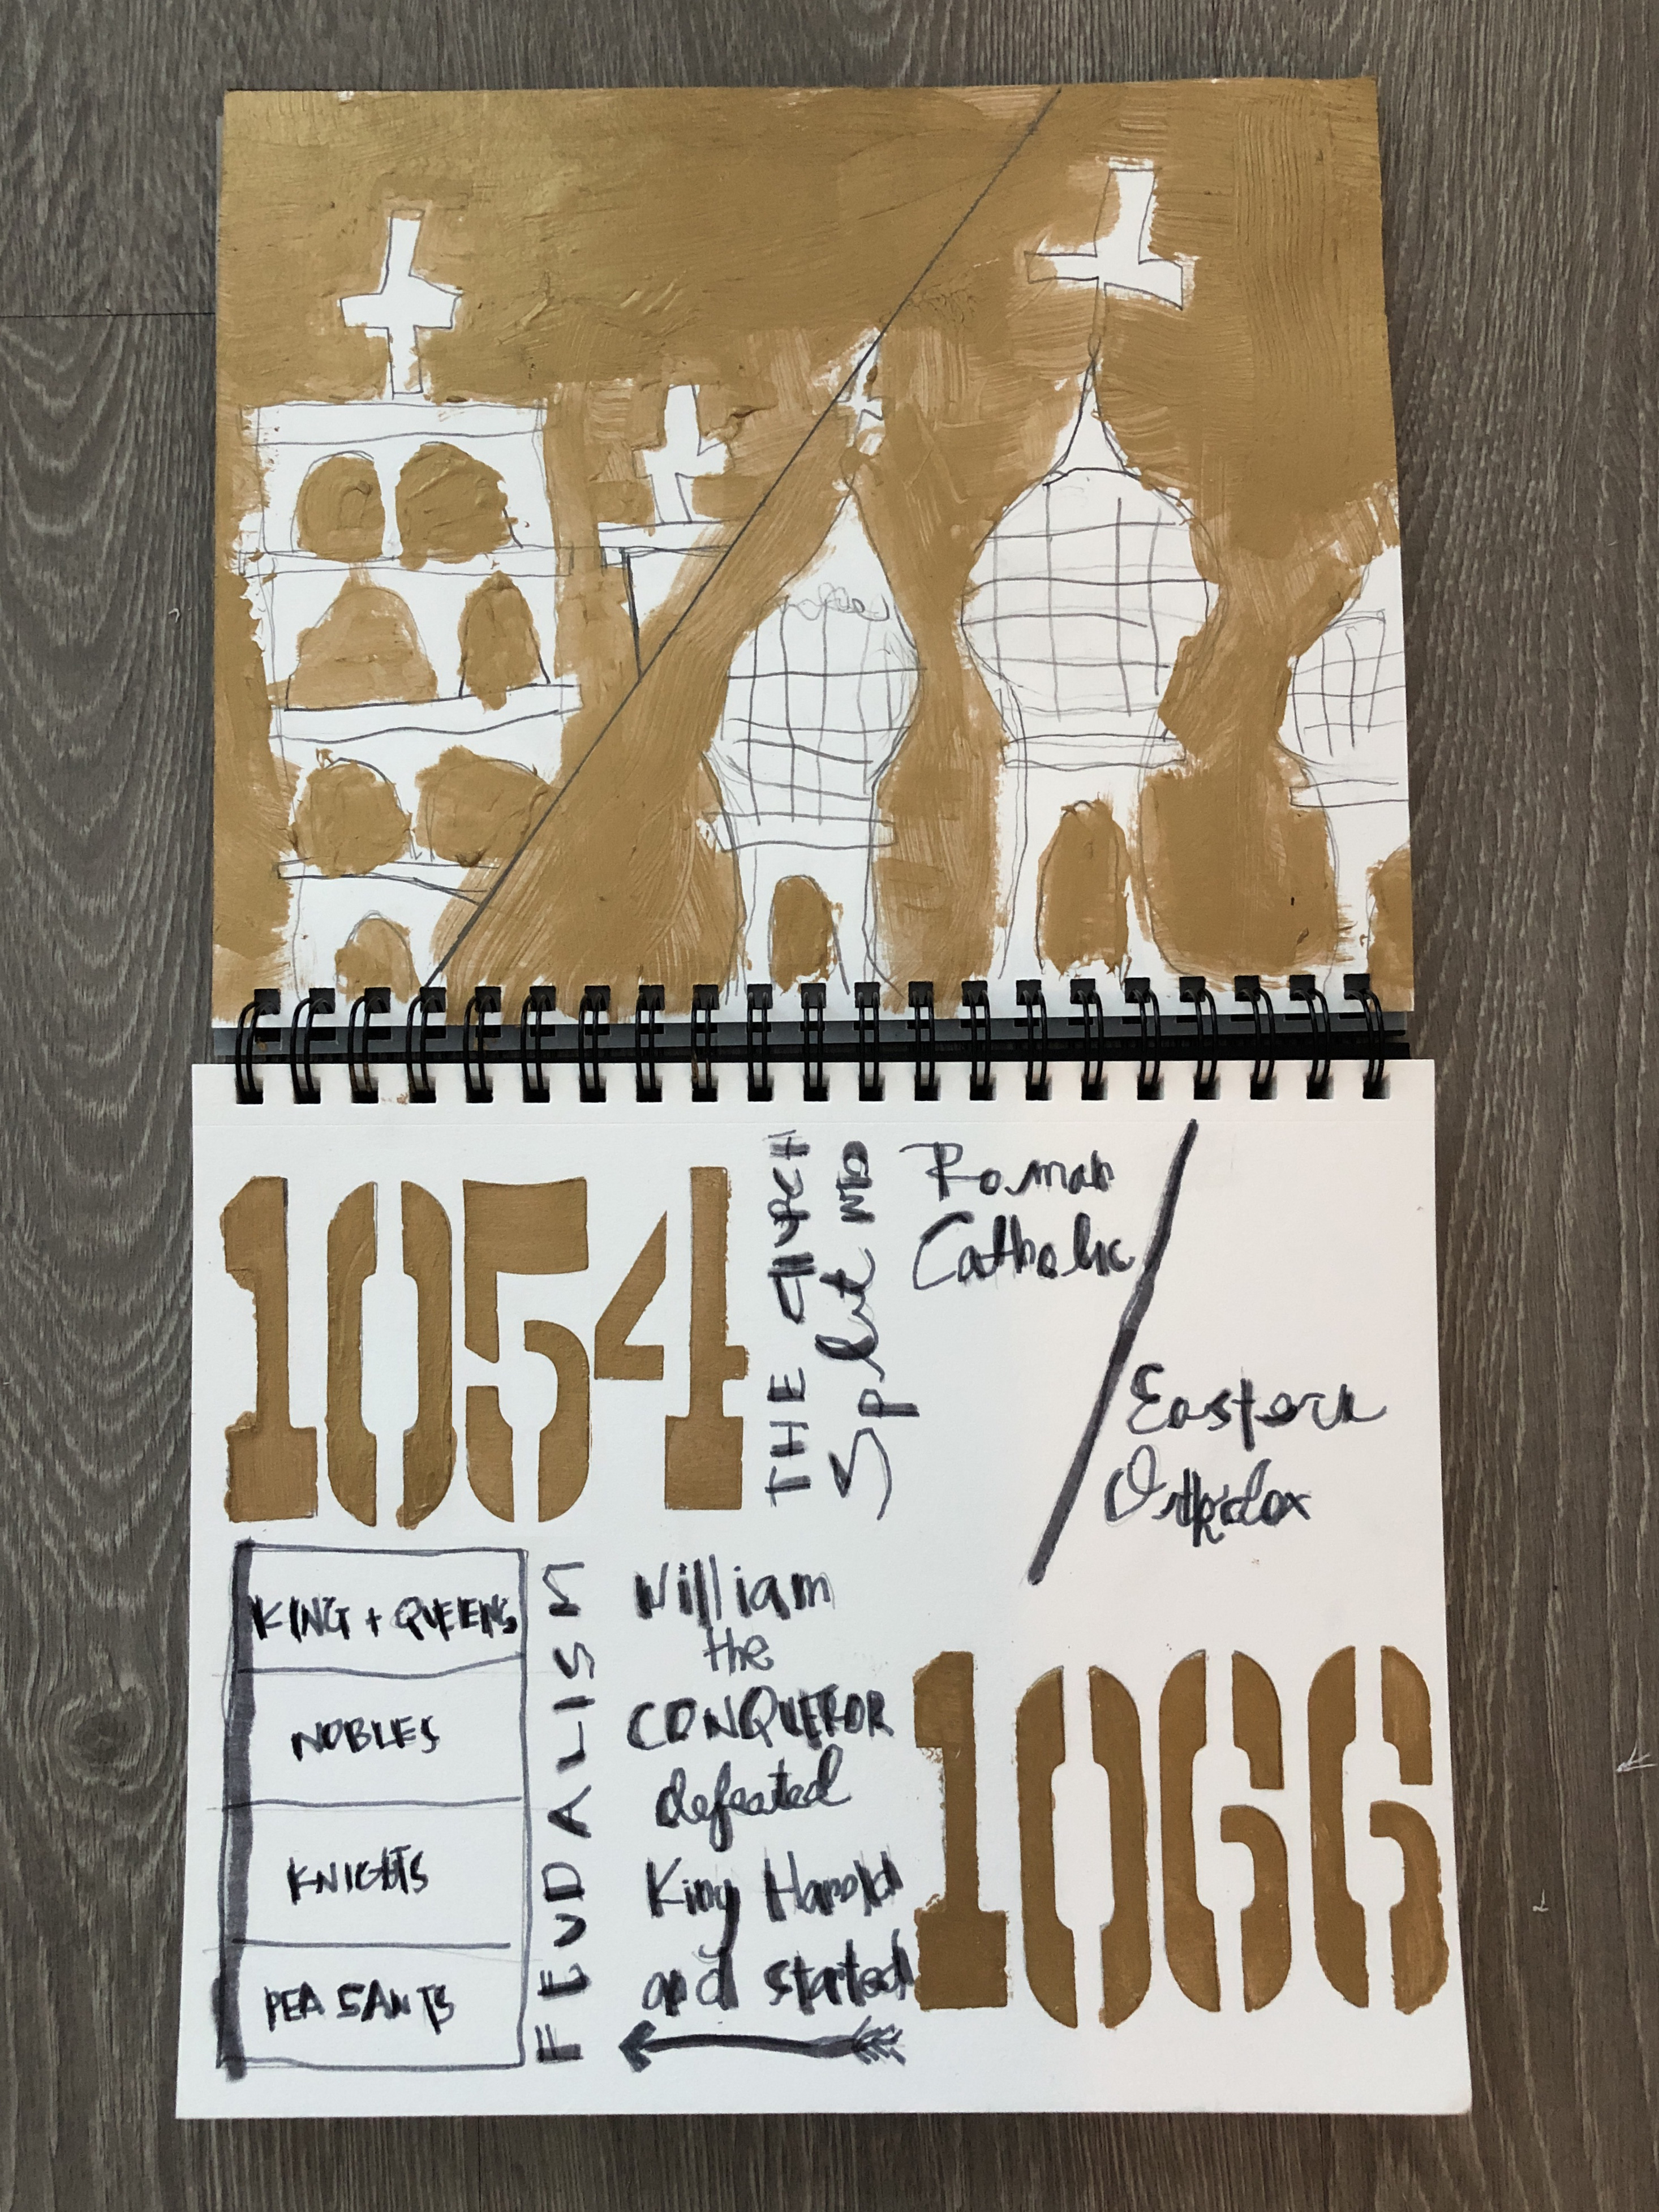
- paint the negative space (the background) and leave the positive space (the church drawings) white.
- we used gold acrylic paint with a medium size and very thin brush for the details. Other medium options: gold crayon, gold color pencil, any other paint color that reflects the medieval time period
- don’t worry too much if you paint over the crosses or any other part of your drawing the next step will fix it!
- let your painting dry
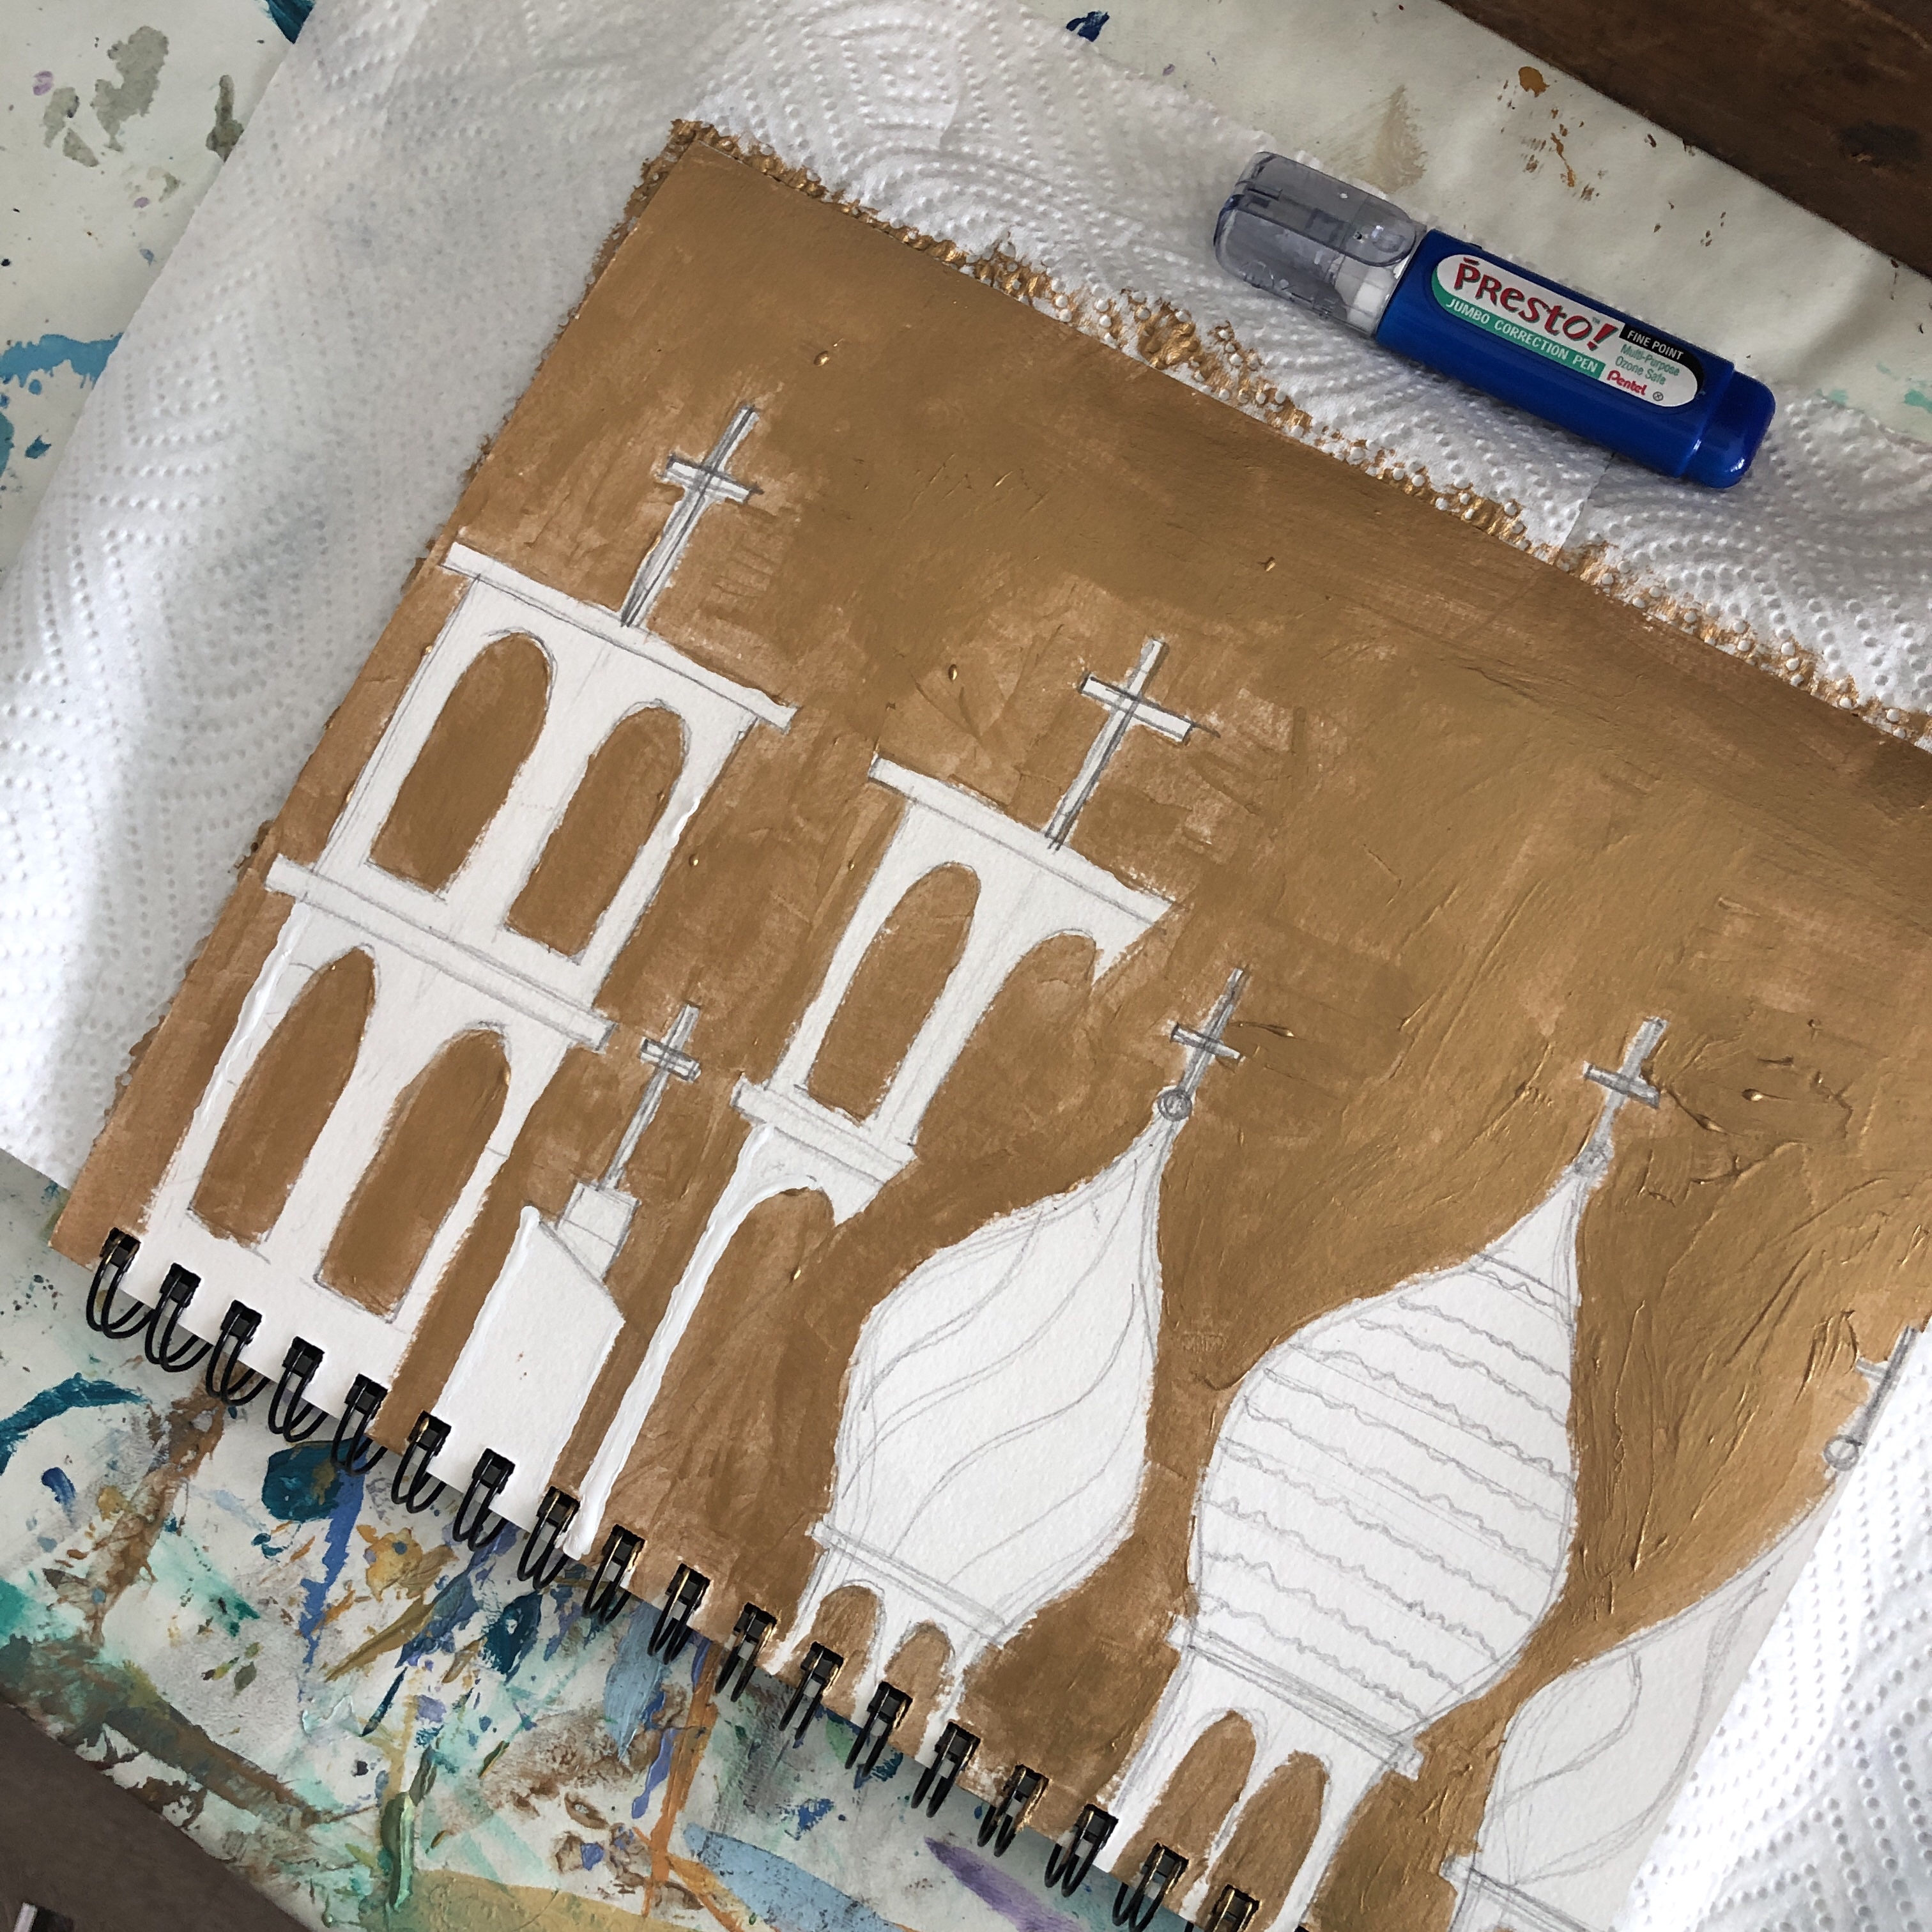
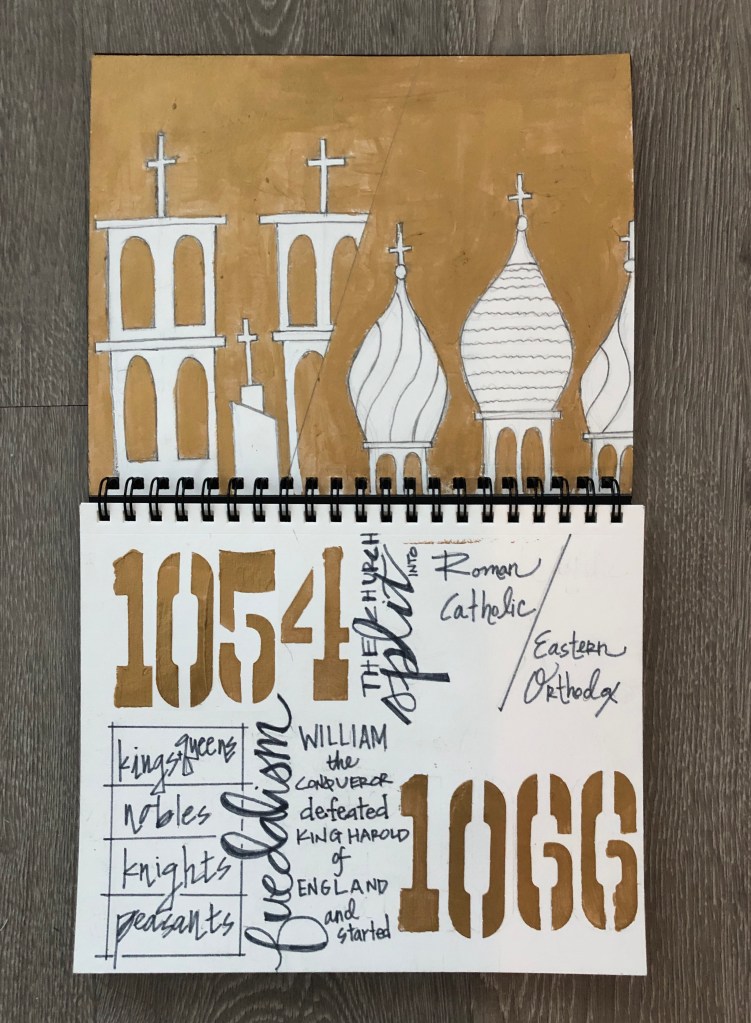
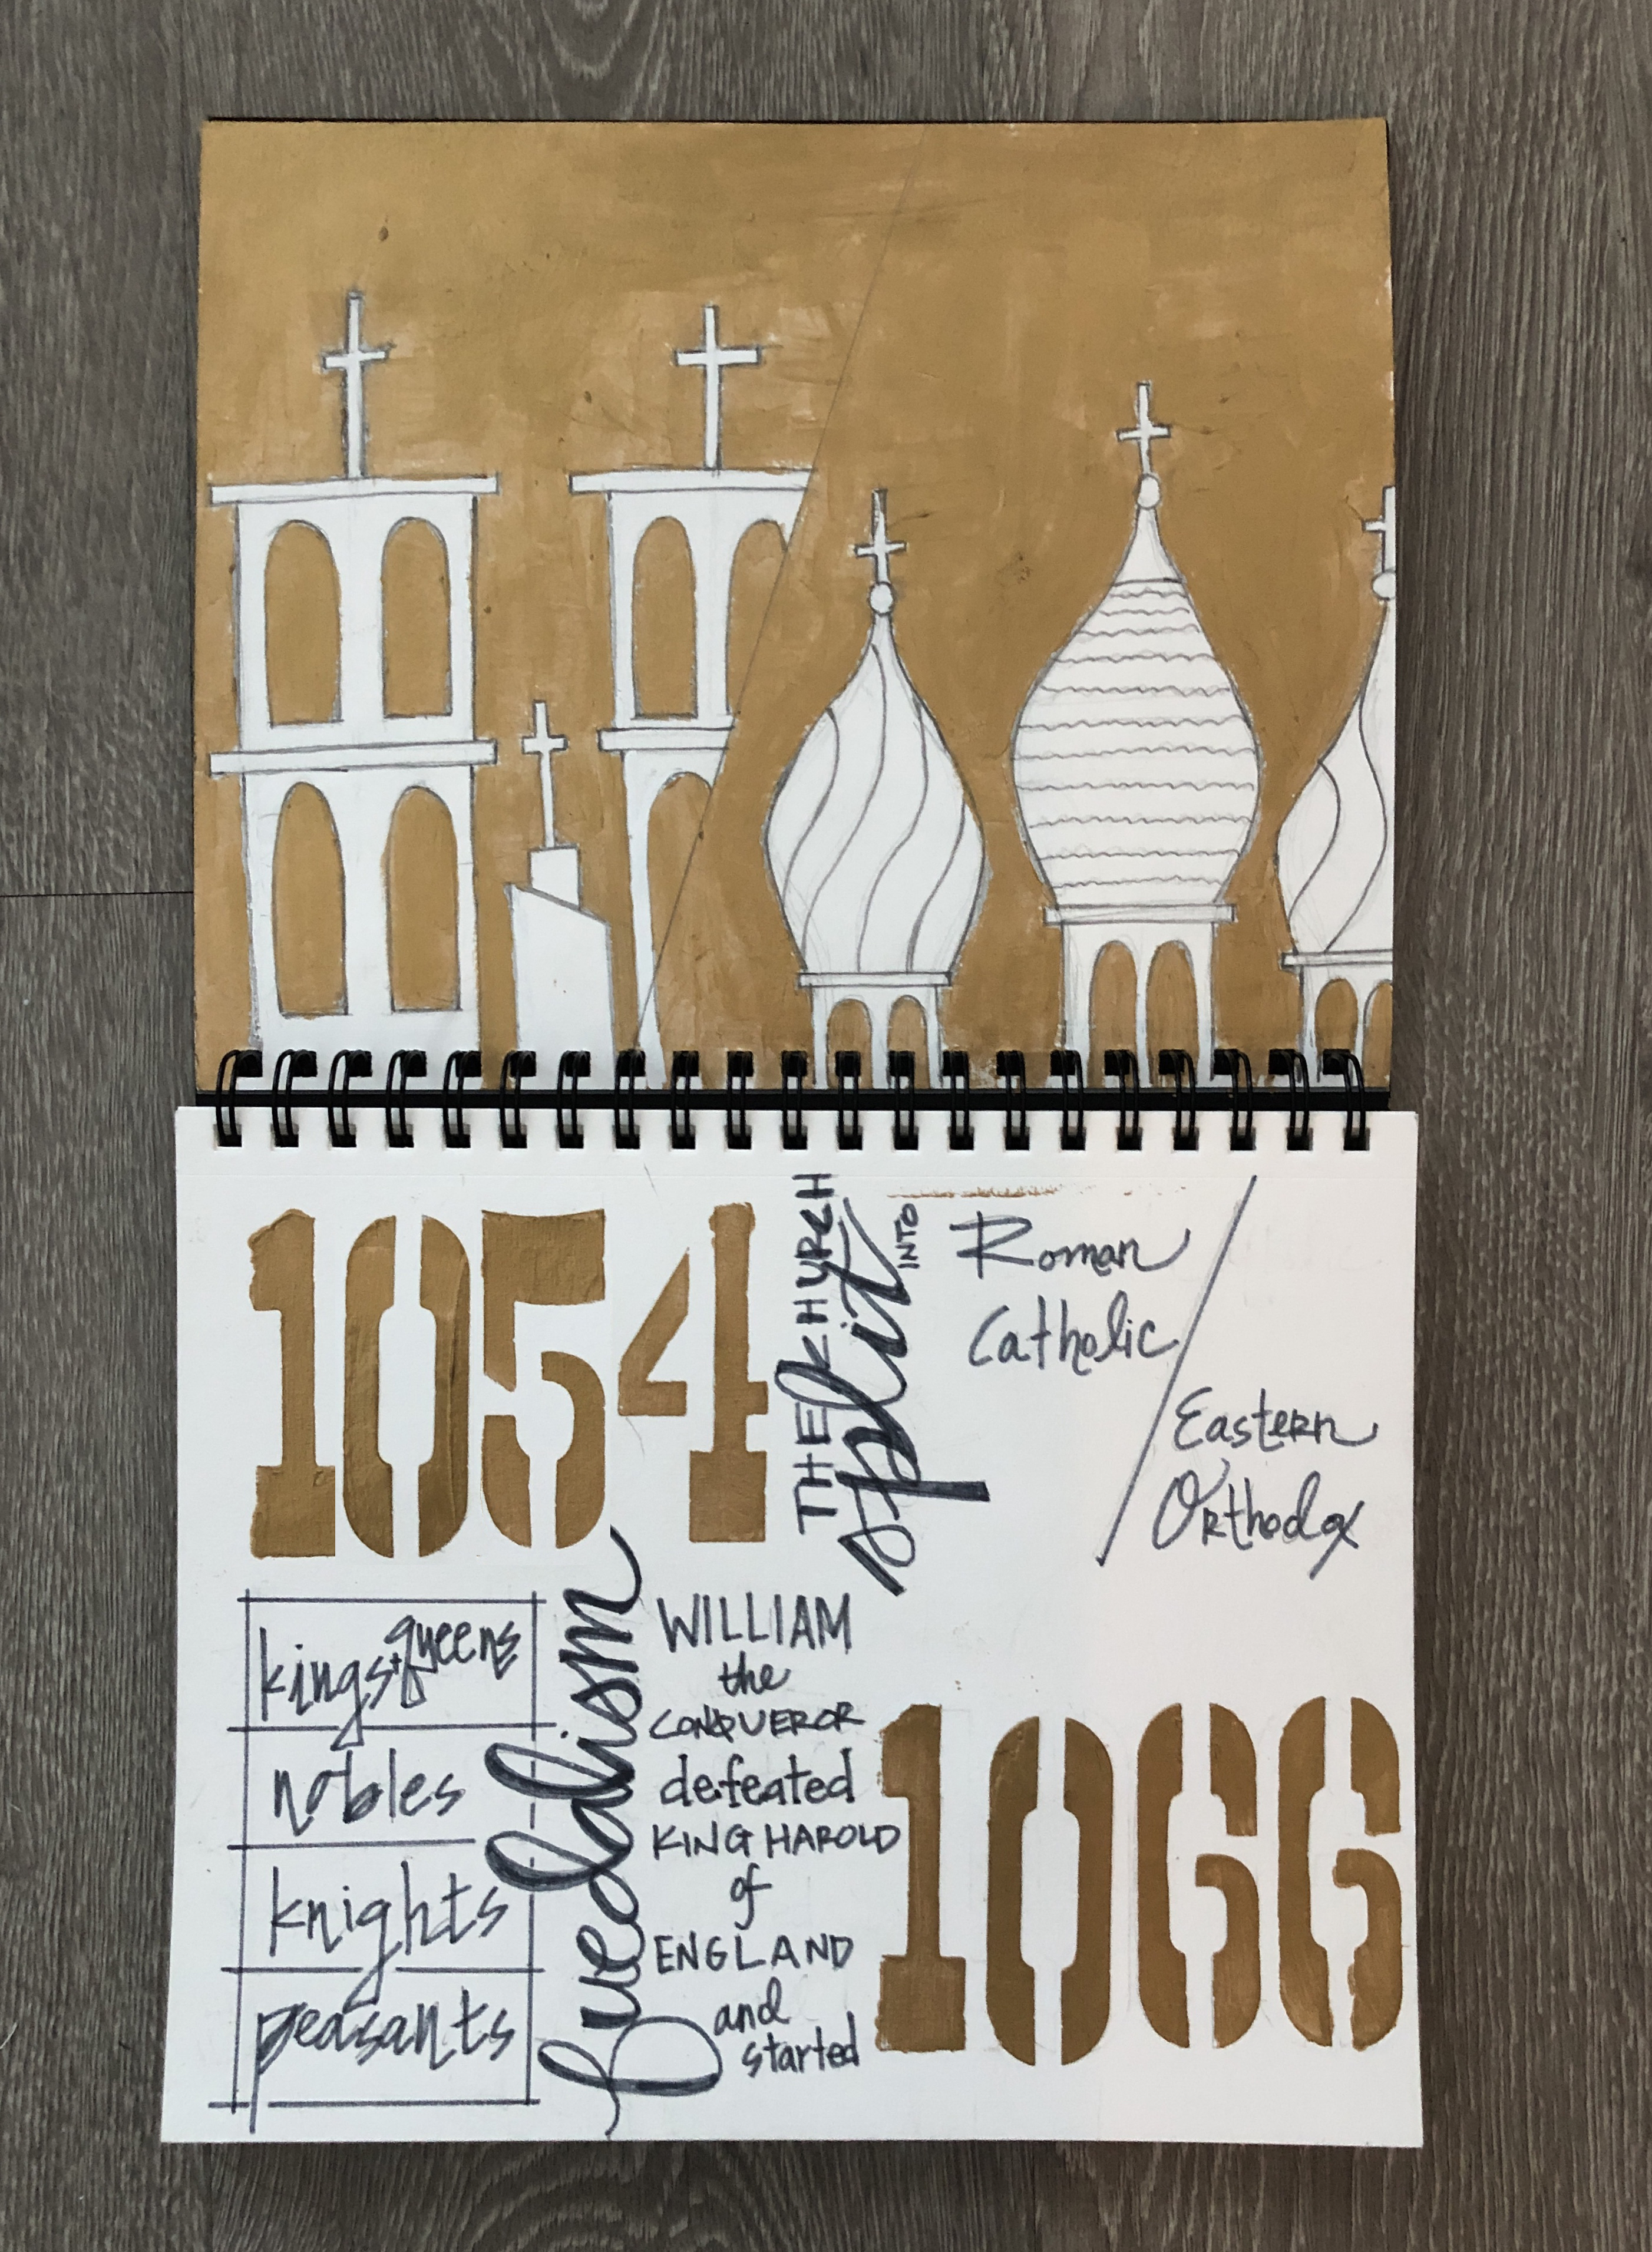
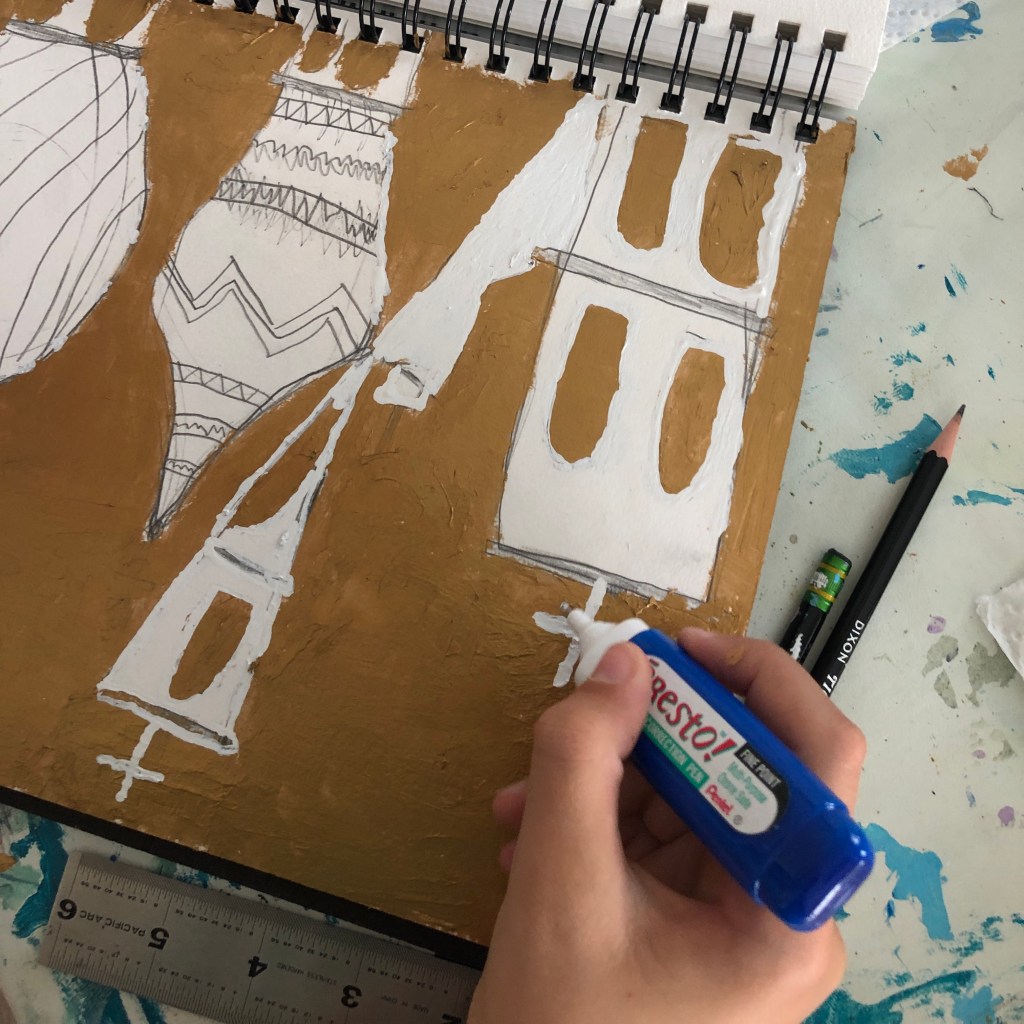
STEP NO. 3
- white out to the rescue! if you’re like us you’ve painted over your crosses and into your arches!
- clean up your painting and put back in those white crosses with a white out correction pen.
- let the white out dry
- trace over and darken up your architectural drawings and the angled line with pencil
STEP NO. 4
- layout your history sentence in light pencil with the feudalism chart.
- my ten year old and i are working on our hand lettering skills and trying some new styles guided by a book titled “hand-lettering 201”. i’ll link to it in the tools section of the blog.
- trace your history sentence in a gray felt tip pen. the gray picks up the pencil color in the architectural drawings.

STEP NO.4
- paint the positive space in the numbers
- if you have stencils this is really fun for kids and to be honest …. grown ups too! we did this with paper stencils. if you have plastic stencils, try testing them before doing it in your sketchbook.
- lay down your stencil and paint over it. when you lift it up a beautiful number will be in your sketch book.
- our stencils are too wide to paint the numbers next to each other so we had to let the paint dry in between numbers.